
Have you ever wondered how hard it really is to replace your brake pads and rotors? If your brakes are making noise or not stopping as smoothly, you might be thinking about fixing them yourself.
The good news is, it’s easier than you might expect. With the right tools and a little guidance, you can save money and gain confidence by doing this job on your own. Keep reading, and you’ll discover simple steps that make replacing brake pads and rotors a straightforward task—even if you’re not a car expert.
Your safety and your wallet will thank you.
Credit: www.advicsaftermarket.com
Tools Needed
Replacing brake pads and rotors requires some basic tools and safety gear. Having the right tools makes the job smoother and safer. It also helps avoid damage to your car parts. Below are the main tools you will need for this task.
Basic Tools
You will need a jack and jack stands to lift and hold your car. A lug wrench helps remove the wheel bolts. A socket set and ratchet make it easy to remove caliper bolts. A C-clamp or brake caliper tool pushes the caliper piston back. Screwdrivers and pliers may be needed to remove clips or pins. Clean rags help wipe dirt and brake dust. A torque wrench ensures bolts are tightened correctly. These tools cover most of the work.
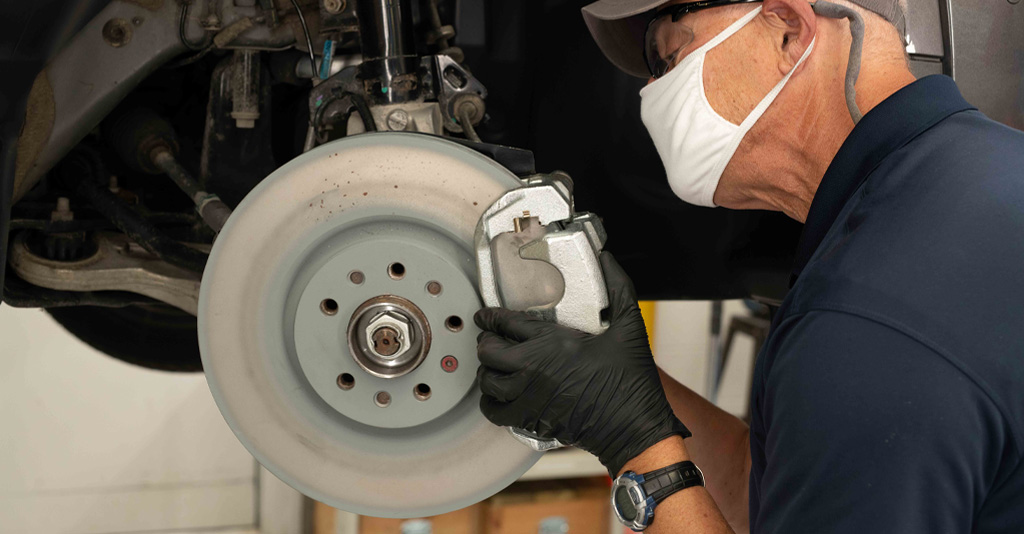
Safety Gear
Safety is important when working on brakes. Wear safety glasses to protect your eyes from dust and debris. Gloves protect your hands from sharp parts and dirt. A dust mask helps avoid breathing brake dust, which can be harmful. Closed-toe shoes keep your feet safe from falling tools. Always work on a flat surface and keep the car stable with jack stands. This gear keeps you safe throughout the brake job.
.jpg)
Credit: www.cbac.com
Preparing Your Vehicle
Preparing your vehicle is the first step to replace brake pads and rotors safely. Proper preparation helps avoid accidents and makes the work easier. It involves lifting the car and removing the wheels. These steps give clear access to the brake parts.
Take your time to prepare well. This ensures a smooth and safe brake replacement process.
Lifting The Car
Start by parking your car on a flat, hard surface. Engage the parking brake to stop the car from moving. Use a car jack to lift the vehicle. Place the jack under the car’s frame near the wheel you want to work on.
Lift the car until the tire is off the ground. Use jack stands to support the car safely. Never rely on the jack alone. Make sure the car is stable before you work under it.
Removing The Wheels
Before removing wheels, loosen the lug nuts slightly while the car is still on the ground. After lifting the car, finish removing the lug nuts. Keep them in a safe place.
Pull the wheel straight off the hub. Some wheels might need a little wiggle to come off. Removing the wheel gives clear access to the brake pads and rotors.
Removing Old Brake Pads
Removing old brake pads is a key step in brake maintenance. It helps keep your car safe and smooth. The process is simple with the right tools and some care. This section explains how to find and remove the worn pads.
Take your time. Avoid rushing to prevent damage. Clear space and good light help a lot. Let’s start with locating the parts.
Locating Brake Components
First, find the brake caliper. It holds the brake pads. Look near the wheel hub. The pads are inside the caliper on each side of the rotor.
Check for the brake rotor too. It is the round metal disc the pads press against. Knowing these parts makes removal easier.
Detaching Pads
Next, remove the caliper bolts carefully. The caliper will lift away from the rotor. This exposes the brake pads.
Pull out the old brake pads. They may be tight or stuck. Use a flat tool gently if needed. Avoid bending or breaking the caliper parts.
Check the pad thickness. Thin pads mean it’s time to replace them. Clean the area before fitting new parts.
Replacing Rotors
Replacing rotors is a key part of brake maintenance. Rotors work with brake pads to stop your car. Over time, rotors can wear out or get damaged. Changing them helps keep your brakes safe and effective. This section explains when to replace rotors, how to remove old ones, and how to install new ones.
When To Replace Rotors
Rotors need replacement if they are warped, cracked, or very thin. Warped rotors cause vibrations when braking. Cracks can lead to rotor failure. Thin rotors cannot cool properly and wear out fast. Check your vehicle manual for minimum thickness. If rotors show these signs, change them soon.
Removing Old Rotors
Start by lifting the car and removing the wheel. Next, take off the brake caliper carefully. Use a wrench to remove caliper bolts. Hang the caliper to avoid stress on the brake line. Then, remove any screws or clips holding the rotor. Pull the rotor off the hub. Rust may make removal hard; use a mallet to tap gently.
Installing New Rotors
Clean the hub surface before placing the new rotor. This ensures a flat, secure fit. Slide the new rotor onto the hub. Reattach any screws or clips. Put the brake caliper back in place and tighten bolts. Spin the rotor to check for smooth movement. Finally, reinstall the wheel and lower the car. Test brakes gently before driving normally.
Installing New Brake Pads
Installing new brake pads is a key step in brake repair. It helps your car stop safely and smoothly. The process requires care and attention to detail. This section explains how to position the pads and secure all parts properly. Follow these steps for a safe brake pad replacement.
Positioning Pads
First, place the new brake pads into the caliper bracket. Make sure the metal backing faces the caliper piston. The friction surface should face the rotor. Align the pads correctly to avoid uneven wear. Press them gently but firmly into place. Check that the pads move freely without sticking.
Securing Components
Next, secure the brake pads with the retaining clips or pins. These parts hold the pads firmly. Tighten bolts or screws to the right torque. Loose parts can cause noise or brake failure. Double-check all connections for safety. Reinstall the caliper over the pads and rotor. Tighten the caliper bolts to complete the job.

Credit: www.youtube.com
Reassembling And Testing
After replacing brake pads and rotors, reassembling and testing are key steps. These ensure your brakes work safely and smoothly. Taking time here protects you on the road.
Putting Wheels Back
Start by placing the wheels back onto the car. Align the wheel holes with the wheel studs. Hand-tighten the lug nuts first to keep the wheel in place.
Use a wrench to tighten the nuts in a star pattern. This prevents the wheel from sitting unevenly. Lower the car carefully to the ground before fully tightening the nuts.
Tighten the lug nuts firmly with a torque wrench. Check your car’s manual for the correct torque value. Proper tightening avoids wheel wobble or damage.
Testing Brake Performance
Before driving, test the brake pedal feel. Press the brake pedal several times until it feels firm. A soft or spongy pedal means air may be in the brake lines.
Start the car and move slowly in a safe area. Apply brakes gently to check for smooth stopping. Listen for noises or vibrations that signal a problem.
Test at different speeds to ensure consistent braking. If the brakes feel weak or uneven, do not drive far. Recheck your work or ask a mechanic for help.
Common Challenges
Replacing brake pads and rotors seems straightforward but comes with common challenges. Knowing these helps you prepare better and avoid mistakes. Some problems can slow down the job or cause extra work. Understanding these issues makes the process smoother and safer.
Stuck Bolts
Bolts holding the rotors often get stuck from rust or dirt. They need strong tools and patience to loosen. Using too much force can break the bolts, making repairs harder. Applying a penetrating oil and letting it sit helps free stuck bolts. Careful handling avoids damage to other brake parts.
Uneven Brake Wear
Brake pads and rotors wear unevenly due to driving habits or poor maintenance. Uneven wear causes vibrations or noise when braking. It makes replacement tricky because parts may not fit well together. Checking wear patterns before replacing helps pick the right parts. Proper installation ensures smooth and safe braking after replacement.
Maintenance Tips
Proper maintenance keeps your brakes working well longer. It helps avoid costly repairs and unsafe driving. Simple habits protect brake pads and rotors from wearing out fast. Regular checks catch problems early. This section shares easy tips to maintain your brakes.
Extending Brake Life
Drive gently to reduce brake wear. Avoid hard stops and fast driving. Use engine braking on hills to ease brake strain. Keep tires inflated correctly to help brakes work better. Clean brakes and rotors regularly to remove dust and dirt. Regularly check brake fluid and replace it as needed.
Signs For Replacement
Listen for squealing or grinding noises. These sounds mean brake pads may be worn out. Feel for vibrations or pulsing in the brake pedal. Check if the brake pedal feels soft or sinks. Inspect brake pads through the wheel spokes for thinness. Look for grooves or cracks on rotors. Replace parts immediately if these signs appear.
Frequently Asked Questions
How Long Does It Take To Replace Brake Pads And Rotors?
Replacing brake pads and rotors usually takes 1 to 2 hours for an experienced person. It depends on the vehicle model and tools available. Beginners may need more time to ensure safety and accuracy during the process.
What Tools Are Needed To Replace Brake Pads And Rotors?
Basic tools include a jack, lug wrench, socket set, C-clamp, and screwdriver. Having brake cleaner and anti-seize lubricant is helpful. Proper tools ensure a smooth and safe brake replacement job.
Can I Replace Brake Pads And Rotors Myself?
Yes, with basic mechanical skills and the right tools, you can replace them. Follow a reliable guide carefully and prioritize safety. If unsure, consulting a professional mechanic is recommended.
How Do I Know When To Replace Brake Pads And Rotors?
Signs include squealing brakes, vibration during braking, or reduced stopping power. Visual inspection revealing worn pads or scored rotors also indicates replacement is needed. Regular checks prevent brake failure and ensure driving safety.
Conclusion
Replacing brake pads and rotors is not as hard as it seems. With the right tools and clear steps, anyone can do it. Taking your time helps avoid mistakes and keeps you safe. Doing this yourself also saves money and teaches you more about your car.
Regular checks make sure your brakes work well. Try it once, and you’ll find it easier next time. Simple tasks like this can boost your confidence in car care.


