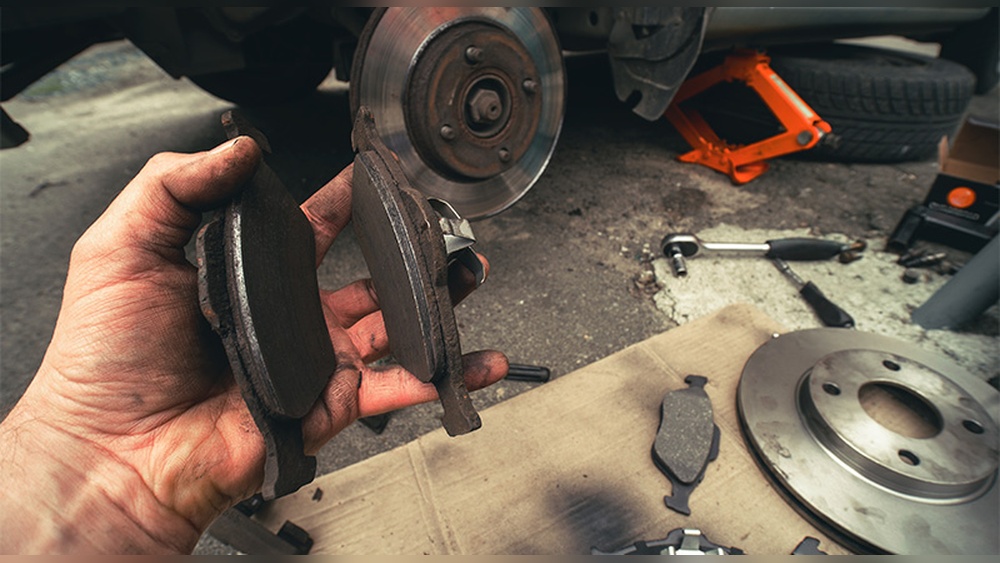
If you want your brakes to work smoothly and last longer, knowing how to bed brake pads and rotors is essential. Proper bedding helps your brakes perform better, reduces noise, and prevents uneven wear.
Whether you’re a daily driver or a weekend racer, taking the time to do this right can save you money and keep you safe on the road. Ready to learn the simple steps that make a big difference? Keep reading, and you’ll soon master the technique that every car owner should know.
Importance Of Bedding Brake Pads And Rotors
Bedding brake pads and rotors ensures better stopping power and longer part life. Proper bedding helps brakes work smoothly and safely. It reduces noise and uneven wear on the brake parts.
Understanding The Role Of Bedding
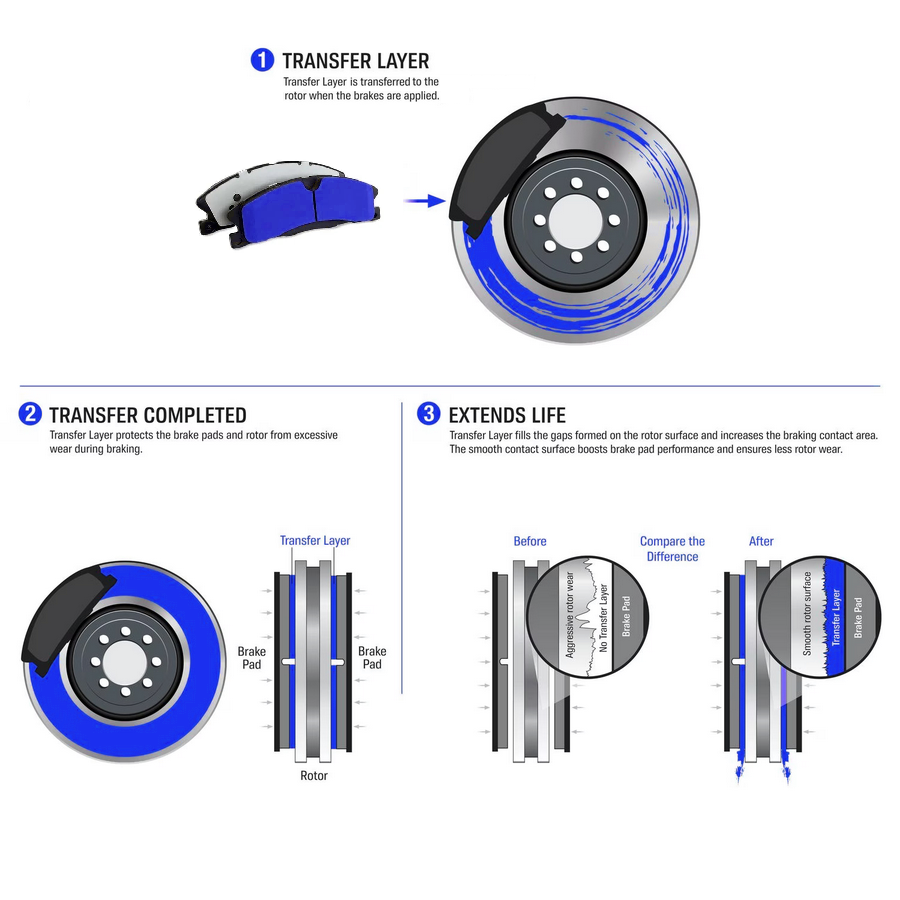
Bedding brake pads and rotors is a key step in brake maintenance. It helps create a smooth, even surface between the pads and rotors. This process improves braking power and safety. New brake parts often have tiny rough spots. Bedding removes these spots and allows the parts to work well together.
Improved Brake Performance
Proper bedding helps brakes respond better. It reduces the time needed for brakes to stop the car. The brake pads grip the rotor firmly and evenly. This leads to shorter stopping distances. It also reduces brake noise and vibrations during driving.
Longer Lifespan For Brake Parts
Bedding can extend the life of brake pads and rotors. It prevents uneven wear and damage. Without bedding, the brakes can wear out faster or cause rotor warping. This saves money on repairs and replacements. Good bedding protects your investment in brake parts.
Safer Driving Experience
Bedding ensures brakes work reliably in all conditions. It reduces the chance of brake fade on long drives or steep hills. Brakes feel more consistent and stable. This builds driver confidence and safety on the road. Properly bedded brakes help avoid accidents caused by poor stopping power.
Credit: www.brakes-shop.com
Signs You Need To Bed New Brake Pads And Rotors
Knowing the signs that tell you to bed new brake pads and rotors is important. Proper bedding helps brakes work better and last longer. Without it, brakes may feel weak or make noise.
New brake parts need a smooth surface for the best grip. Bedding creates this surface by gently wearing in the pads and rotors together. Watch for clear signs before starting the bedding process.
Unusual Noises During Braking
Squeaking or grinding sounds can mean the pads and rotors need bedding. These noises happen when new parts rub against each other unevenly. Bedding helps stop these sounds by smoothing the contact surface.
Poor Brake Performance
Soft or spongy brakes may signal that pads and rotors are not bedded. The brakes might not stop the car quickly or feel weak. Bedding improves brake bite and overall stopping power.
Visible Glazing On Brake Pads
A shiny or glassy look on the pads shows glazing. This happens if the pads overheat or are not bedded properly. Glazed pads reduce friction and cause poor braking. Bedding helps avoid glazing by heating pads evenly.
Uneven Rotor Wear
Rotors with uneven wear or scoring marks need bedding. These surface problems can cause vibrations or noise when braking. Bedding smooths the rotor surface and allows even contact with the pads.
Brake Vibration Or Pulsation
Feeling vibrations or pulsing in the brake pedal can mean bedding is needed. This happens when pads do not grip the rotor evenly. Bedding balances the contact and reduces brake pedal shake.
Tools And Materials Required
Preparing to bed brake pads and rotors requires the right tools and materials. Having everything ready makes the process smooth and safe. It also helps achieve better braking performance and longer part life.
Gather all necessary items before starting. This saves time and avoids interruptions during the job. The following tools and materials are essential for proper bedding of brake pads and rotors.
Brake Pads And Rotors
Use new or properly cleaned brake pads and rotors. Worn or damaged parts reduce braking efficiency and cause uneven bedding. Quality parts ensure even contact and proper heat transfer.
Jack And Jack Stands
A reliable jack lifts the vehicle safely off the ground. Jack stands support the vehicle securely while you work. Never rely on the jack alone for safety.
Lug Wrench Or Impact Wrench
Remove and tighten lug nuts with a lug wrench or impact wrench. Proper torque on lug nuts prevents wheel damage and ensures safety.
Brake Cleaner
Brake cleaner removes dirt, grease, and oil from rotors and pads. Clean surfaces improve bedding and reduce brake noise and vibration.
Shop Towels Or Rags
Use clean shop towels to wipe parts after cleaning. Avoid lint or debris that can stick to the brake surfaces.
Gloves And Safety Glasses
Protect your hands and eyes while working on brakes. Brake dust can irritate skin and eyes, so safety gear is essential.
Driving Route
Plan a safe route for bedding brakes. It should allow repeated stops without traffic interference or hazards.
Credit: www.hollenshades.com
Preparing Your Vehicle For Bedding
Preparing your vehicle for bedding brake pads and rotors is an important step. This process helps the brakes perform better and last longer. Proper preparation ensures safety and prevents damage during bedding. Follow these easy steps to get your vehicle ready.
Safety Precautions
Park your car on a flat surface. Use the parking brake and turn off the engine. Wear gloves to protect your hands from dirt and chemicals. Use safety glasses to shield your eyes from dust. Keep a fire extinguisher nearby just in case. Never rush this process. Safety always comes first.
Initial Inspection
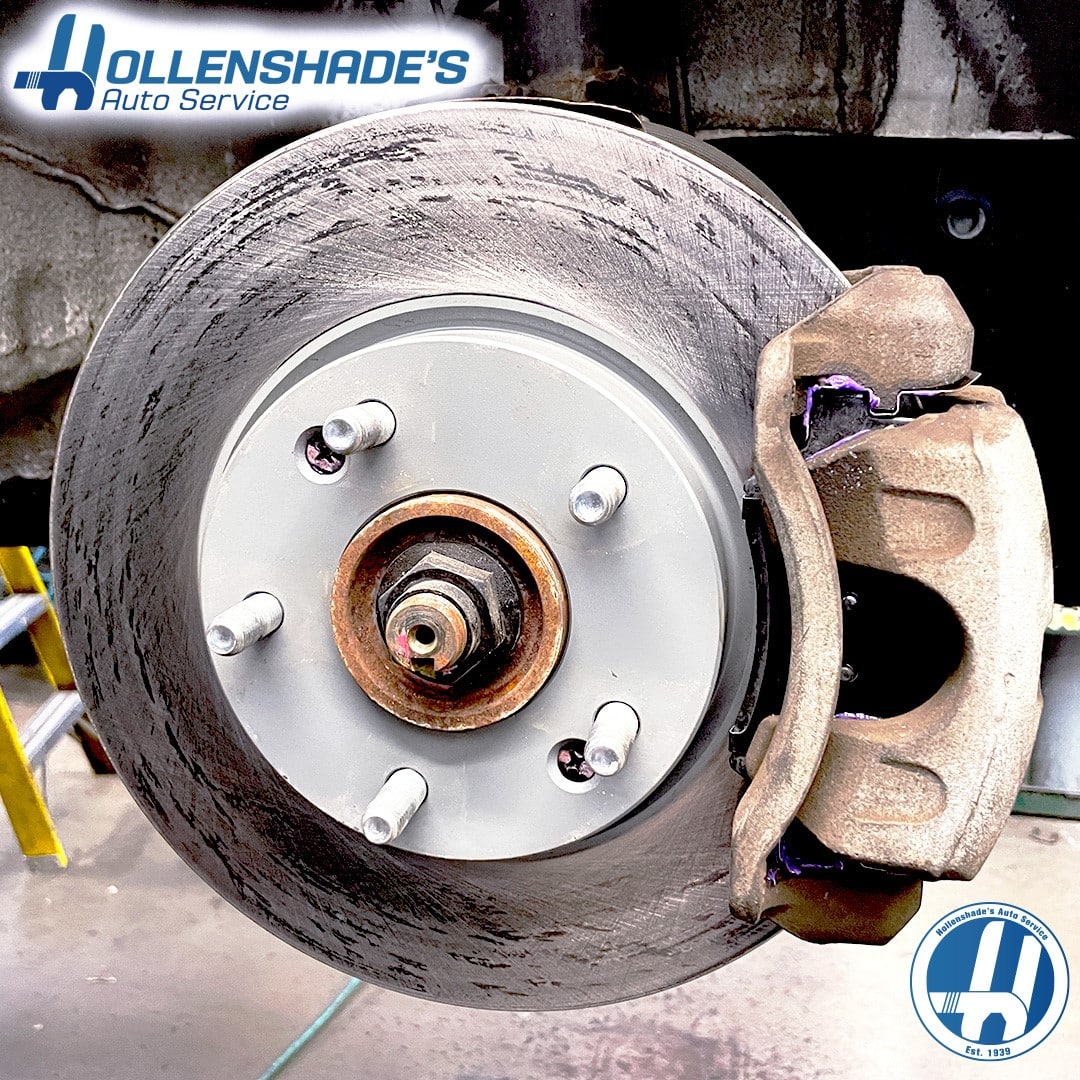
Check your brake pads and rotors for damage or wear. Look for cracks, grooves, or rust on the rotors. Inspect the pads for uneven thickness or cracks. Make sure all bolts and clips are tight and secure. Replace any parts that look worn out. Good condition parts help the bedding process work well.
Cleaning The Components
Use brake cleaner spray on the rotors and pads. Spray evenly to remove dirt, oil, and dust. Wipe clean with a lint-free cloth or paper towel. Avoid touching the rotor surface with bare hands. Dirt or grease can stop the bedding from working. Clean parts help the brakes grip properly during bedding.
Step-by-step Bedding Process
Bedding brake pads and rotors is a vital process. It helps your brakes work better and last longer. This step-by-step bedding process prepares the brake surfaces for optimal contact. The method ensures smooth braking and reduces noise or vibration. Follow each step carefully for the best results.
Heating Up The Brakes
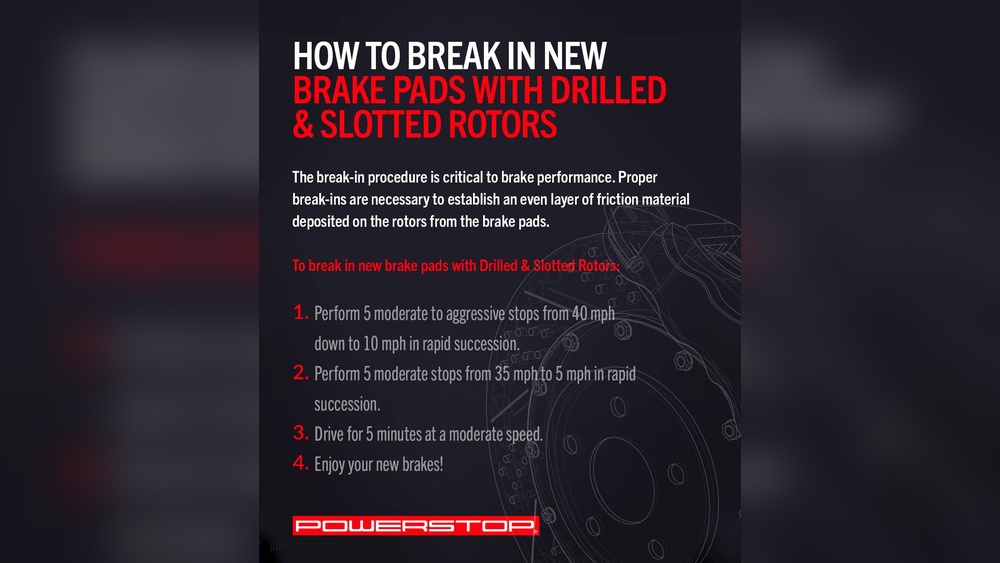
Begin by driving at a moderate speed. Avoid heavy traffic or stop signs. Apply the brakes gently but firmly several times. This heats up the brake pads and rotors. Warm brakes help the pad material transfer evenly to the rotor surface. Do this for about 5 to 10 minutes without stopping.
Applying Controlled Stops
Next, perform a series of controlled stops. Accelerate to around 30-35 mph. Brake smoothly but with firm pressure until you slow to about 5 mph. Avoid coming to a full stop. Repeat this 5 to 8 times. This step helps create a thin layer of pad material on the rotor.
Cooling Down Periods
After the stops, allow the brakes to cool naturally. Drive at a low speed without using the brakes hard. This prevents uneven pad deposits and warping. Cooling helps set the brake pad material on the rotors. Wait at least 10 minutes before heavy braking again.
Common Mistakes To Avoid
Bedding brake pads and rotors is a key step for safe driving. Mistakes can cause poor brake performance and early wear. Knowing what to avoid saves time and money. Here are common errors people make during the bedding process.
Not Warming Up The Brakes
Cold brakes do not bed properly. Skipping the warm-up causes uneven pad and rotor contact. Always start with gentle stops to heat the brakes slowly. This step prepares the brake surfaces for proper bedding.
Using Too Much Brake Pressure
Pressing the brake pedal too hard can glaze the pads. Glazing reduces friction and causes noise. Apply steady, moderate pressure during bedding. This helps pads and rotors match evenly.
Stopping At Low Speeds
Stopping too slowly does not generate enough heat. Low heat means poor pad transfer to the rotor. Brake at moderate speeds for proper bedding. Avoid very slow or quick stops in the process.
Not Repeating The Process Enough
One or two stops are not enough. Bedding requires multiple stops to build a smooth pad layer. Follow the recommended number of stops in your brake instructions. Consistency ensures better braking power.
Ignoring Vehicle Load And Conditions
Empty or light loads can change bedding results. Perform bedding with normal weight in the vehicle. Dry, flat roads are best. Wet or hilly areas affect heat buildup and bedding quality.
Aftercare For Optimal Brake Performance
Proper aftercare is key to keeping your brakes working well after bedding brake pads and rotors. This care helps your brakes stay safe, smooth, and effective. Follow simple steps to protect your brake system and get the best performance.
Checking Brake Fluid
Brake fluid keeps your brake system working correctly. Check the fluid level often. Top it up if it is low. Use the right type of brake fluid for your vehicle. Clean, fresh fluid helps your brakes respond quickly.
Look for any leaks around brake lines and the master cylinder. Leaks can cause brake failure. Replace old brake fluid every 1-2 years to avoid moisture buildup. Moisture can lower brake performance and cause corrosion.
Avoiding Hard Braking Initially
After bedding, avoid hard or sudden stops for the first 200 miles. Gentle braking lets the pads and rotors settle fully. This step prevents uneven wear and overheating.
Keep your speed moderate to reduce stress on the brakes. Smooth braking helps the brake surface stay even. This leads to quieter brakes and longer pad life.
Routine Maintenance Tips
Regular brake checks catch problems early. Inspect pads, rotors, and brake lines for wear or damage. Replace worn parts promptly to keep braking safe.
Clean brake dust and dirt from wheels and brake parts regularly. Dirt can cause noise and reduce brake efficiency. Use a soft brush or compressed air for cleaning.
Listen for unusual noises or vibrations when braking. These signs may mean your brakes need attention. Address issues quickly to avoid costly repairs.

Credit: goodcar.com
Troubleshooting Brake Issues Post-bedding
After bedding brake pads and rotors, some issues may appear. These problems can affect braking performance and safety. Knowing how to spot and fix these problems helps keep your brakes working well.
Brake noises, vibrations, or poor stopping power are common signs. These issues often relate to bedding problems but could have other causes too. Careful checks and simple fixes usually solve the problem fast.
Identifying Brake Noise After Bedding
Squeaking or squealing sounds may occur after bedding. This often happens if the pads did not seat evenly. Dust or debris caught between pads and rotors can also cause noise. Cleaning the brake parts and checking pad alignment helps reduce noise.
Dealing With Brake Vibration
Vibration during braking can mean uneven rotor surfaces. This happens if bedding was uneven or rushed. Warped rotors or loose components cause shaking too. Inspect rotors for damage and tighten all bolts. Light sanding can smooth rotor surfaces if needed.
Handling Poor Brake Response
If brakes feel weak or slow, pads may not be fully bedded. Oil or grease contamination on pads reduces friction. Make sure pads and rotors are clean and dry. Repeat the bedding process gently to improve brake grip.
Checking For Brake Fade
Brake fade means brakes lose power during use. It can occur if rotors overheat during bedding. Allow brakes to cool fully before driving hard again. Use short, controlled stops to avoid excess heat build-up.
Frequently Asked Questions
What Is The Purpose Of Bedding Brake Pads And Rotors?
Bedding brake pads and rotors ensures optimal contact for better braking. It prevents uneven wear and improves braking performance and safety.
How Do You Properly Bed Brake Pads And Rotors?
Drive at moderate speed and apply brakes gently several times. Then, apply firmer stops without coming to a full halt. Repeat this process 4-6 times to transfer a layer of pad material onto the rotors.
How Long Does The Bedding Process Take?
The bedding process usually takes about 10 to 15 minutes. It depends on the driving style and brake type but should be done carefully to avoid damage.
Can I Drive Normally After Bedding Brake Pads?
Yes, but avoid hard braking for the first 100 miles. This lets the pads and rotors settle evenly, ensuring consistent and safe braking performance.
Conclusion
Properly bedding brake pads and rotors ensures safer driving. It helps brakes work better and last longer. The process removes any coatings and creates good contact. Follow the steps carefully for best results. Take your time and avoid rushing the job.
Well-bedded brakes feel smooth and stop the car quickly. This simple task saves money on repairs later. Drive with confidence knowing your brakes are ready. Keep checking and maintain your brakes often. Safe stops start with good brake care.