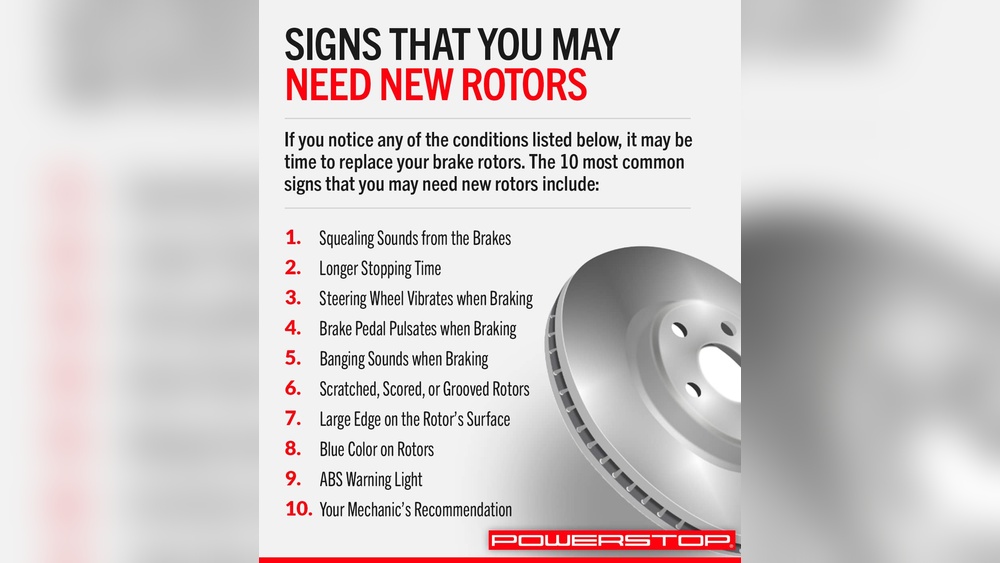
If your car’s brakes are making noise or not stopping as smoothly as before, it might be time to change your brake pads and rotors. You don’t have to pay a mechanic to do this—it’s a task you can handle yourself with the right tools and guidance.
Imagine saving money and gaining confidence in your car’s safety by learning a simple skill. You’ll discover step-by-step instructions that make changing brake pads and rotors easier than you think. Keep reading, and you’ll be ready to tackle this important maintenance job on your own.
Tools And Materials Needed
Changing car brake pads and rotors requires specific tools and materials. Having everything ready makes the job faster and safer. This section lists what you need before starting the work.
Essential Tools
First, a jack and jack stands are necessary to lift and secure the car. A lug wrench helps remove the wheel bolts. A socket set and ratchet make removing bolts easier.
You also need a C-clamp or brake caliper tool to press the caliper piston. A flathead screwdriver helps pry off old brake pads. A wire brush cleans rust from the rotor and caliper.
Finally, a torque wrench ensures bolts are tightened to the right level.
Choosing The Right Brake Pads And Rotors
Select brake pads that match your car’s make and model. Check the material type; ceramic pads last longer and are quieter.
Rotors must fit your car’s specifications. Choose between standard and performance rotors based on driving needs. Buying quality parts improves safety and performance.
Safety Gear
Wear safety glasses to protect your eyes from dust and debris. Gloves keep your hands clean and safe from sharp edges. A dust mask prevents inhaling brake dust, which can be harmful.
Use work clothes that can get dirty. Keep a fire extinguisher nearby for emergencies.
.jpg)
Credit: www.cbac.com
Preparing Your Vehicle
Preparing your vehicle is the first step to change brake pads and rotors safely. It helps avoid accidents and makes the job easier. Follow these steps carefully to get ready for the task.
Parking And Securing The Car
Park your car on a flat surface. Avoid slopes or uneven ground. Apply the parking brake firmly. This stops the car from moving.
Turn off the engine and remove the keys. Place wheel chocks behind the wheels. This adds extra security against rolling.
Loosening Lug Nuts
Before lifting, loosen the lug nuts on the wheel. Use a lug wrench or tire iron. Turn the nuts counterclockwise, but do not remove them yet.
Loosening nuts early prevents the wheel from spinning when raised. It also saves effort later during removal.
Lifting The Vehicle Safely
Find the correct jacking point under your car. Check your owner’s manual if unsure. Place the jack securely in that spot.
Lift the car slowly until the wheel is off the ground. Use jack stands to support the car. Never rely on the jack alone.
Double-check stability before starting work. Safety must always come first.
Removing Old Brake Components
Removing old brake components is the first step in changing your car’s brake pads and rotors. This step clears the way for new parts and ensures your brakes work well. Follow each part carefully to avoid damage and keep safety in mind.
Taking Off The Wheel
Start by loosening the lug nuts with a wrench. Use a jack to lift the car and place it on jack stands. Remove the lug nuts completely and take the wheel off. Set the wheel aside in a safe place.
Accessing The Brake Caliper
Locate the brake caliper around the rotor. Use a socket wrench to remove the bolts holding the caliper. Carefully slide the caliper off the rotor. Support the caliper with a hook or rest it on a secure spot to avoid stress on the brake line.
Removing The Brake Pads
The brake pads sit inside the caliper bracket. Pull them out by hand or gently pry them with a flat tool. Check for any clips or pins holding the pads in place and remove those first. Note the pad position for correct installation of new pads.
Detaching The Brake Rotor
The rotor may be held by screws or rusted in place. Remove any screws with a screwdriver. Tap the rotor gently with a rubber mallet to loosen it. Slide the rotor off the hub carefully. Clean the hub surface before installing new parts.

Credit: www.2carpros.com
Inspecting Brake System Parts
Inspecting brake system parts is a crucial step before changing brake pads and rotors. It ensures safety and helps identify worn or damaged components early. Proper inspection saves time and money by avoiding unnecessary replacements.
Checking Caliper Condition
Start by examining the brake calipers. Look for leaks around the piston area. Check for rust or corrosion on the caliper body. Make sure the caliper moves smoothly on its slides. Stuck or damaged calipers can cause uneven brake pad wear.
Examining Brake Lines
Brake lines carry hydraulic fluid to the brakes. Inspect them for cracks, bulges, or leaks. Pay attention to rubber hoses and metal lines. Any damage can reduce braking power or cause failure. Replace brake lines if you find signs of wear or damage.
Assessing Rotor And Pad Wear
Rotors must be smooth and free of deep grooves. Check for warping by spinning the rotor. Brake pads should have at least 3mm of material left. Thin or uneven pads need replacement. Worn rotors often require resurfacing or full replacement.
Installing New Brake Pads And Rotors
Installing new brake pads and rotors is a key step in brake maintenance. Proper installation ensures safety and smooth braking. Follow each step carefully to avoid problems later.
Cleaning The Hub Surface
Start by cleaning the hub surface. Use a wire brush to remove rust and dirt. This helps the rotor sit flat and prevents noise. Wipe the surface with a clean cloth after brushing.
Placing The New Rotor
Place the new rotor on the hub. Align the holes with the wheel studs. Push the rotor firmly until it sits flush. Avoid touching the rotor surface with bare hands.
Installing New Brake Pads
Install the new brake pads into the caliper bracket. Make sure they fit snugly and do not move. Apply brake grease on the back of the pads to reduce noise. Check that the pads align with the rotor.
Reattaching The Caliper
Carefully place the caliper over the brake pads and rotor. Tighten the caliper bolts to the correct torque. Check that the caliper moves freely but stays secure. Test the brake pedal before driving.
Reassembling And Finishing Up
Reassembling and finishing up your brake pad and rotor replacement is a critical step. Proper reassembly ensures your brakes work safely and effectively. Follow these steps carefully for a smooth finish.
Putting The Wheel Back On
Align the wheel with the wheel hub. Slide it onto the lug bolts gently. Make sure the wheel sits flush against the hub. This prevents wobbling and ensures safety.
Lowering The Vehicle
Use the jack to slowly lower the vehicle to the ground. Remove the jack once the car is stable. Never work under a car supported only by a jack. Always ensure it rests on the ground firmly.
Tightening Lug Nuts
Tighten the lug nuts by hand first to secure the wheel. Use a torque wrench to tighten nuts in a star pattern. This method balances pressure evenly across the wheel. Check your car manual for the correct torque settings.
Checking Brake Fluid
Open the brake fluid reservoir under the hood. Check the fluid level and top it up if needed. Use the recommended brake fluid type for your vehicle. Proper fluid levels ensure your brakes function smoothly.
Testing And Break-in Procedures
Testing and break-in procedures are key after changing brake pads and rotors. They ensure safety and extend the life of your brakes. Proper testing confirms everything works well. Breaking in new parts helps them fit and perform smoothly. This section covers how to test brakes and break in new pads and rotors safely.
Initial Brake Testing
Start by pressing the brake pedal gently. Check for a firm feel, not soft or spongy. Test brakes at low speed in a safe place. Listen for unusual noises like grinding or squealing. Make sure the vehicle stops evenly without pulling to one side. If anything feels wrong, stop and recheck the installation.
Proper Break-in Of New Pads And Rotors
Break in new brakes with careful driving. Avoid hard stops or sudden braking for the first 200 miles. Use moderate braking to allow pads and rotors to adjust. This helps create a smooth, even surface. It reduces noise and wear. Proper break-in improves braking power and safety over time.
Signs Of Proper Installation
Look for smooth braking without vibration or noise. The pedal should feel firm and responsive. No pulling or uneven stopping should occur. Check the brake components for proper alignment and tightness. New pads should wear evenly after some use. These signs mean your brake change was successful and safe.

Credit: www.youtube.com
Common Issues And Troubleshooting
Changing car brake pads and rotors can solve many braking problems. Sometimes, issues appear even after replacement. Knowing common problems helps fix them fast. Troubleshooting stops small problems from becoming big safety risks.
Squeaking Or Grinding Noises
Squeaking brakes often mean worn pads. Dust or dirt can cause noise too. Grinding sounds show pads are too thin. Rotors may be damaged or warped. Clean brake parts and check pad thickness. Replace parts if noise stays after cleaning.
Uneven Brake Wear
Uneven wear means brakes do not press equally. This can happen from stuck calipers or bad slides. Bad brake hardware also causes uneven wear. Check calipers, slides, and hardware for damage. Replace or repair parts to fix uneven wear.
Brake Pedal Feel Problems
A soft or spongy brake pedal shows air in brake lines. Brake fluid leaks can cause low pedal feel. A hard pedal means a stuck caliper or bad booster. Check brake fluid level and brake lines first. Repair leaks or bleed brakes to fix pedal feel.
Frequently Asked Questions
How Often Should I Change Brake Pads And Rotors?
Brake pads typically need replacement every 30,000 to 70,000 miles. Rotors last longer but should be checked regularly. Inspect them during every brake service to ensure safety and optimal performance.
What Tools Are Needed To Change Brake Pads And Rotors?
You need a jack, lug wrench, socket set, C-clamp, and screwdriver. Safety gloves and eye protection are also recommended. These tools help you safely remove and replace brake components.
Can I Replace Brake Pads Without Changing Rotors?
Yes, if rotors are in good condition with no deep grooves or warping. However, replacing both ensures better braking performance and longer part life. Always inspect rotors before deciding.
How Long Does It Take To Change Brake Pads And Rotors?
On average, it takes about 1 to 2 hours for both sides. Time varies based on experience and vehicle type. Proper preparation and tools can speed up the process.
Conclusion
Changing car brake pads and rotors is a useful skill. It saves money and keeps your car safe. Take your time and follow each step carefully. Use the right tools and parts for your vehicle. Always check your work before driving.
Regular brake maintenance helps avoid bigger problems later. Practice makes this task easier over time. Stay patient and focused during the process. Your car will stop better and feel more reliable. Simple steps lead to safer drives every day.