
If your Echo trimmer isn’t running as smoothly as it used to, the fuel filter might be the problem. Changing the fuel filter is a simple step that can save you from costly repairs and keep your trimmer working like new.
In this guide, you’ll learn exactly how to change the fuel filter quickly and easily, even if you’ve never done it before. Keep reading to make sure your trimmer stays reliable and ready for your next job.

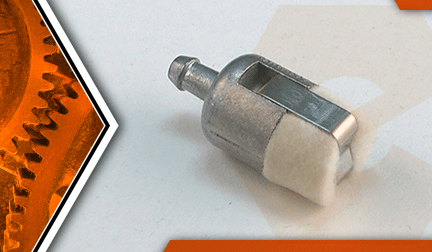
Credit: www.amazon.com
Tools And Materials Needed
Changing the fuel filter on an Echo trimmer needs a few simple tools and materials. Having these ready makes the job easier and faster. Use the right tools to avoid damage and ensure safety.
Fuel Filter Replacement Kit
Start with a fuel filter replacement kit made for Echo trimmers. This kit usually includes a new fuel filter and sometimes small clamps. The filter fits perfectly and works well with your trimmer.
Screwdrivers
You need a flathead or Phillips screwdriver. These help open the fuel tank and access the filter. Choose the right size to avoid stripping screws.
Pliers
Needle-nose pliers work best. They help remove and install the small fuel filter clips. Pliers also grip hoses without causing damage.
Clean Cloth Or Rags
Keep a clean cloth or rag nearby. Use it to wipe any spilled fuel. Also, clean dirt around the fuel tank before opening it.
Small Container
A small container or cup holds any fuel that may spill during the change. This keeps your workspace clean and safe.
Gloves
Wear gloves to protect your hands from fuel and dirt. Nitrile gloves work well and keep your grip strong.
Safety Precautions
Safety is the top priority when changing the fuel filter on your Echo trimmer. Taking simple precautions can prevent accidents and keep you safe. Always prepare your workspace and tools before starting. Stay calm and focused throughout the process.
Turn Off The Trimmer And Let It Cool
Make sure the trimmer is off before you begin. Hot parts can cause burns. Wait at least 15 minutes for the engine to cool down. Never touch the engine while it is hot.
Work In A Well-ventilated Area
Fuel fumes are harmful. Choose a place with fresh air. Avoid working indoors or in closed spaces. This helps reduce the risk of inhaling dangerous fumes.
Wear Protective Gloves And Eye Gear
Fuel can irritate your skin and eyes. Use gloves to protect your hands. Wear safety glasses to guard your eyes. This reduces the chance of injury during the task.
Avoid Open Flames And Sparks
Fuel is highly flammable. Keep away from cigarettes, matches, and sparks. Do not smoke while working on the trimmer. Stay clear of anything that could ignite the fuel.
Dispose Of Old Fuel And Filter Properly
Used fuel and filters can harm the environment. Collect old fuel in a safe container. Take the used filter to a recycling center. Never pour fuel down drains or on the ground.
Locating The Fuel Filter
Locating the fuel filter on an Echo trimmer is the first step to changing it. Knowing exactly where it sits saves time and effort. The fuel filter cleans the fuel before it reaches the engine. A dirty or clogged filter can cause poor performance. Finding the filter quickly helps keep your trimmer running smoothly.
Understanding The Fuel Line Layout
The fuel filter is inside the fuel line. The fuel line runs from the fuel tank to the carburetor. Follow the clear or black rubber tube connected to the tank. The filter is a small, white, or off-white piece in this line. It looks like a tiny plastic cylinder or mesh.
Checking Near The Fuel Tank
Most Echo trimmers have the fuel filter close to the tank. Look at the tank’s base or side. The filter sits inside the fuel line here. Sometimes, it is visible through the clear tubing. Other times, you need to gently pull the fuel line to see it better.
Identifying The Fuel Filter By Shape And Size
The fuel filter is small and often white or cream-colored. It is usually about an inch long. The filter may feel like a small sponge or plastic piece. It fits snugly inside the fuel line to catch dirt and debris. Spotting this part helps in removing and replacing it properly.
Preparing The Trimmer
Preparing the trimmer is the first step in changing the fuel filter on an Echo trimmer. It helps ensure safety and makes the process easier. Taking time to prepare the trimmer protects you and the tool.
Follow these simple steps to get ready. Each step is important for a smooth and safe filter change.
Turn Off The Trimmer And Let It Cool
Switch off the trimmer completely. Do not try to work on a hot engine. Let the trimmer cool for at least 15 minutes. This prevents burns and accidents.
Remove The Spark Plug Wire
Locate the spark plug wire on the trimmer. Gently pull it off the spark plug. This step stops the engine from starting by accident. Safety first.
Find A Clean Workspace
Choose a flat, clean surface to work on. Dirt and debris can damage parts. A clean area helps keep everything organized and easy to find.
Gather Necessary Tools And Materials
Collect tools like screwdrivers, pliers, and a new fuel filter. Have a small container ready to catch any spilled fuel. This saves time and avoids mess.
Removing The Old Fuel Filter
Removing the old fuel filter from your Echo trimmer is an important step. It keeps the trimmer running smoothly. The old filter may be clogged or dirty. This can reduce engine performance and cause problems.
Take your time. Work carefully. Follow these steps to remove the old filter safely and easily.
Prepare The Work Area
Find a flat, clean surface to work on. Keep a small container nearby. This will hold any fuel that might spill. Wear gloves to protect your hands from fuel.
Turn Off The Trimmer
Make sure the trimmer is off. Let the engine cool down if it was running. This prevents burns and accidents. Remove the spark plug wire to stop accidental starts.
Access The Fuel Tank
Locate the fuel tank on your trimmer. Open the fuel tank cap slowly. Use a clean cloth to wipe around the opening. This stops dirt from falling inside.
Remove The Fuel Line
Find the fuel line connected to the filter. Use pliers to gently loosen the clamp. Carefully pull the fuel line off the filter. Be ready for some fuel to leak out.
Take Out The Old Fuel Filter
Pull the old fuel filter out of the fuel tank. Check its condition. If it looks dirty or clogged, it needs replacing. Dispose of it properly according to local rules.
Installing The New Fuel Filter
Installing the new fuel filter on your Echo trimmer is a simple but important task. This step helps your trimmer run smoothly and last longer. Follow each step carefully to avoid any damage or fuel leaks.
Prepare The New Fuel Filter
Take the new fuel filter out of its package. Check for any visible damage or dirt. Make sure it matches the size and shape of the old filter you removed.
Attach The Fuel Filter To The Fuel Line
Slide the new fuel filter into the fuel line. Push it firmly but gently. The filter should fit snugly to prevent any fuel leaks. Do not force it too hard to avoid damage.
Secure The Fuel Filter In Place
Use clamps or clips to hold the fuel filter firmly. Tighten the clamps just enough to keep the filter from moving. Avoid over-tightening, which could crush the fuel line or filter.
Check For Proper Installation
Look over the filter and fuel line connection. Ensure there are no gaps or loose parts. A well-installed filter keeps fuel flowing cleanly to the engine.
Reassembling The Trimmer
Reassembling the trimmer is a key step after changing the fuel filter. It brings your tool back to life. Careful reassembly ensures the trimmer works smoothly and safely.
Follow each step with care. Avoid forcing parts into place. Align everything correctly before securing screws or clips. Proper assembly saves time and prevents damage.
Replace The Fuel Filter Cover
Start by putting the fuel filter cover back. Make sure it fits snugly over the new filter. The cover protects the filter from dirt and debris.
Secure The Cover With Screws
Use a screwdriver to tighten the screws. Tighten evenly but do not overtighten. Loose screws cause leaks; too tight can crack the cover.
Reconnect The Fuel Line
Attach the fuel line to the filter carefully. Check for any bends or kinks. A smooth line allows proper fuel flow to the engine.
Reattach The Air Filter Housing
Place the air filter housing back in its position. Secure it firmly with clips or screws. This step prevents dirt from entering the engine.
Test The Trimmer
Before full use, start the trimmer briefly. Listen for smooth running and check for leaks. Proper reassembly means the trimmer runs well and safely.
Credit: www.ereplacementparts.com
Testing The Trimmer
Testing the trimmer after changing the fuel filter is important. It shows if the filter works well. The trimmer should run smoothly without any issues. This step helps avoid bigger problems later.
Starting The Trimmer
Start the trimmer on a flat surface. Use the choke if the engine is cold. Pull the starter cord gently. Listen for steady engine sounds. Avoid hard pulling to prevent damage.
Checking For Fuel Flow
Look for smooth fuel flow to the engine. The trimmer should not stall or hesitate. If it does, check the fuel filter again. A clean filter lets fuel pass freely.
Watching For Smoke Or Smell
Notice any smoke or strong fuel smell. Little smoke is normal at start. Too much smoke means a problem. A bad smell may show fuel leaks or poor combustion.
Testing The Throttle Response
Press the throttle slowly. The engine speed should rise smoothly. No sudden stops or drops in power. Good response means the fuel system works right.
Listening For Unusual Sounds
Listen for strange noises like knocking or sputtering. Steady sounds mean the engine is fine. Odd sounds suggest a fuel or engine issue. Stop and inspect if you hear them.
Maintenance Tips
Maintaining your Echo trimmer is key to its long life. Changing the fuel filter is part of this care. A clean filter keeps fuel flowing well. It stops dirt from clogging the engine. Regular checks help avoid costly repairs. Here are some tips to keep your trimmer running smoothly.
Check The Fuel Filter Regularly
Look at the fuel filter every few months. Dirt builds up over time. Replace the filter if it looks dark or clogged. A clean filter improves engine performance. It also saves fuel and cuts emissions.
Use The Right Replacement Filter
Always buy filters made for Echo trimmers. Using wrong parts can harm your machine. The right filter fits perfectly and works well. It keeps your trimmer running strong.
Keep Your Trimmer Clean
Wipe dirt and grass from your trimmer after use. Clean parts help the fuel filter last longer. Dirt near the filter can cause blockages. A clean machine is easier to maintain.
Store Trimmer Properly
Store your trimmer in a dry place. Moisture can damage the fuel filter. Drain fuel if you store for a long time. Proper storage protects your equipment from damage.
Follow The Manufacturer’s Guide
Check the Echo trimmer manual for fuel filter advice. Follow the recommended change schedule. The manual gives safety tips too. It helps keep your trimmer in top shape.

Credit: www.youtube.com
Frequently Asked Questions
How Often Should I Change The Fuel Filter On Echo Trimmer?
Change the fuel filter every 25 hours of use or at the start of each season. Regular replacement ensures optimal engine performance and prevents clogging.
What Tools Do I Need To Replace Echo Trimmer Fuel Filter?
You need a flathead screwdriver, pliers, and a new fuel filter. These simple tools help remove the old filter safely and install the new one correctly.
Can I Clean The Fuel Filter Instead Of Replacing It?
Cleaning is not recommended because it may damage the filter. Replacing ensures proper fuel flow and protects the engine from dirt and debris.
How Do I Safely Remove The Old Fuel Filter On Echo Trimmer?
First, disconnect the fuel line using pliers. Then, carefully pull out the old filter without spilling fuel. Wear gloves and work in a ventilated area.
Conclusion
Changing the fuel filter on your Echo trimmer keeps it running well. Clean fuel helps the engine work smoothly and last longer. Follow the steps carefully and take your time. Regular maintenance saves money and avoids big problems later. You can do this easily with basic tools.
Keep your trimmer ready for any job by checking the fuel filter often. Simple care makes a big difference in performance. Try it yourself and see how your trimmer runs better.


