Are you hearing strange noises when you brake? Or maybe your car isn’t stopping as smoothly as it used to?
It could be time to change your rotors and brakes. Knowing how to do this yourself can save you money and give you confidence in your car’s safety. In this guide, you’ll discover simple, step-by-step instructions that anyone can follow.
By the end, you’ll feel ready to tackle this important task and keep your vehicle running smoothly. Ready to get started? Let’s dive in!
Tools And Materials Needed
Changing your rotors and brakes requires specific tools and materials. Having the right items makes the job easier and safer. Prepare everything before you start to avoid interruptions. This section lists the essential tools and brake parts you need for the task.
Essential Tools
A good jack and jack stands are necessary to lift and hold your vehicle securely. Use a lug wrench to remove the wheel nuts. A socket set with ratchet helps remove bolts on the brake caliper and rotor. A C-clamp or brake caliper tool pushes the caliper piston back into place. Screwdrivers and pliers assist with clips and pins. A torque wrench ensures bolts are tightened to the correct level. Don’t forget safety gloves and eye protection.
Brake Parts And Accessories
New brake pads and rotors must match your vehicle’s make and model. Brake cleaner removes dust and grime from parts before installation. High-temperature brake grease lubricates caliper slides and contact points. Brake hardware kits include clips, springs, and pins needed for secure fitting. Brake fluid may require topping up or bleeding after the job. Having all these parts ready keeps the process smooth and efficient.

Credit: www.youtube.com
Preparing Your Vehicle
Preparing your vehicle is the first step in changing rotors and brakes. This stage ensures safety and ease during the repair. It helps you avoid accidents and damage. Proper preparation saves time and effort later. Follow these guidelines carefully before starting the job.
Safety Measures
Wear safety glasses to protect your eyes from dust and debris. Use gloves to keep your hands clean and safe. Make sure the car is on a flat surface. Avoid loose clothing that can get caught in tools. Keep a fire extinguisher nearby for emergencies. Disconnect the car battery to prevent electrical shocks.
Lifting And Securing The Car
Use a reliable jack to lift the car. Place the jack under the car’s frame or recommended lift points. Raise the vehicle just enough to remove the wheel. Always use jack stands to support the car. Never rely only on the jack for support. Double-check that the car is stable before working underneath. Chock the wheels that stay on the ground to prevent rolling.
Removing The Wheel
Removing the wheel is the first important step to change your rotors and brakes. You need to do this safely and carefully. The wheel holds the brake parts, so take your time. This process makes the rest of the job easier and safer.
Loosening Lug Nuts
Start by loosening the lug nuts. Use a lug wrench to turn them counterclockwise. Do this while the car is still on the ground. This stops the wheel from spinning. Loosen the nuts just enough to break their tight grip.
Taking Off The Wheel
Next, lift the car using a jack. Make sure the car is stable before lifting. Remove the lug nuts completely once the wheel is off the ground. Keep the nuts safe so you don’t lose them. Pull the wheel straight off the hub. Place the wheel aside carefully.
Accessing The Brake Assembly
Accessing the brake assembly is the first step in changing your rotors and brakes. This part holds the key components like the caliper and rotor. You must carefully reach this area to work safely and effectively. Understanding the layout helps avoid damage and speeds up the job.
Locating The Caliper
The caliper sits over the rotor and holds the brake pads. It looks like a clamp on the edge of the wheel. You can see it once the wheel is off. The caliper connects to the brake line, which carries brake fluid.
Find the bolts that hold the caliper to the mounting bracket. These bolts keep it tight and secure. You may need a wrench or socket to remove them. Knowing this spot helps you prepare for the next steps.
Removing The Caliper
Start by loosening the bolts holding the caliper. Remove them carefully and keep them safe. Pull the caliper away from the rotor slowly. Avoid pulling on the brake line to prevent damage.
Use a hook or a piece of wire to hang the caliper. This keeps the brake line from stretching or breaking. Now, the rotor is exposed and ready for removal. This step makes the brake change easier and safer.
Removing Old Rotors And Pads
Removing old rotors and brake pads is a key step in brake maintenance. It helps keep your car safe and running well. This process takes some tools and care. Follow simple steps to do it right.
Detaching Brake Pads
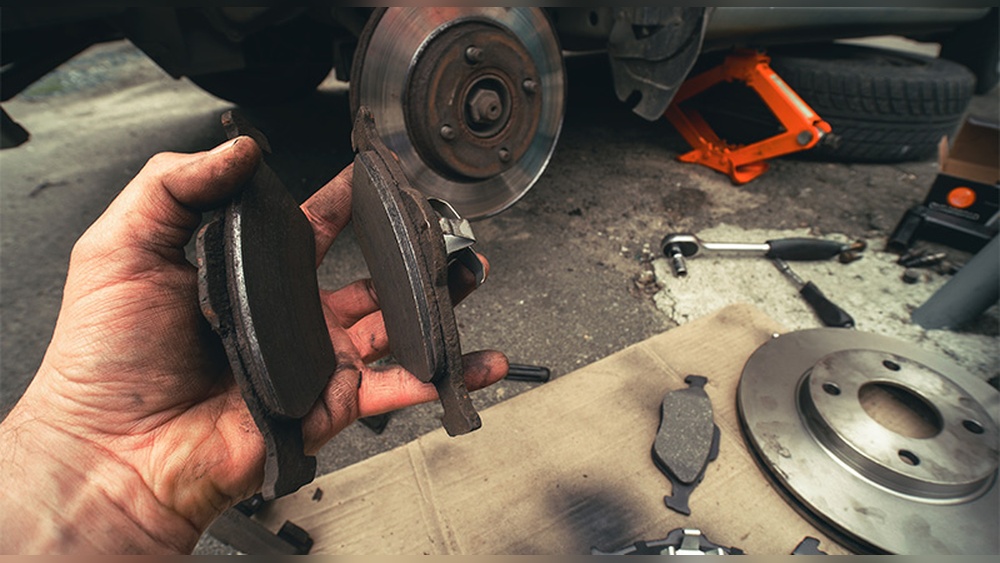
Start by loosening the caliper bolts. Use a wrench or socket set for this. Lift the caliper gently off the rotor. Support it with a wire or rest it on a solid surface. Take out the old brake pads from the caliper bracket. Check the pads for wear before removal. Sometimes, they stick and need a little wiggle. Clean the area around the caliper to remove dirt and dust.
Taking Off The Rotor
Remove any screws or clips holding the rotor in place. If the rotor is stuck, tap it lightly with a rubber mallet. Avoid hitting too hard to prevent damage. Pull the rotor straight off the hub. Check the hub for rust or debris. Clean the surface before installing the new rotor. This ensures a good fit and smooth braking.
Installing New Rotors And Pads
Installing new rotors and brake pads is a key step in brake maintenance. Proper installation ensures safe driving and longer brake life. Follow these steps to fit your new parts correctly. Take your time and work carefully.
Cleaning And Preparing Surfaces
Start by cleaning the hub surface where the rotor sits. Remove all rust, dirt, and old brake dust. Use a wire brush or sandpaper for best results. Clean the rotor with brake cleaner to remove oil or grease. A clean surface helps the rotor fit tightly and prevents noise.
Fitting New Rotors
Place the new rotor onto the hub. Make sure it fits flat and snug against the surface. Use the wheel bolts to hold the rotor in place temporarily. Check for any wobbling or uneven gaps. Tighten the bolts in a star pattern to secure the rotor evenly.
Installing Brake Pads
Remove the old brake pads from the caliper. Check the caliper pins and clean them. Apply a small amount of brake grease to the back of the new pads. Slide the new pads into the caliper bracket. Make sure they sit firmly and move freely. Reinstall the caliper over the rotor and tighten the bolts.
Reassembling The Brake System
Reassembling the brake system is a key step after changing rotors and brakes. It ensures your vehicle stops safely and works properly. Careful work here prevents brake problems later. Follow each step with attention to detail.
Reattaching The Caliper
Start by placing the caliper back over the new rotor. Align it carefully with the brake pads. Make sure the pads sit correctly on both sides of the rotor. Slide the caliper bolts into their holes. Tighten the bolts firmly but avoid over-tightening. This keeps the caliper stable and secure during driving.
Securing All Components
Check that all parts fit tightly. Inspect the rotor, pads, and caliper for any movement. Tighten the caliper bracket bolts last. Use a torque wrench to reach the manufacturer’s recommended tightness. This step prevents loose parts and brake noise. Finally, reconnect any brake lines or sensors you removed. Test the brake pedal for firmness before driving.
Finishing Up
After replacing your rotors and brakes, it’s time to finish the job safely. This final step ensures everything works well. Follow these easy steps to complete the process properly.
Replacing The Wheel
Put the wheel back on the hub carefully. Align the holes in the wheel with the bolts. Hand-tighten the lug nuts to hold the wheel in place. Avoid using the wrench at this stage to prevent cross-threading.
Lowering The Vehicle
Use the jack to slowly lower the vehicle until the wheel touches the ground. Remove the jack completely once the car is stable. Tighten the lug nuts in a star pattern. This ensures the wheel is secure and balanced.
Testing Brake Performance
Press the brake pedal several times to build pressure. Start the vehicle and test the brakes at low speed. Listen for any unusual sounds or vibrations. If the brakes feel soft or weak, check the installation again. Safe brakes mean safe driving.
Tips For Maintenance And Safety
Maintaining your brakes and rotors is key to safe driving. Simple checks and care help avoid big problems. This keeps your vehicle ready for the road.
Follow these tips to keep your brakes working well. Safety should always come first during maintenance.
Regular Inspections
Check your brakes often. Look at the brake pads and rotors for any damage. Listen for unusual noises when braking. Feel for changes in brake pedal pressure. These signs help spot issues early. Early checks prevent costly repairs later.
Signs Of Brake Wear
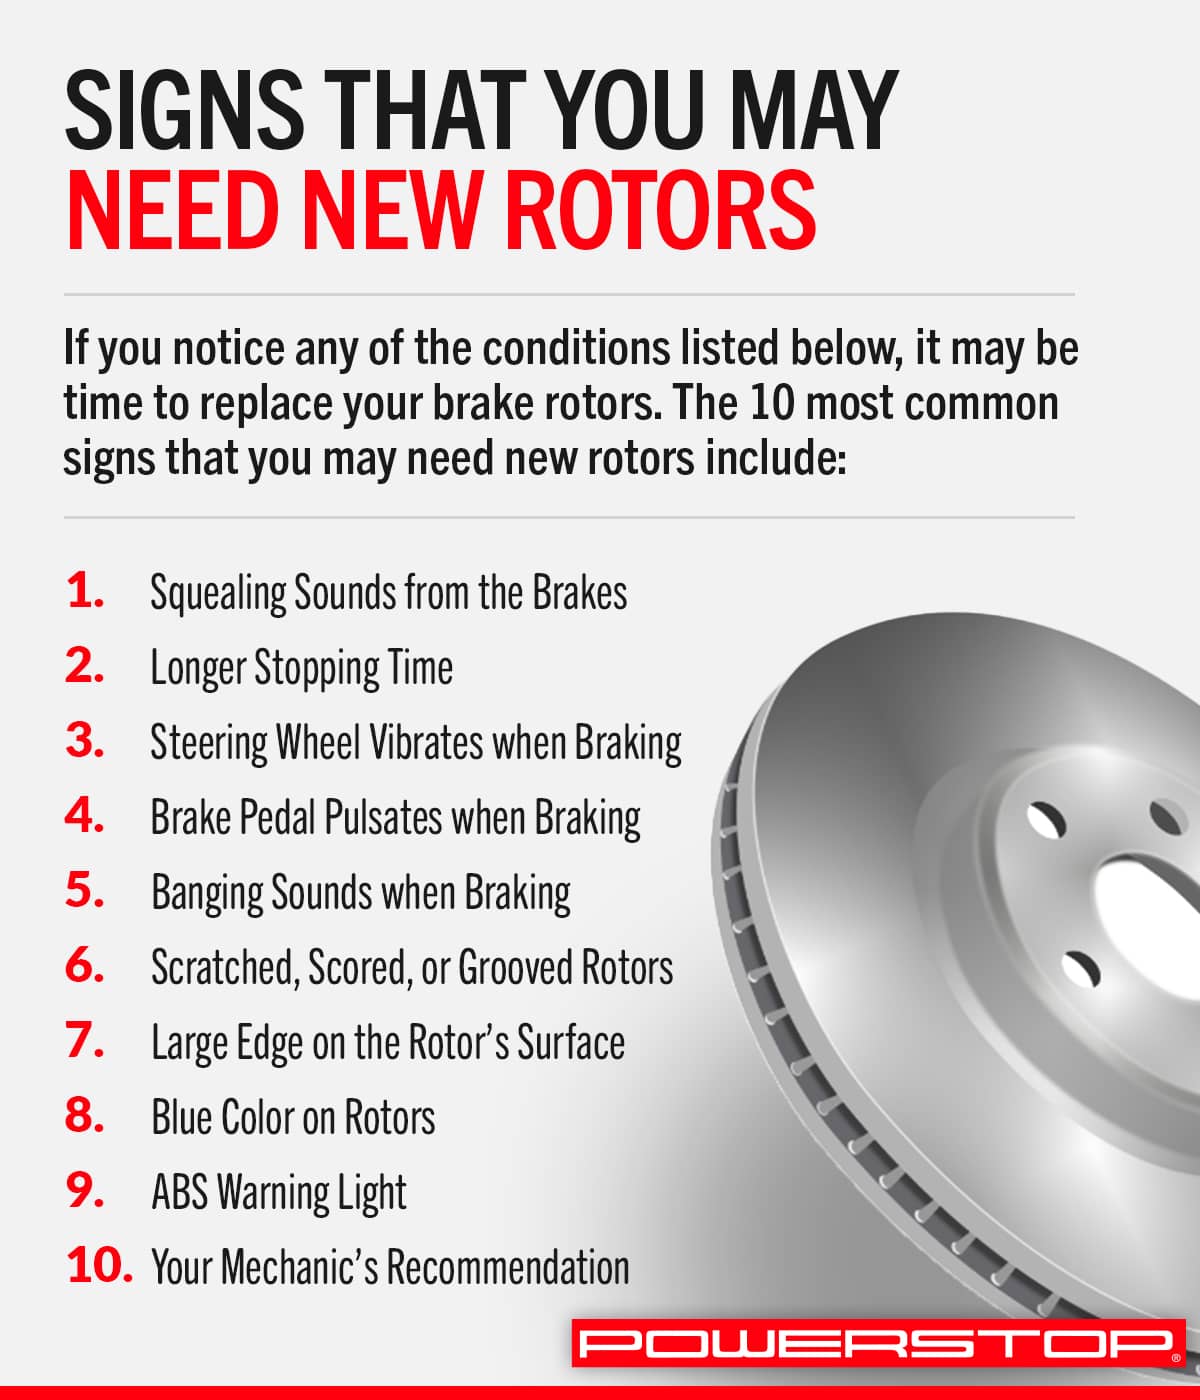
Watch for squeaking or grinding sounds. These noises mean your pads may be worn out. Notice if your car pulls to one side when braking. This can show uneven brake wear. Also, check if the brake pedal feels soft or spongy. These signs tell you it is time to replace parts.
Credit: www.powerstop.com

Credit: www.wikihow.com
Frequently Asked Questions
How Often Should I Change Brake Rotors And Pads?
Brake rotors and pads should be checked every 20,000 miles. Typically, rotors last 30,000 to 70,000 miles. Replace pads more frequently, around 20,000 to 50,000 miles, depending on driving habits and conditions.
What Tools Do I Need To Change Rotors And Brakes?
You need a jack, lug wrench, socket set, C-clamp, and brake cleaner. Also, wear safety gloves and goggles. Proper tools ensure safe, efficient rotor and brake pad replacement.
Can I Change Rotors And Brakes By Myself?
Yes, with basic mechanical skills and proper tools, you can. Follow safety precautions, consult your vehicle’s manual, and work in a secure, clean environment for best results.
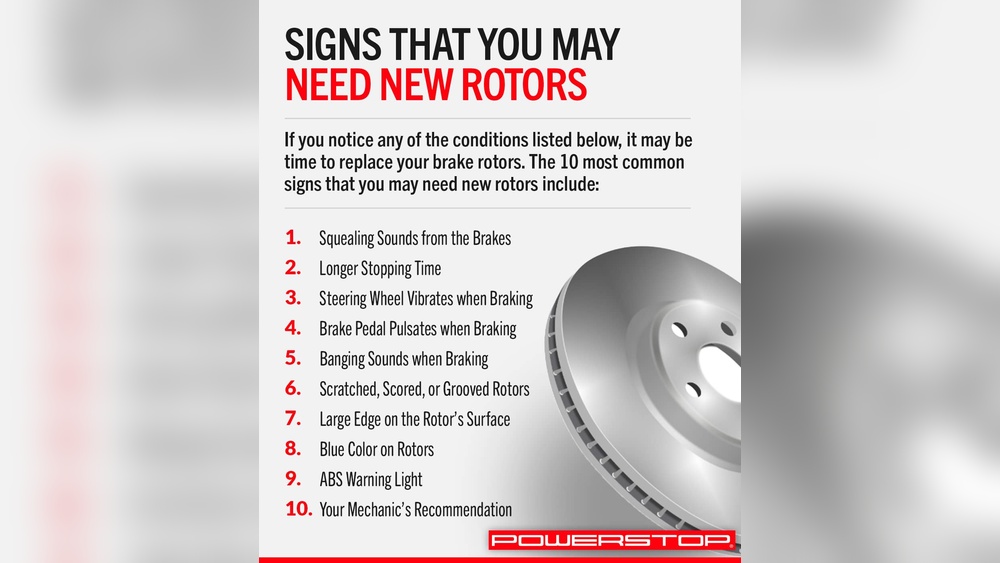
How Do I Know If My Rotors Need Replacing?
Look for deep grooves, cracks, or warping on rotor surfaces. Also, listen for squealing or grinding noises while braking. These signs indicate rotor damage needing replacement.
Conclusion
Changing your rotors and brakes can keep your car safe and smooth. Take your time and follow each step carefully. Use the right tools and check all parts for wear. Regular brake maintenance helps avoid bigger problems later. A little effort now saves money and worry later.
Stay safe on the road with well-maintained brakes. You can handle this with patience and care. Keep your car in good shape and enjoy the drive.