
Your car vacuum cleaner is your best friend when it comes to keeping your vehicle spotless. But what happens when your vacuum itself gets dirty or clogged?
If you don’t clean it regularly, it won’t work as well, and that dirt will stay in your car longer than you want. You might think cleaning your car vacuum cleaner is complicated or time-consuming, but it doesn’t have to be.
In this guide, you’ll discover simple, step-by-step tips to keep your vacuum running like new. Stick with me, and you’ll save time, avoid frustration, and enjoy a cleaner car every time you drive.
Preparing Your Vacuum Cleaner
Preparing your car vacuum cleaner is the first step to effective cleaning. Taking time to get ready helps avoid damage and makes the process easier. Clean parts work better and last longer. Below are simple steps to prepare your vacuum cleaner for cleaning.
Gathering Cleaning Supplies
Collect all necessary tools before starting. You will need a soft brush, a cloth, mild soap, and water. A small screwdriver may help with disassembly. Have a trash bin nearby to throw away dirt and debris. Preparing these items saves time and keeps the work area tidy.
Unplugging And Disassembling
Always unplug the vacuum before cleaning. This prevents accidents and protects the device. Remove the dust container or bag carefully. Take off any detachable parts like filters and brushes. Use a screwdriver if needed. Disassemble gently to avoid breaking small pieces. Proper disassembly allows thorough cleaning inside the vacuum.

Credit: www.youtube.com
Emptying The Dust Container
Emptying the dust container is an important part of cleaning your car vacuum cleaner. It keeps the vacuum working well and stops dirt from building up inside. Regular emptying helps the vacuum pick up more dirt and last longer.
Most car vacuums have a dust container that collects dirt and debris. This container needs to be removed carefully and emptied after each use. Doing this often will keep the vacuum cleaner running smoothly and prevent bad smells.
Removing The Dust Bin
Find the dust bin on your vacuum cleaner. It is usually a clear plastic container attached to the main body. Press the release button or pull the bin gently to remove it. Be careful not to spill the dust inside.
Hold the bin over a trash can. Avoid touching the dirt with your hands. Some bins twist off, while others click out easily. Check your vacuum’s manual if you are not sure how to remove it.
Disposing Of Debris Properly
Empty the dust bin slowly into a trash bag or bin. Tap the sides to get all debris out. Use a small brush to clean stuck dirt if needed. Avoid dumping dust on the floor or in your car.
Close the dust container tightly after emptying. Place it back on the vacuum cleaner. Dispose of the trash bag outside to prevent dust from spreading indoors. This keeps your car and home clean.
Cleaning Filters
Cleaning the filters of your car vacuum cleaner keeps it working well. Filters catch dust and dirt, so they get dirty fast. Regular cleaning helps your vacuum pick up more debris and last longer.
Locating Filters
Most car vacuums have filters near the dust container. Open the vacuum’s dust compartment carefully. Look for a small mesh or foam piece inside. This is the filter that traps dirt and dust.
Washing And Drying Filters
Take the filter out gently. Tap it to remove loose dirt. Rinse the filter with warm water. Avoid using soap unless the manual says it is safe.
Let the filter dry completely before putting it back. Drying can take several hours. Never put a wet filter back. It can cause damage or bad smells.
Replacing Filters When Needed
Filters wear out after long use. Check for tears or heavy stains. If the filter looks damaged, replace it. Using a new filter keeps your vacuum working well.
Buy the right filter model for your vacuum. Follow the instructions to install the new filter.
:max_bytes(150000):strip_icc():focal(1999x0:2001x2)/peo-car-vacuums-test-dirt-devil-scorpion-plus-corded-handheld-cleaner-sd30025b-walmart-dburreson-020-10-1-60d02502982545b6b1b4d1707dee7e1d.jpeg)
Credit: people.com
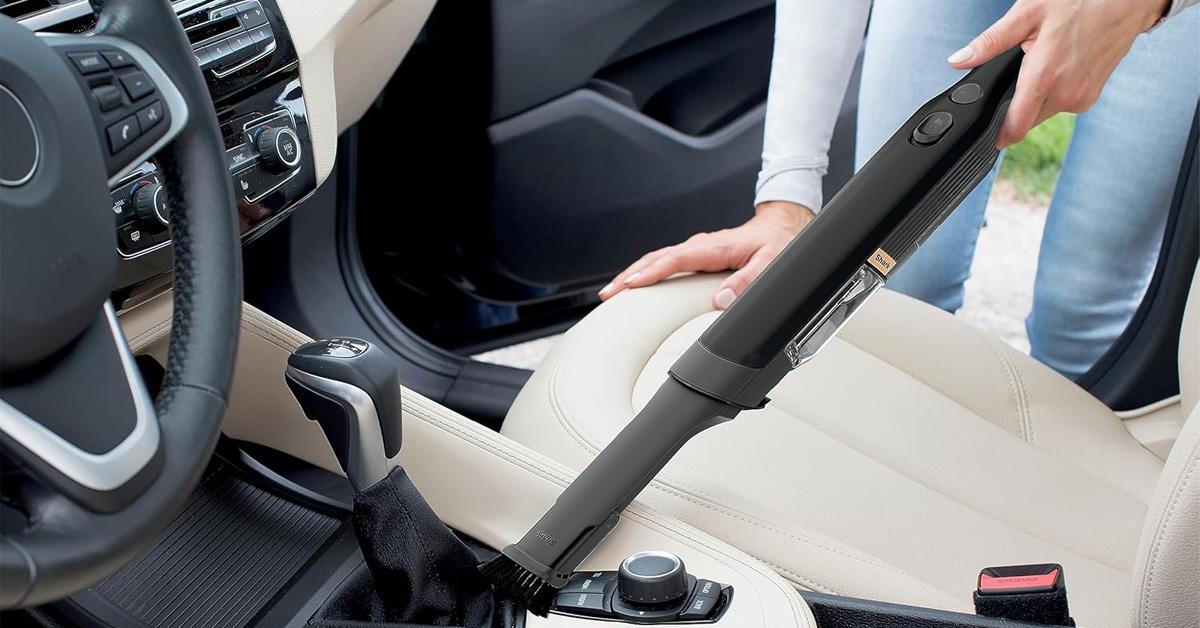
Clearing The Brush And Attachments
Cleaning the brush and attachments of your car vacuum cleaner keeps it working well. Dirt and hair can block the brush, reducing suction. Regular cleaning helps remove these clogs. It also makes sure the vacuum picks up all debris from your car’s floor and seats.
Removing Hair And Dirt
Start by detaching the brush from the vacuum. Use your fingers or scissors to pull out tangled hair. Be careful not to cut the bristles. Remove any dirt or small stones stuck in the brush. Check the openings of the attachments too. Clean them gently to avoid damage.
Washing Brush Heads
Some brush heads can be washed with water. Use warm, soapy water and a soft cloth. Avoid soaking parts that hold motors or electronics. Rinse the brush heads well. Let them dry completely before reattaching. Drying prevents mold and damage to the vacuum.
Wiping The Exterior
Wiping the exterior of your car vacuum cleaner keeps it looking good and working well. Dust and dirt build up on the outside over time. Cleaning the surface stops grime from entering the machine. It also helps you spot any damage early. Use soft cloths for wiping. Avoid rough materials that can scratch the surface. Focus on all sides, including buttons and vents. A clean exterior means a longer-lasting vacuum.
Using The Right Cleaning Solutions
Pick mild soaps or gentle cleaners for the exterior. Harsh chemicals can damage the plastic and paint. Mix a small amount of dish soap with water. Dampen a soft cloth with this mix for wiping. Avoid soaking the cloth too much. Too much liquid can seep inside and harm parts. Test the cleaner on a small area first. This ensures no discoloration or damage occurs.
Avoiding Damage To Electrical Parts
Keep water and cleaning liquids away from electrical parts. Do not spray cleaners directly on the vacuum. Use a cloth dampened with cleaner instead. Pay close attention around switches and charging ports. Make sure these areas stay dry to prevent short circuits. After wiping, let the vacuum air dry completely. Only plug it in once fully dry to avoid damage.
Reassembling And Testing
Reassembling and testing your car vacuum cleaner is the final step after cleaning. This stage ensures your vacuum works well and lasts longer. Taking care during this phase helps avoid damage and keeps the vacuum efficient.
Follow each step carefully. Double-check parts before putting them back. Testing confirms everything fits and runs smoothly.
Putting Parts Back Together
Start by placing the filter in its slot. Align each piece carefully. Snap the dust container back onto the main body. Attach the vacuum nozzle or brush securely. Tighten any screws or latches by hand. Avoid forcing parts, which can cause damage. Make sure all parts fit snugly without gaps.
Checking Vacuum Performance
Turn on the vacuum cleaner. Listen for unusual sounds. Check if the suction feels strong. Test the vacuum on a small area inside your car. Look for dirt pickup efficiency. If suction is weak, recheck the filter and connections. Repeat the test until it works properly. Clean parts and proper assembly improve vacuum power.
Maintenance Tips For Longevity
Maintaining your car vacuum cleaner helps it work better and last longer. Simple care steps avoid damage and keep the machine strong. Small efforts save money and time on repairs.
Follow easy tips for cleaning and storing your vacuum. These habits protect parts and improve performance. Keep your vacuum ready for every cleaning task.
Regular Cleaning Schedule
Clean your vacuum after every use. Empty the dust container to stop clogs. Check filters and wash or replace them often. Clean brushes and nozzles to remove hair and dirt. This stops blockages and keeps suction strong.
Set a weekly or biweekly cleaning plan. Stick to it to avoid build-up. Regular care prevents motor strain and saves energy. Your vacuum will work like new longer.
Storing Your Vacuum Properly
Store the vacuum in a dry, cool place. Avoid damp areas that cause rust and damage. Keep the cord wrapped neatly to prevent tangles and breaks. Use the holder or hook if available.
Do not leave the vacuum in the car under heat. Extreme temperatures harm batteries and plastic parts. Proper storage keeps the vacuum safe and ready. It ensures a longer life for your device.
Credit: www.greenmatters.com
Frequently Asked Questions
How Often Should I Clean My Car Vacuum Cleaner?
You should clean your car vacuum cleaner after every 2-3 uses. Regular cleaning prevents clogging and maintains suction power. Empty the dust container and clean filters to ensure optimal performance and extend the vacuum’s lifespan.
What Is The Best Way To Clean Vacuum Filters?
Remove the filters and gently tap them to remove dust. Wash washable filters with mild soap and water, then air dry completely before reinstalling. Avoid harsh chemicals to preserve filter integrity and improve air quality during use.
How Do I Unclog A Car Vacuum Hose?
Detach the hose and use a flexible brush or compressed air to remove debris. Avoid using sharp objects to prevent damage. Regularly checking and clearing blockages ensures consistent suction and efficient cleaning.
Can I Use Water To Clean The Vacuum Cleaner?
Yes, you can use water to clean washable parts like filters and dust bins. Ensure all components are completely dry before reassembling to avoid electrical damage and mold growth. Never immerse the vacuum motor or electrical parts in water.
Conclusion
Cleaning your car vacuum cleaner keeps it working well. Regular care helps remove dust and dirt easily. Empty the dust container after each use. Wash or replace filters to keep air clean. Check the brush and nozzle for stuck debris.
A clean vacuum lasts longer and works better. Take a few minutes to clean it often. Your car will stay tidy and fresh. Simple steps make a big difference. Keep your vacuum ready for every cleanup.

