
Are you ready to give your vinyl wrap a professional finish without the hassle? Cutting corners on vinyl wrap might sound tricky, but with the right tips, you can master it quickly and easily.
Imagine saving time, avoiding common mistakes, and making your wrap look sharp and smooth every single time. In this guide, you’ll discover simple techniques that anyone can use to get perfect edges and clean lines. Keep reading, and you’ll learn how to transform your vinyl wrapping skills and achieve results you’ll be proud of.
Choosing The Right Tools
Choosing the right tools makes a big difference in cutting corners on vinyl wrap. Good tools help you work faster and get cleaner edges. They also reduce mistakes and save material. Picking the right instruments and vinyl is a smart first step.
Essential Cutting Instruments
Sharp blades cut vinyl smoothly. Use a fresh utility knife or craft blade. Dull blades tear or stretch the vinyl, ruining the finish. A metal ruler helps guide straight cuts. It keeps the blade steady and accurate. A cutting mat protects surfaces and keeps blades sharp longer. Small scissors work well for detailed trimming.
Selecting Quality Vinyl Wrap
Choose vinyl that is easy to cut and handle. Thin vinyl bends and cuts better around corners. Look for vinyl with a smooth backing for clean cuts. Cheaper vinyl may stretch or tear during cutting. Good vinyl holds its shape and sticks well after application. This saves time and material waste.
Credit: graphics-pro.com
Preparing The Surface
Preparing the surface is the first step to a successful vinyl wrap. A clean, smooth surface helps the wrap stick better. It also prevents bubbles and wrinkles. Taking time here saves effort later.
Cleaning Techniques
Start by washing the area with soap and water. Use a soft cloth or sponge to avoid scratches. Remove all dirt, grease, and dust. Next, wipe the surface with rubbing alcohol. This removes leftover oils and helps the wrap stick well.
Smoothing The Area
Check the surface for bumps or rough spots. Sand them lightly with fine-grit sandpaper if needed. Use a clean cloth to remove any dust after sanding. A flat surface makes the vinyl wrap look smooth and neat.
Measuring And Marking
Measuring and marking are key steps in vinyl wrap projects. Getting these right saves time and materials. Careful measurements prevent mistakes and reduce waste. Marking guides your cutting and placement for a smooth finish.
Accurate Measurements
Use a good tape measure or ruler for precise results. Measure twice, cut once is a good rule. Write down the measurements to avoid forgetting. Check the surface shape and size carefully. Remember to add a little extra for edges and curves.
Using Guides And Templates
Templates help mark shapes quickly and correctly. You can make templates from cardboard or paper. Use tape to hold templates steady on the surface. Draw outlines lightly with a pencil or chalk. Guides reduce errors and speed up the cutting process.

Credit: layed.com
Cutting Techniques For Sharp Edges
Cutting sharp edges on vinyl wrap requires the right techniques. Clean, precise cuts make the wrap look professional. Poor cuts cause peeling and wrinkles. This section covers easy ways to cut straight lines, curves, and corners.
Straight Cuts
Use a sharp blade for straight cuts. A metal ruler helps guide the blade. Hold the ruler firmly to avoid slips. Cut slowly and apply steady pressure. Avoid pressing too hard to prevent damage.
Curved Cuts
Curved cuts need a flexible cutting tool. Scissors or a craft knife work well. Follow the curve carefully with your eyes. Move the vinyl gently to keep control. Take breaks to keep your hand steady.
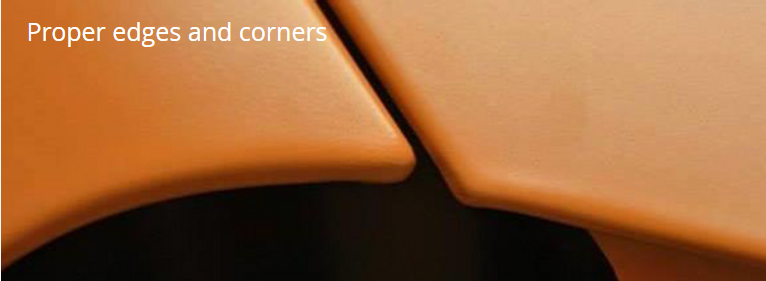
Handling Corners
Corners need special care to stay sharp. Cut small relief slits near corners. This helps the vinyl bend without wrinkling. Use a heat gun to soften vinyl for tight corners. Press edges down firmly for a clean finish.
Applying The Vinyl Wrap
Applying a vinyl wrap takes patience and care. The right method helps save time and avoids mistakes. This section covers key steps to place the wrap on your surface smoothly. Follow these tips to get a clean, professional look.
Positioning And Alignment
Start by cleaning the surface well. Dirt can cause bumps under the wrap. Peel back a small part of the vinyl backing. Place the exposed sticky side on the surface. Check the edges and corners carefully. Adjust the wrap so it fits perfectly. Use light pressure at first to avoid wrinkles. Make sure the wrap is straight before pressing down fully.
Dealing With Air Bubbles
Air bubbles happen when air gets trapped under the wrap. Use a squeegee or a flat tool to push bubbles out. Start from the center and move toward edges. If bubbles remain, try lifting the vinyl gently. Then press it down again while pushing air out. For small bubbles, a pin can help release trapped air. Work slowly and patiently to avoid tearing the wrap.
Finishing Touches
Finishing touches make vinyl wraps look neat and last longer. They help avoid peeling and bubbles. Small steps here improve the overall look and durability.
Heat Application Tips
Apply heat evenly to soften the vinyl wrap. Use a heat gun on low or medium setting. Keep it moving to avoid burning the material.
Heat helps the vinyl stretch around curves and corners. It also activates the adhesive for a better bond. Don’t overheat; this can cause wrinkles or damage.
Sealing The Edges
Press down all edges firmly to seal them. Use a plastic squeegee or your fingers wrapped in a soft cloth. This step stops dirt and moisture from getting under the wrap.
Check corners carefully, as they tend to lift first. Trim excess vinyl close to edges for a clean finish. Good sealing extends the life of your wrap.
Common Mistakes To Avoid
Cutting corners on vinyl wrap can save time and money. Avoid mistakes that cause damage or waste material. Knowing common errors helps you get better results. Focus on key steps for a smooth process and lasting finish.
Cutting Errors
Cutting vinyl too short is a common error. This leaves gaps or exposes the surface underneath. Cutting too much makes the wrap hard to adjust. Use a sharp blade for clean cuts. Avoid rough or jagged edges that peel easily. Cut slowly and measure twice before cutting once.
Surface Preparation Issues
Dirty or oily surfaces cause poor adhesion. Clean the area well with soap and water. Remove dust, grease, and wax completely. Dry the surface before applying the wrap. Skipping this step leads to bubbles and peeling later. Smooth surfaces help the wrap stick firmly. Take time to prep for a neat finish.
Maintenance For Longevity
Maintaining vinyl wrap properly helps it last longer and look better. Regular care prevents damage and keeps the wrap fresh. Small efforts in cleaning and protection make a big difference over time.
Cleaning Wrapped Surfaces
Use a soft cloth or sponge to clean vinyl wrap. Avoid harsh brushes or scrubbing pads. Mild soap mixed with water works best for dirt and grime. Rinse with clean water and dry gently. Never use strong chemicals or solvents. These can harm the vinyl and fade colors.
Clean the wrap regularly to stop dirt buildup. Quick cleaning after driving on dusty roads helps. Avoid pressure washers too close to the surface. High pressure can peel or lift the edges.
Protecting Edges From Damage
Edges are the most vulnerable parts of vinyl wrap. They can lift or peel if not cared for. Apply edge sealant or tape to protect corners. This helps keep the wrap tight and secure. Avoid scraping edges on curbs, doors, or tools.
Check edges often for small signs of lifting. Fix minor issues early with heat and pressure. This stops peeling from spreading and keeps the wrap intact. Proper edge care extends the life of your vinyl wrap.

Credit: www.youtube.com
Frequently Asked Questions
How Do You Cut Vinyl Wrap Corners Cleanly?
Use a sharp blade and steady hand to cut corners. Score lightly first, then cut through carefully to avoid tearing. Heating the vinyl slightly softens it, making corners easier to wrap and trim neatly.
What Tools Are Best For Cutting Vinyl Wrap Corners?
A sharp utility knife or precision craft blade works best. Use a squeegee to smooth the vinyl before cutting. Heat guns help soften vinyl for easier cutting and better corner shaping.
Can Heating Vinyl Wrap Improve Corner Cuts?
Yes, heating vinyl with a heat gun makes it more pliable. Warm vinyl stretches smoothly over edges and corners, reducing wrinkles and bubbles. Always heat evenly to avoid damaging the vinyl.
How To Avoid Wrinkles When Cutting Vinyl Wrap Corners?
Heat the vinyl to soften it and stretch gently over corners. Use a squeegee to press out air bubbles. Cut slowly and carefully to maintain smooth edges and prevent wrinkles.
Conclusion
Cutting corners on vinyl wrap saves time and effort. Use sharp tools and steady hands for clean edges. Measure twice to avoid mistakes. Work in small sections for better control. Keep the surface clean and dry before starting. Practice patience to get the best results.
Small tricks make a big difference. Enjoy the process and see your project improve. Simple steps help you finish faster and neater. Keep these tips in mind for your next wrap.


