If you want to give your Toyota Sienna a fresh, polished look while protecting it from dings and scratches, installing body side molding is a smart move. You might think it’s a tough job, but with the right steps, you can easily do it yourself and save money.
In this guide, you’ll learn exactly how to install body side molding on your Toyota Sienna quickly and correctly. Keep reading—you’re just moments away from upgrading your vehicle’s style and defense with confidence.

Credit: www.youtube.com
Tools And Materials Needed
Installing body side molding on your Toyota Sienna requires the right tools and materials. This helps the job go smoothly. Using proper tools also ensures a clean, secure fit. Preparing everything before starting saves time and effort.
Gather all necessary items. Check each tool and material for quality. This preparation sets the stage for a successful installation.
Required Tools
You will need a few basic tools for the installation. A flathead screwdriver helps remove old molding or clips. A tape measure ensures precise placement of new molding. Use a clean cloth to wipe the surface before applying. Adhesive promoter may be necessary for better stickiness. A heat gun or hair dryer helps soften the adhesive tape on the molding. Lastly, wear gloves to keep hands clean and avoid fingerprints.
Choosing The Right Molding
Pick molding designed specifically for Toyota Sienna. This guarantees the best fit and finish. Check the color and style to match your vehicle. Some moldings come pre-painted, while others need painting. Choose the material carefully for durability. Plastic or rubber moldings resist weather and impacts well. Confirm the molding kit includes all parts and instructions. Proper selection reduces installation problems and improves appearance.
Preparing The Vehicle
Preparing your Toyota Sienna for body side molding installation is crucial. Proper preparation ensures the molding fits well and sticks firmly. Take time to get the surface ready for the best results.
Cleaning The Surface
Start by washing the area where the molding will go. Use soap and water to remove dirt and grime. Dry the surface completely with a clean cloth. Any dust or oil can stop the molding from sticking properly.
Next, wipe the area with rubbing alcohol. This step removes any leftover grease or wax. Let the surface dry before moving to the next step.
Removing Old Molding
Check if any old molding remains on your Sienna. Remove it carefully to avoid damage to the paint. Use a plastic scraper or your fingers to lift the edges. Pull gently to peel it off.
If the old molding is hard to remove, apply heat with a hairdryer. Warm the adhesive to soften it. This makes removal easier and cleaner.
After removing the old molding, clean the surface again. Remove any sticky residue with adhesive remover. Dry the area fully before installing the new molding.
Measuring And Aligning
Measuring and aligning body side molding on a Toyota Sienna is a key step. It ensures the molding fits perfectly and looks great. Careful measuring helps avoid mistakes. Proper alignment keeps the molding straight and secure.
Marking Placement
Start by cleaning the side of the van. Use a soft cloth and mild cleaner. Dry the surface before marking. Use a pencil or masking tape to mark the molding’s position. Measure from the bottom and front edges. Mark points evenly along the side panel. These marks guide where the molding will go. Double-check measurements to keep marks balanced.
Checking Fit And Position
Hold the molding up to the side of the van. Line it up with the marks you made. See if the molding fits well along the curve. Check both ends to avoid gaps. Adjust the molding slightly if needed. Make sure the molding lies flat without bending. Confirm the marks match the molding’s edges. This step prevents misalignment before final fixing.

Credit: www.reddit.com
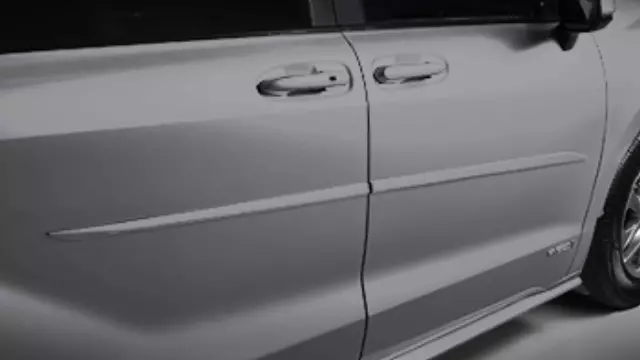
Applying The Body Side Molding
Applying the body side molding on your Toyota Sienna is a simple step. It protects the doors and adds style. This part needs care to stick well and last long. Follow the steps below to attach it properly. This ensures a neat, strong fit that looks great.
Peeling Adhesive Backing
Start by holding the molding carefully. Slowly peel the adhesive backing from one end. Do not touch the sticky side with your fingers. Keep the adhesive clean for strong grip. Peel a small section first to help place it right.
Pressing And Securing The Molding
Align the molding with the side of the car. Press the exposed adhesive firmly against the surface. Move along the molding, peeling the backing as you press. Use even pressure to avoid bubbles or gaps. Check the edges and press again to secure.
Final Touches
The final touches are important to make sure the body side molding looks great and lasts long. This step focuses on securing the molding firmly and cleaning the area for a neat finish. Taking time here can prevent future problems.
Ensuring Proper Adhesion
Check that the molding sticks well to the car surface. Press firmly along the entire length to remove air bubbles. Use a soft cloth to apply even pressure. Avoid touching the adhesive tape with your fingers. Let the adhesive cure for at least 24 hours without washing the car.
Cleaning Up
Remove any dust, dirt, or marks around the molding with a gentle cleaner. Use a soft cloth to avoid scratching the paint. Clean the tools and area to keep the car looking tidy. This helps the molding blend smoothly with the vehicle’s body.
Maintenance Tips
Maintaining the body side molding on your Toyota Sienna keeps it looking fresh and protects it from damage. Regular care extends the molding’s life and prevents costly repairs. Simple steps help you keep the molding clean and intact.
Cleaning And Care
Use mild soap and water to clean the molding. Avoid harsh chemicals that can damage the surface. Soft cloths or sponges work best to remove dirt without scratching. Clean the molding every two weeks or more often in dirty conditions. Dry the molding with a clean towel to prevent water spots. Regular cleaning keeps the molding shiny and prevents buildup.
Handling Repairs
Check the molding for cracks or loose spots regularly. Small cracks can be fixed with adhesive designed for automotive trim. For loose molding, press it firmly back into place. Replace damaged clips if needed to secure it properly. If damage is severe, consider professional help. Early repairs prevent bigger problems and keep the molding secure.
Credit: parts.longotoyota.com
Frequently Asked Questions
How Do I Prepare My Toyota Sienna For Molding Installation?
Clean the vehicle’s side thoroughly to remove dirt and grease. Ensure the surface is dry. This helps the molding adhere better and last longer.
What Tools Are Needed To Install Body Side Molding?
You need adhesive promoter, trim removal tool, cleaning cloth, and the molding itself. These tools make installation easier and ensure a secure fit.
How Long Does It Take To Install Side Molding?
Installation typically takes about 30 to 45 minutes. Time may vary based on experience and mold type. Patience ensures proper alignment and adhesion.
Can I Install Body Side Molding Myself?
Yes, with basic tools and careful attention, you can install molding. Follow instructions carefully for the best results and avoid damage to your vehicle.
Conclusion
Installing body side molding on your Toyota Sienna protects its sides and adds style. Take your time to clean the surface well before starting. Use the right tools and follow the steps carefully. Press the molding firmly to ensure it sticks properly.
Small effort brings big results. Enjoy a cleaner, more polished look for your vehicle. Now, your Sienna stands out and stays safe from dings and scratches. Simple steps. Great outcome.