Are you ready to give your car a sleek, modern look without spending a fortune? Installing a carbon fiber vinyl wrap is one of the easiest and most affordable ways to transform your vehicle’s appearance.
But if you’ve never done it before, the process might seem tricky. Don’t worry—this guide will walk you through every step, making it simple and stress-free. By the end, you’ll have the skills to apply a flawless wrap that turns heads wherever you go.
Keep reading to discover how you can upgrade your ride with confidence and style.
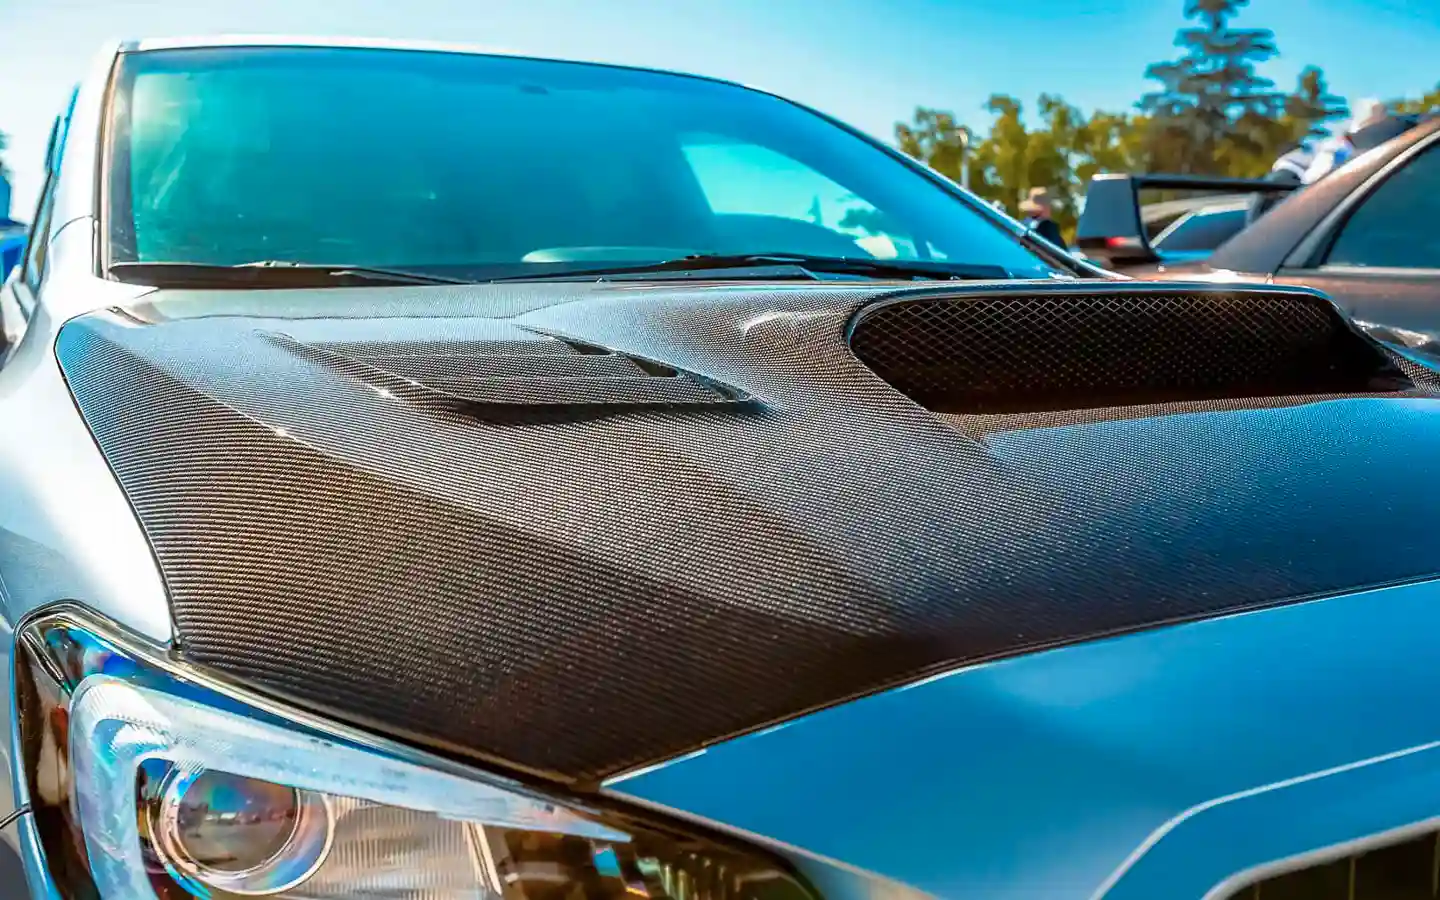
Credit: www.tintingchicago.com
Materials Needed
Before starting your carbon fiber vinyl wrap project, gather all needed materials. Proper preparation ensures a smooth and successful installation. Knowing what to use helps avoid mistakes and saves time.
Choosing The Right Vinyl
Select high-quality carbon fiber vinyl for the best look and durability. Choose a vinyl that fits your vehicle’s surface and curves. Look for vinyl with air-release technology to prevent bubbles. Pick the right color and finish to match your style.
Essential Tools
Use a squeegee to smooth out the vinyl and remove air pockets. A heat gun helps stretch the vinyl around curves and edges. Have a sharp utility knife for precise trimming of excess vinyl. Use cleaning supplies to prepare the surface before wrapping. Gloves keep fingerprints off the vinyl during installation.
Preparing The Surface
Preparing the surface is a key step before applying a carbon fiber vinyl wrap. A clean and smooth surface helps the vinyl stick better. It also makes the wrap look smooth and neat. Poor surface preparation leads to bubbles, wrinkles, and peeling later.
Take your time with cleaning and removing any old materials. This work sets the foundation for a perfect wrap finish.
Cleaning Techniques
Start by washing the area with soap and water. Use a soft cloth to remove dirt and dust. Rinse thoroughly and dry with a clean towel. Avoid using harsh chemicals that can damage the paint.
Next, wipe the surface with isopropyl alcohol. This step removes oils and grease. Use a lint-free cloth for best results. Ensure the surface is fully dry before moving on.
Removing Old Wraps And Adhesives
Old vinyl or adhesive must be removed completely. Peel off the vinyl slowly to avoid paint damage. Use a plastic scraper for stubborn spots. Avoid metal tools that can scratch the surface.
Apply adhesive remover to soften leftover glue. Let it sit for a few minutes. Gently rub with a cloth until all residue disappears. Clean the area again with alcohol to remove any leftover remover.
Measuring And Cutting
Measuring and cutting are key steps in applying a carbon fiber vinyl wrap. Getting these right saves time and avoids waste. Careful measurement ensures the wrap fits perfectly on your surface. Cutting with precision prevents damage to the vinyl and keeps edges clean.
Accurate Measurements
Start by cleaning the surface to measure. Use a soft tape measure for accuracy. Measure the length and width of the area twice. Add an extra 2 to 3 inches for overlap. Mark measurements lightly on the backing paper. Double-check before cutting to avoid mistakes.
Cutting Tips For Precision
Use a sharp utility knife or vinyl cutter. Cut on a flat, clean surface to prevent slips. Follow your marked lines carefully and slowly. Avoid cutting too close to the edge of the wrap. Use a straight edge or ruler for straight cuts. Keep your blade fresh to get smooth cuts. Small mistakes can ruin the look, so take your time.
Applying The Vinyl Wrap
Applying the vinyl wrap is a careful process that shapes the final look of your project. Patience and precision help achieve a smooth, professional finish. Each step matters to avoid mistakes that can cost time and materials.
Positioning The Vinyl
Start by aligning the vinyl wrap on the surface. Hold it gently to check the fit and coverage area. Use light pressure to keep it in place. Make sure edges line up with the parts you want to cover. This step prevents wrinkles and gaps later.
Using Heat For Flexibility
Heat softens the vinyl, making it easier to stretch and mold. Use a heat gun or hair dryer on low heat. Move the heat source evenly over the vinyl. Avoid staying too long in one spot to prevent damage. Warm vinyl adapts better to curves and corners.
Smoothing Out Bubbles And Wrinkles
Use a squeegee or soft cloth to push out air bubbles. Start from the center and move toward the edges. Work slowly to avoid tearing or stretching the vinyl. Small wrinkles can be lifted and repositioned gently. Heat can help relax stubborn creases for a flat finish.
Trimming And Finishing
Trimming and finishing are the final steps in installing a carbon fiber vinyl wrap. These steps ensure the wrap fits perfectly and lasts longer. Proper trimming removes excess material and creates clean edges. Finishing touches protect the wrap from peeling or damage over time.
Edge Trimming Methods
Use a sharp utility knife or vinyl cutter for trimming edges. Cut slowly to avoid damaging the surface beneath the wrap. Leave a small margin, about 1-2 mm, to tuck under edges. Use a plastic squeegee to press down the edges firmly. Heat the edges gently with a heat gun to soften the vinyl. This helps the vinyl stick better around curves and corners.
Final Touches For Durability
Apply pressure on all edges to seal the wrap well. Use a heat gun to warm the entire wrap surface lightly. This activates the adhesive and improves bonding. Check for any bubbles or wrinkles and smooth them out carefully. Avoid stretching the vinyl too much to prevent tears. Finish by cleaning the surface with a soft cloth to remove dust and fingerprints.

Credit: www.amazon.com
Maintenance Tips
Keeping your carbon fiber vinyl wrap in good shape needs care and attention. Proper maintenance helps the wrap last longer and look great. Follow these tips to protect your investment and keep the finish sharp.
Cleaning Wrapped Surfaces
Use a soft cloth or sponge to clean the wrap. Avoid rough materials that can scratch the surface. Clean with mild soap and water only. Harsh chemicals damage the vinyl and fade the color. Rinse well and dry with a microfiber towel. Do not wash the wrap too often. Spot clean dirt and grime quickly to prevent buildup.
Avoiding Common Mistakes
Do not use abrasive brushes or scrub pads on the wrap. Avoid high-pressure washers that can peel edges. Never polish or wax the wrap with automotive products. Avoid parking the vehicle in direct sunlight for long periods. Heat and UV rays cause fading and shrinking. Keep sharp objects away to prevent tears or punctures.

Credit: www.youtube.com
Frequently Asked Questions
What Tools Are Needed To Install Carbon Fiber Vinyl Wrap?
You need a heat gun, squeegee, utility knife, cleaning solution, microfiber cloth, and gloves. These tools help apply the wrap smoothly and avoid bubbles or damage.
How Long Does Carbon Fiber Vinyl Wrap Installation Take?
Installation typically takes 2 to 4 hours depending on the surface size and complexity. Proper preparation and careful application ensure a flawless finish.
Can I Install Carbon Fiber Vinyl Wrap Myself?
Yes, with patience and the right tools, DIY installation is possible. Follow step-by-step instructions for best results and avoid common mistakes.
How Do I Prepare The Surface For Vinyl Wrap?
Clean the surface thoroughly using soap and water, then use isopropyl alcohol. Remove all dirt, grease, and wax to ensure strong vinyl adhesion.
Conclusion
Installing carbon fiber vinyl wrap takes patience and care. Clean your surface well before starting. Use a squeegee to smooth out air bubbles. Work slowly to avoid wrinkles and mistakes. Heat helps the wrap stick better around curves. Trim edges carefully for a neat finish.
Practice makes the process easier over time. You can change your car’s look without paint. Enjoy the fresh, stylish appearance of your vehicle.