

Are you ready to bring fun and excitement to your next party or event? Imagine creating a foam machine cannon that shoots out clouds of bubbly foam with just a few simple steps.
You don’t need expensive equipment or complicated instructions. In this guide, you’ll discover how to make your own foam machine cannon using easy-to-find materials. By the end, you’ll have a cool gadget that everyone will love. Keep reading, and let’s get started on making your event unforgettable!

Credit: partymachines.com
Materials Needed
Building a foam machine cannon starts with gathering the right materials. The parts and ingredients must work well together. Each item plays an important role in the machine’s performance. Preparing a complete list helps the project go smoothly. Below are the main categories of materials you will need.
Foam Solution Ingredients
The foam solution creates the bubbles that the cannon shoots. Use water as the base. Add liquid dish soap to make foam. Glycerin or sugar helps bubbles last longer. Mix these ingredients in the right amounts for best results.
Mechanical Parts
The mechanical parts move air and solution to form foam. You need a strong fan or air blower. A water pump pushes the foam solution through the machine. Use pipes or tubes to connect parts. A container or tank holds the foam solution safely.
Electrical Components
Electrical parts power the fan and pump. A reliable power source is essential. Use a switch to control the machine easily. Wires and connectors link the components. Make sure all electrical parts fit together correctly.
Safety Gear
Safety gear protects you during assembly and use. Wear gloves to avoid soap irritation. Safety goggles shield your eyes from splashes. Use a mask if you work with strong chemicals. Keep a first aid kit nearby for emergencies.
Building The Base
Building the base of your foam machine cannon is a crucial step. It provides support and stability. A strong base keeps the machine steady during use. It also holds all parts together safely. Focus on choosing the right materials and assembling them carefully. This ensures your foam cannon works smoothly and lasts long.
Choosing The Right Container
Select a container that is sturdy and durable. Plastic bins or metal boxes work well. The container should be large enough to hold the motor and other parts. It must have a flat bottom to keep the machine stable. Avoid containers that are too light or flimsy. A solid container will prevent wobbling and tipping over.
Assembling The Frame
Use wood or metal to build a strong frame inside the container. Cut pieces to fit the container’s size. Attach them tightly with screws or bolts. The frame should hold the motor and foam reservoir firmly. Make sure the frame does not block air or foam flow. A well-built frame keeps all parts aligned and secure.
Mounting The Motor
Secure the motor on the frame using brackets or clamps. Position it so the fan or pump faces the foam outlet. Tighten all screws to prevent movement during operation. Check that the motor shaft spins freely without obstruction. Proper mounting improves performance and extends the motor’s life.
Creating The Foam Generator
Creating the foam generator is a key part of building your foam machine cannon. This section guides you through the main steps to make the foam flow smoothly. Each part must work well to create a steady foam stream. Follow these steps carefully to ensure your foam machine works efficiently.
Installing The Fan
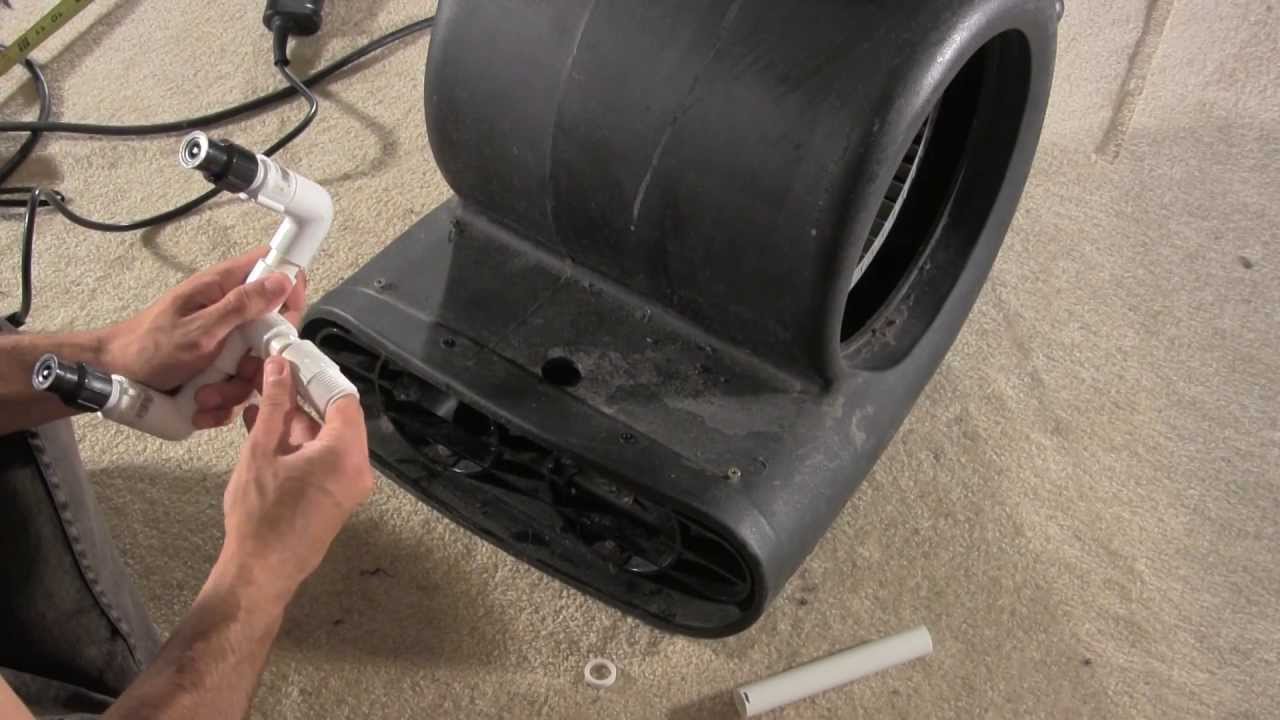
The fan pushes air into the foam generator. Choose a fan that fits the size of your machine. Secure it firmly to prevent vibrations. Connect the fan to a power source with a switch. Test the fan to make sure it blows air steadily.
Setting Up The Nozzle
The nozzle controls the foam’s shape and direction. Attach it to the foam generator’s outlet. Use a nozzle size that matches your foam output needs. Tighten all connections to avoid leaks. Adjust the nozzle angle to aim the foam where you want.
Mixing Air And Foam
Air and foam mix inside the generator to create bubbles. Connect the foam solution tube near the fan’s airflow. Use a valve to control foam flow rate. Make sure air pressure is enough to blend foam and air well. Test the mixture for thick, stable foam output.
Credit: www.youtube.com
Electrical Setup
Setting up the electrical parts is key for a foam machine cannon. It controls the motor that pushes foam out. This section covers wiring, power sources, and controls. Clear steps make the process easy and safe.
Wiring The Motor
Start by connecting wires to the motor terminals. Use insulated wire to avoid shorts. Match wire colors to positive and negative terminals. Secure connections with wire nuts or solder. Check that wires do not touch each other. Proper wiring ensures the motor runs smoothly and safely.
Power Supply Options
Choose a power source that fits your motor’s needs. Common options include batteries, AC adapters, or rechargeable packs. Batteries offer portability but may need frequent replacement. AC adapters provide steady power but require an outlet. Check voltage and current ratings to avoid damage.
Switch And Controls
Add a switch to turn the motor on and off easily. Use a simple toggle or push-button switch. Place the switch in a spot that is easy to reach. Consider adding a speed controller for variable foam output. Controls improve user experience and safety.
Foam Solution Preparation
Preparing the right foam solution is key to making a foam machine cannon work well. The foam needs the perfect mix of water, soap, and other ingredients. This mix creates bubbles that last long and flow smoothly from the cannon. Each step matters to get the best foam effect.
Mixing The Solution
Start with clean water. Use about 4 liters for one batch. Add 200 ml of liquid soap. Choose a mild soap for better foam. Stir gently to avoid breaking bubbles. Mix until the soap blends well with water. Let the solution sit for 10 minutes. This helps the soap and water bind properly.
Testing Foam Quality
Dip a small tube or cup into the solution. Blow air through it to check foam. The foam should be thick and creamy. Thin or watery foam means the mix is weak. Foam that breaks quickly is not good. Test in small amounts before filling the machine.
Adjusting Consistency
If foam is too thin, add more soap slowly. Add 50 ml at a time and test again. For very thick foam, add water in small steps. Stir well after each change. Find a balance where foam flows easily but stays firm. The right consistency makes the foam machine fun and effective.

Credit: www.youtube.com
Operation Tips
Operating a foam machine cannon smoothly makes any event more fun. Follow simple tips to keep the foam flowing and the machine working well. These tips help you start the machine, keep foam going, and stay safe.
Starting The Machine
First, check the power supply. Make sure the machine is plugged in securely. Fill the foam tank with the right foam solution. Turn on the machine and let it warm up for a few minutes. Watch for steady foam flow before use.
Maintaining Continuous Foam
Keep the foam solution level steady. Refill the tank before it runs dry. Clean the foam nozzle often to prevent clogs. Use fresh foam mix for best results. Adjust the air pressure to control foam size and distance.
Safety Precautions
Place the machine on a flat surface. Keep it away from water and electrical hazards. Do not touch moving parts during operation. Use the foam solution as directed. Keep children and pets at a safe distance from the machine.
Troubleshooting
Troubleshooting your foam machine cannon can save time and improve your experience. Problems may stop the machine from working well. Fixing these issues helps the foam flow smoothly and keeps the motor running. This guide covers common problems and simple fixes.
Common Issues
Foam machine cannons may face blockages or low foam output. Sometimes, the motor does not start or stops suddenly. Foam mix may leak or foam might be too thin. Checking for dirt, loose parts, or empty liquid tanks helps find the cause quickly.
Fixing Motor Problems
If the motor does not work, check the power source first. Ensure the battery or plug is connected well. Look for burnt wires or loose connections. Clean the motor vents to prevent overheating. Replace the motor if it makes strange noises or does not spin at all.
Improving Foam Output
Thin or weak foam means the mixture is off. Use the right soap-to-water ratio for thick foam. Clean the nozzle regularly to avoid clogs. Adjust the pump speed if your machine has a control. Adding a foam booster can help create more bubbles.
Event Ideas
Foam machine cannons bring fun and excitement to many events. They create a bubbly, playful atmosphere that everyone enjoys. Here are some great event ideas where a foam machine cannon can be the star.
Birthday Parties
Foam machine cannons make birthday parties unforgettable. Kids love playing in the foam, running, and laughing. It keeps them active and happy for hours. Parents appreciate the easy setup and clean-up. It suits both small and big birthday gatherings.
Outdoor Festivals
Outdoor festivals get lively with foam machines. They add a splash of joy and surprise to the crowd. People enjoy dancing and cooling down in the foam on hot days. Foam cannons fit well with music, food, and games. They attract more visitors and boost the festival’s fun.
Community Gatherings
Community events feel warm and friendly with foam machines. They break the ice and help people meet and smile. Kids and adults join in the bubbly fun together. Foam cannons make local fairs, park days, and block parties more special. They bring neighbors closer and create happy memories.
Frequently Asked Questions
What Materials Do I Need For A Foam Machine Cannon?
You need a plastic container, a fan, a foam solution, PVC pipes, and a power source. These materials are affordable and easy to find. Using these items ensures your foam cannon works efficiently and safely.
How Do I Assemble A Foam Machine Cannon?
Connect the fan to the PVC pipe, attach the container for foam solution, and secure all parts. Make sure connections are tight to avoid leaks. Follow safety instructions to ensure proper operation.
Can I Use Homemade Foam Solution In The Cannon?
Yes, you can mix water, dish soap, and glycerin for a safe foam solution. This mixture creates thick, long-lasting foam. Avoid harsh chemicals to prevent damage to the machine and environment.
How Do I Maintain My Foam Machine Cannon?
Clean the machine after each use with water to prevent clogs. Check for damage or leaks regularly. Proper maintenance extends the life of your foam cannon and ensures consistent performance.
Conclusion
Building a foam machine cannon can be fun and simple. Follow the steps carefully to create your own. You only need a few materials and some patience. Enjoy making foam for parties or events. This project brings joy and excitement to any gathering.
Try it out and see the smiles it creates. Keep safety in mind while using your foam cannon. Have fun experimenting and sharing with friends and family.


