Are you ready to take your car washing game to the next level? Making your own foam cannon can save you money and give you that thick, rich foam that cleans better and looks amazing.
Imagine spraying a blanket of suds over your vehicle with ease, making the dirt slide right off. In this guide, you’ll discover simple steps to create your very own foam cannon using easy-to-find materials. Keep reading, and you’ll be amazed at how straightforward and fun it can be to achieve professional-level results right at home.
Your car—and your wallet—will thank you!
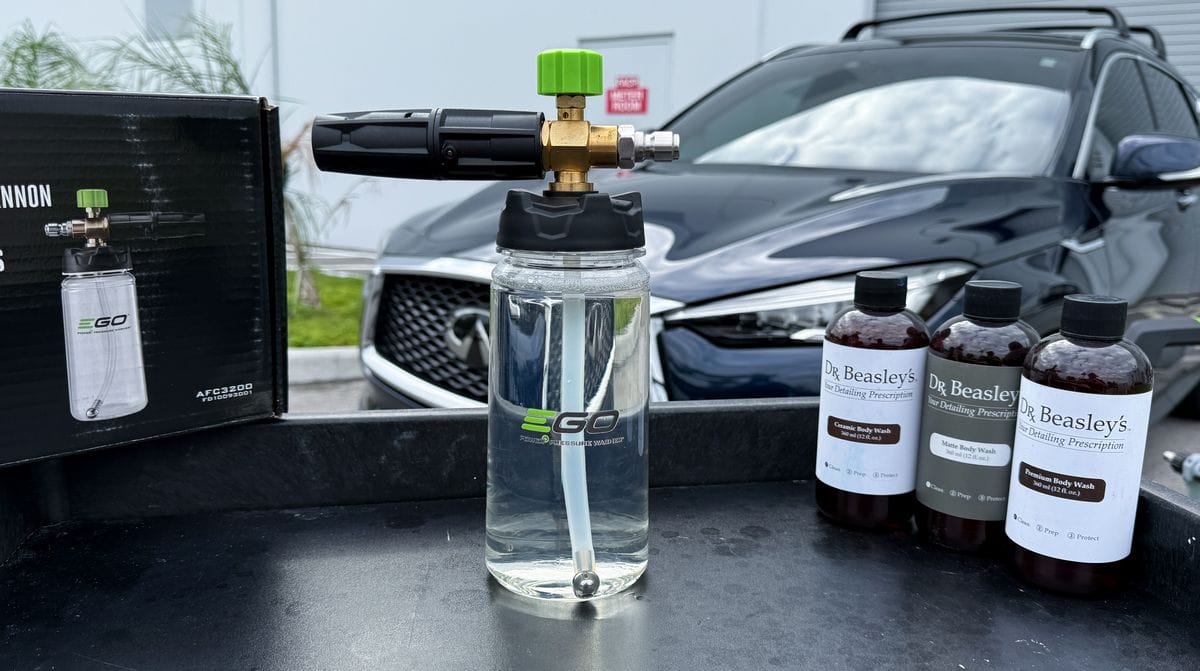
Credit: www.drbeasleys.com
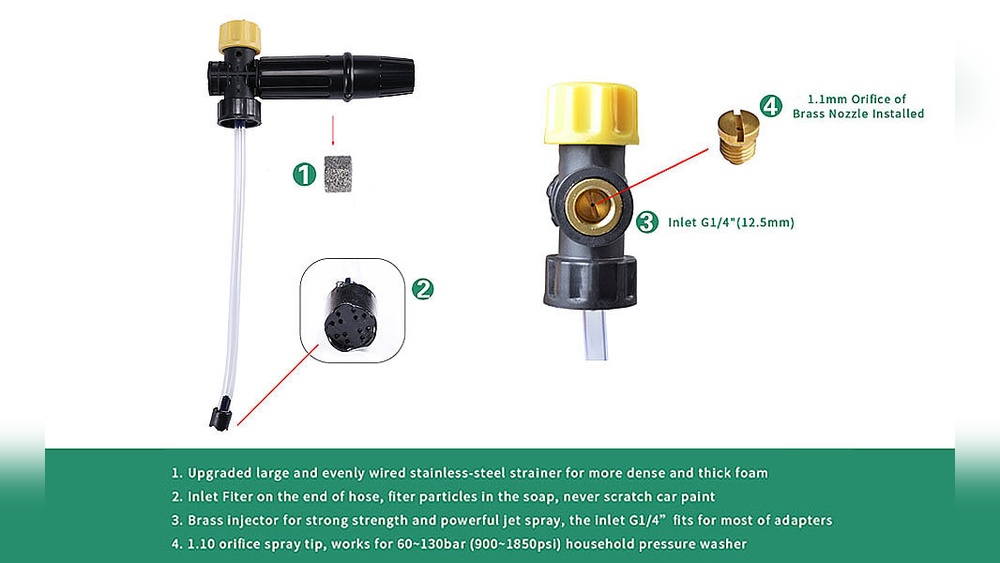
Choosing Foam Cannon Components
Choosing the right components for your foam cannon is key to getting thick, rich foam. The parts must work well together. Each piece affects how well the foam sprays and covers the surface. Knowing what to pick helps you build a foam cannon that works perfectly.
Selecting The Right Bottle
The bottle holds the soap solution. Choose a bottle made from strong plastic. It should resist cracks and leaks. A clear bottle helps you see the soap level. Look for bottles with a wide mouth. They make filling and cleaning easy.
Picking The Nozzle Type
The nozzle controls the foam spray pattern. Different nozzles offer different spray widths. A fan-shaped nozzle spreads foam evenly. A narrow nozzle produces a thicker, concentrated spray. Pick one that suits your cleaning task. Some nozzles allow easy adjustment of spray patterns.
Understanding Pressure Washer Compatibility
Match the foam cannon to your pressure washer’s pressure and flow. Check the maximum PSI and GPM ratings. Using the wrong cannon can damage your washer or give poor foam. Make sure the connection types fit. Most foam cannons use quick-connect fittings.
Gathering Necessary Tools
Gathering the right tools is the first step to making a foam cannon. Having all items ready saves time and ensures a smooth process. Using proper tools helps build a foam cannon that works well and lasts longer.
Essential Tools List
You need a few basic tools for this project. Start with a pressure washer that fits your foam cannon. A foam cannon attachment is necessary to create thick foam. Use a funnel to pour soap without spilling. Have a measuring cup to get soap quantities right. A wrench or pliers help tighten connections. Keep a clean cloth handy to wipe any mess.
Safety Gear Recommendations
Safety should never be ignored while working. Wear safety goggles to protect your eyes from soap splashes. Gloves keep your hands safe and clean. Use old clothes or a waterproof apron to avoid stains. Make sure the work area is well ventilated. Keep a first aid kit nearby, just in case.
Step-by-step Assembly
Building a foam cannon is simple with the right steps. Follow this guide to assemble your foam cannon easily. Each step helps you create a perfect tool for car washing or cleaning.
Preparing The Bottle
Start by choosing a clean, empty bottle. Use a bottle with a wide mouth for easy filling. Rinse it well to remove any dirt or residue. Fill the bottle with soap and water mix. Leave some space at the top for air and foam. Screw the bottle cap tightly to avoid leaks.
Attaching The Nozzle
Pick the correct nozzle for your foam cannon. Align the nozzle with the bottle opening. Push or screw the nozzle firmly onto the bottle. Ensure the connection is tight to prevent soap from spilling. Check the nozzle’s spray pattern and adjust if needed.
Connecting To Pressure Washer
Find the foam cannon’s connector that fits your pressure washer. Attach the connector securely to the pressure washer wand. Make sure it clicks or screws in place. Test the connection by turning on the pressure washer. Adjust the foam cannon settings for best foam output.
Mixing The Foam Solution
Mixing the foam solution is a key step in making an effective foam cannon. The right mixture creates thick foam that clings to surfaces. It helps remove dirt and grime gently without scratching. Understanding the soap type, dilution, and common errors improves the foam quality. This section explains how to prepare the perfect foam solution.
Choosing Soap And Additives
Select a soap that produces thick, rich foam. Car wash soaps or shampoos work best. Avoid harsh detergents that can damage paint. Additives like foam boosters can increase foam thickness. Use them sparingly to avoid residue. Always pick products safe for your vehicle’s finish.
Proper Dilution Ratios
Mix soap with water carefully. A common ratio is 1 part soap to 10 parts water. Adjust slightly based on soap type and foam desired. Too much soap creates runny foam. Too little soap makes weak foam. Measure ingredients for consistent results every time.
Avoiding Common Mistakes
Do not mix soap with hot water. It can reduce foam quality. Avoid using dish soap as it strips wax. Do not overuse additives; they cause streaks. Mix gently to prevent bubbles before spraying. Clean your foam cannon after each use to avoid clogs.
Using The Foam Cannon
Using a foam cannon is a simple way to clean your car quickly and thoroughly. It sprays thick foam that sticks to the surface, loosening dirt and grime. This makes washing easier and protects your paint from scratches. Understanding how to use the foam cannon properly helps you get the best cleaning results every time.
Adjusting Foam Thickness
Control the foam thickness by changing the soap-to-water ratio. More soap creates thicker foam. Less soap makes lighter foam. Use the adjustment knob on the cannon to control foam flow. Test the foam spray on a small area first. Find the thickness that works best for your cleaning needs.
Applying Foam Evenly
Hold the foam cannon about two feet from the car. Spray the foam in slow, even strokes. Cover the entire surface without missing spots. Avoid spraying too close to prevent streaks or runs. Work from top to bottom for better cleaning. Let the foam sit for a few minutes to break down dirt.
Tips For Best Results
Use cold water to mix the soap for better foam. Clean the foam cannon after each use to avoid clogs. Wear gloves to protect your hands from chemicals. Avoid washing your car in direct sunlight to prevent soap drying too fast. Rinse the car thoroughly after foaming to remove all residue.

Credit: stonercarcare.com
Maintenance And Troubleshooting
Maintaining your foam cannon is key for long-lasting use and good performance. Regular care helps avoid common problems and keeps it working well. Troubleshooting is easier with simple checks and fixes.
Cleaning After Use
Rinse the foam cannon with clean water after every use. This removes soap and dirt that can clog the nozzle. Use warm water to clean inside the container and hose. Let all parts dry fully before storing. Clean parts prevent blockages and keep foam strong.
Fixing Common Issues
If foam is weak, check for clogs in the nozzle or hose. Clear blockages with a soft brush or toothpick. Make sure the soap mixture is correct. Low pressure from the washer can reduce foam. Tighten all connections to stop leaks. Replace worn seals or O-rings to fix leaks.
Storage Tips
Store the foam cannon in a dry place away from direct sunlight. Keep it in a cool area to avoid damage to plastic parts. Remove all soap and water before storing. Store parts separately if possible to avoid damage. Proper storage extends the life of your foam cannon.
Enhancing Foam Cannon Performance
Improving your foam cannon’s performance makes washing easier and faster. Better foam means better dirt removal without scrubbing hard. Small changes can have a big impact.
Focus on three key areas: parts, soap, and water pressure. Each one helps your foam cannon work at its best.
Upgrading Components
Use high-quality nozzles for finer foam spray. Stronger materials last longer and handle pressure well. Swap plastic parts for metal ones to avoid breakage. Adjust the nozzle size for thicker or lighter foam.
Using Specialized Soaps
Choose soaps made for foam cannons. These soaps create thick, lasting foam. Avoid harsh detergents that can damage your car’s paint. Dilute soap as instructed for best results. Experiment with foam soap brands to find your favorite.
Optimizing Water Pressure
Check your pressure washer’s PSI and flow rate. Higher pressure produces denser foam but needs the right cannon. Keep water flow steady for smooth foam output. Clean filters and hoses to prevent blockages. Match foam cannon specs with your washer’s power.

Credit: www.shinsancarcare.com
Frequently Asked Questions
What Materials Are Needed To Make A Foam Cannon?
To make a foam cannon, you need a pressure washer, foam cannon attachment, soap solution, and water. Use a high-quality car wash soap for best foam. Ensure all parts fit your pressure washer model for optimal performance.
How Do I Mix Soap For Foam Cannon Use?
Mix car wash soap with water in a 1:10 ratio for foam cannon use. Adjust concentration for thicker foam. Avoid harsh detergents as they can damage your car’s paint during washing.
Can I Use A Foam Cannon With Any Pressure Washer?
Most foam cannons work with pressure washers between 1000-3000 PSI. Check your pressure washer’s compatibility before purchasing. Using the wrong pressure can affect foam quality and damage equipment.
How Do I Clean And Maintain My Foam Cannon?
Rinse the foam cannon with clean water after each use to prevent soap buildup. Store it in a dry place to avoid damage. Regularly check for clogs and clean the nozzle for consistent foam output.
Conclusion
Making a foam cannon is simple and fun. You only need a few parts and some patience. Follow the steps carefully and test your cannon. Enjoy the thick foam for cleaning cars or other surfaces. This project saves money and gives great results.
Try different soap mixtures to find the best foam. Keep safety in mind while using your foam cannon. Now, you can create rich foam easily at home. Give it a try and see the difference yourself!


