
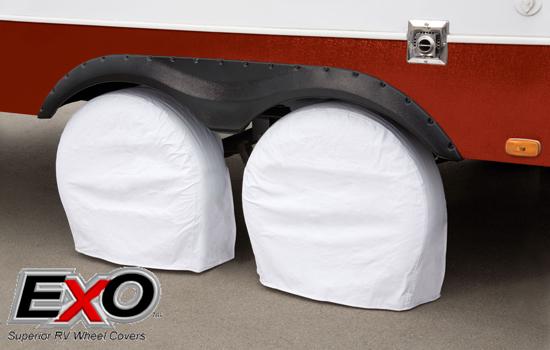
Your RV wheels face a lot of wear and tear from sun, rain, and road debris. Protecting them with wheel covers can save you money and keep your vehicle looking great.
But buying covers can be expensive, and finding the right fit is often tricky. What if you could make your own wheel covers, tailored exactly to your RV’s needs? In this guide, you’ll learn simple steps to create durable, custom-fit RV wheel covers.
By the end, you’ll have the know-how to protect your wheels and extend their life—all without breaking the bank. Keep reading to discover how easy it can be to make your own RV wheel covers.
Materials Needed
Making RV wheel covers needs the right materials. Choosing good materials helps the covers last longer. It also protects your RV wheels from sun, dirt, and rain. This section lists all materials you need to make strong and useful covers.
Selecting Durable Fabrics
Pick fabric that stands up to sun and rain. Heavy-duty polyester or canvas works well. These fabrics resist tears and fading. Choose waterproof or water-resistant fabric for extra protection. Dark colors hide dirt better but may absorb heat. Light colors reflect sunlight and keep wheels cool. Check the fabric thickness to ensure good durability. A strong fabric keeps the covers useful for many seasons.
Choosing Fasteners And Tools
Use strong fasteners that hold covers tight on wheels. Velcro strips work well for easy on and off. You can also use snaps or heavy-duty zippers. Elastic bands help keep the cover snug around the tire. For tools, keep scissors, a sewing machine, and measuring tape ready. A marker helps mark fabric before cutting. Strong thread is important to sew pieces together well. These tools and fasteners make the cover fit perfectly and last long.
Credit: www.nationalrvcovers.com
Measuring Your Rv Wheels
Measuring your RV wheels is the first step to making perfect wheel covers. Accurate measurements ensure the covers fit snugly and protect your wheels well. Taking the right size helps avoid loose or tight covers that wear out quickly.
Determining Wheel Diameter
Start by finding the wheel diameter. Use a tape measure to measure across the center of the wheel. Measure from one edge to the other, passing through the center point. This number is the wheel diameter, usually in inches.
Check the wheel itself for size markings. Often, the diameter is stamped on the side of the wheel or tire. Confirm your tape measure result with this marking for accuracy.
Measuring Tire Width And Depth
Next, measure the tire width. Place the tape measure across the widest part of the tire’s tread. This width affects how the cover fits around the tire, not just the wheel.
Measure the tire depth from the ground to the top of the tire. This height helps ensure the cover fully wraps around the tire. Note both width and depth measurements for a complete fit.
Cutting The Fabric
Cutting the fabric is a key step in making RV wheel covers. It sets the shape and size for the cover. Accurate cutting ensures the cover fits well and protects the wheels properly. This step requires care and attention to detail.
Marking Patterns
Start by creating a pattern based on your wheel size. Use paper or cardboard to draw the shape. Mark the center and edges clearly. Add extra space for seams and elastic. This helps the cover fit snugly around the wheel. Double-check measurements before cutting the fabric.
Tips For Accurate Cutting
Use sharp scissors or a rotary cutter for clean edges. Cut on a flat surface to avoid mistakes. Pin the pattern to the fabric so it does not shift. Cut slowly and follow the lines exactly. Avoid rushing to keep the fabric smooth and even. Accurate cutting saves time and materials.
Sewing The Cover
Sewing the RV wheel cover is a key step in making it strong and durable. The right stitching keeps the cover tight and weatherproof. Using proper sewing techniques helps the cover last long under sun, rain, and wind. Focus on neat, strong stitches for a professional look and better protection.
Stitching Techniques
Use a straight stitch for most parts of the cover. It holds fabric layers firmly together. A zigzag stitch works well on edges to stop fraying. Sew slowly and keep stitches close, about 1/4 inch apart. Double stitching adds strength to long seams. Use heavy-duty thread made for outdoor fabrics.
Reinforcing Stress Points
Stress points need extra care. These include corners and areas near straps. Sew a box stitch or an X shape for added support. Add extra fabric patches inside these points before stitching. This prevents tears from pulling or stretching. Check all stress points after sewing for any weak spots.
Adding Secure Fasteners
Adding secure fasteners to your RV wheel covers keeps them in place during travel. Fasteners stop covers from slipping or blowing away. They also protect wheels from dust, rain, and sun damage. Choosing the right fasteners makes your covers last longer and fit better.
Installing Straps And Buckles
Straps and buckles provide strong, adjustable fastening. Sew straps to the cover’s edges. Use durable buckles for easy tightening and release. Wrap straps around the wheel and clip the buckle. This method holds the cover tight against wind and movement. Check straps often for wear and replace if needed.
Using Elastic Bands For Fit
Elastic bands offer a snug fit without extra tools. Sew a wide elastic band into the cover’s edge. The band stretches to fit tightly around the wheel. Elastic bands work well on different wheel sizes. They make putting on and taking off the cover quick and simple. Choose thick elastic for better durability and grip.

Credit: www.youtube.com
Waterproofing And Uv Protection
Protecting your RV wheel covers from water and sun damage is very important. Water can cause mold and rust, while UV rays can make materials fade and crack. Good waterproofing and UV protection keep your covers strong and looking new for a long time.
This section explains how to apply protective coatings and maintain cover durability easily.
Applying Protective Coatings
Start with a clean, dry wheel cover. Use a waterproof spray made for fabric or plastic. Spray evenly over the entire surface. Let it dry completely before touching. Repeat this process every few months to keep water out.
For UV protection, apply a UV-resistant spray or paint. These products block harmful sun rays. They also stop colors from fading. Follow the instructions on the product for best results. Apply in a well-ventilated area to avoid fumes.
Maintaining Cover Durability
Check your wheel covers regularly. Look for cracks, tears, or faded spots. Clean covers with mild soap and water only. Avoid harsh chemicals that break down materials. Dry covers fully before storing or reinstalling.
Store covers in a cool, dry place when not in use. Avoid folding covers tightly to prevent creases. Proper care helps your covers last through seasons and weather changes. This saves money and keeps your RV looking great.
Fitting And Adjusting Covers
Fitting and adjusting RV wheel covers is a key step. It ensures the covers stay secure and protect your wheels well. Proper fitting helps avoid damage from wind or dirt. It also improves the overall look of your RV. Taking time to test and adjust covers makes a big difference.
Testing The Fit
Start by placing the cover over the wheel. Check if it sits evenly around the tire. The cover should not be too tight or too loose. Move the cover slightly to see if it slips off easily. Make sure the cover covers the entire tire sidewall. Look for any gaps or bunching fabric. If it feels tight, try loosening straps or adjusting elastic bands. A good fit feels snug but not stretched.
Making Final Adjustments
After testing, tighten or loosen straps as needed. Use the adjustable buckles to secure the cover. Smooth out wrinkles or folds in the fabric. Check that the cover does not block any valve stems. Trim excess material if it causes bunching. Secure any loose ends with clips or ties. Re-check the fit by gently shaking the wheel. The cover should stay in place without shifting. Repeat adjustments until the cover fits perfectly.
Tips For Long-term Maintenance
Taking care of your RV wheel covers helps them last longer. Proper maintenance keeps them clean and strong against weather. Small steps in daily care make a big difference over time. Follow these tips for long-term maintenance.
Cleaning Your Covers
Clean your wheel covers regularly to avoid dirt build-up. Use mild soap and warm water for washing. Gently scrub with a soft brush or cloth. Avoid harsh chemicals that can damage the material. Rinse thoroughly and let them air dry completely. Dry covers prevent mold and mildew growth.
Storing Covers Properly
Store wheel covers in a cool, dry place when not in use. Keep them away from direct sunlight to avoid fading. Fold covers carefully to prevent creases or tears. Use a storage bag or box to protect them from dust. Proper storage keeps covers ready for the next trip.

Credit: magneshade.com
Frequently Asked Questions
What Materials Are Best For Rv Wheel Covers?
Durable, weather-resistant materials like heavy-duty vinyl or UV-resistant fabric work best. They protect wheels from sun, rain, and debris effectively.
How Do I Measure My Rv Wheels For Covers?
Measure the wheel diameter and width accurately. This ensures a snug fit and prevents covers from slipping or flapping while driving.
Can I Make Custom Rv Wheel Covers At Home?
Yes, you can create custom covers using durable fabric, waterproof adhesive, and elastic bands. Custom covers fit perfectly and match your style.
How Do Rv Wheel Covers Protect My Tires?
They shield tires from UV rays, dirt, and moisture. This prevents cracking, fading, and premature wear, extending tire life and safety.
Conclusion
Making RV wheel covers is simple and saves money. You only need a few materials and basic tools. The steps are easy to follow and do not take much time. Custom covers protect your wheels from dirt and sun damage.
They also add a personal touch to your RV. Try making your own covers to keep your wheels safe and looking good. Enjoy your travels with this handy DIY project.


