

Have you ever wanted to give your car, laptop, or even your furniture a fresh new look without spending a fortune? Vinyl wraps are the perfect solution, and making them yourself is easier than you might think.
You’ll discover simple, step-by-step tips to create stunning vinyl wraps that stand out. Whether you’re a beginner or looking to improve your skills, this guide will help you transform everyday items into eye-catching pieces. Ready to unlock your creativity and save money?
Let’s dive in and get started!
Materials Needed
Starting a vinyl wrap project needs the right materials. Using good supplies makes the process easier and the results better. Gather everything before you begin for smooth work.
Choosing The Right Vinyl
Pick vinyl made for wrapping cars or objects. Look for high quality and durability. Choose a finish: glossy, matte, or satin. Consider the color and pattern to fit your style. Make sure the vinyl is easy to stretch and reposition.
Essential Tools
Use a squeegee with a soft edge to avoid scratches. Have a sharp utility knife for clean cuts. A heat gun helps the vinyl stretch around curves. A tape measure and ruler ensure accurate sizing. Keep microfiber cloths handy for cleaning and smoothing.
Preparation Supplies
Clean the surface thoroughly with soap and water first. Use isopropyl alcohol to remove grease and residue. Have lint-free towels to dry the area well. Use masking tape to hold the vinyl in place before sticking. Good lighting helps spot dirt and bubbles.
Preparing The Surface
Preparing the surface is the first step to a perfect vinyl wrap. The wrap sticks best to clean, smooth surfaces. Dirt, dust, and old residues can cause bubbles or peeling. Taking time here saves effort later.
Every part of the surface must be ready for the vinyl to hold firmly. Small mistakes in preparation can ruin the whole look. Follow these steps carefully for the best results.
Cleaning Techniques
Start by washing the surface with soap and water. Use a soft cloth to remove dirt and grime. Avoid harsh chemicals that may damage the paint. Dry the surface completely with a clean towel.
Next, wipe the area with isopropyl alcohol. This removes oils and leftover grease. Do not skip this step. It ensures the vinyl will stick properly.
Removing Old Wraps
Peel off any old vinyl wrap slowly. Use heat from a hairdryer to soften the adhesive. Pull the wrap at a low angle to avoid damage. Remove all sticky residue using adhesive remover.
Check for leftover bits and clean them thoroughly. A clean base makes new wraps look smooth and neat.
Smoothing Imperfections
Inspect the surface for dents, scratches, or bumps. Fill small dents with body filler and sand smooth. Use fine sandpaper to smooth rough areas gently. Clean the surface again after sanding.
Vinyl wraps show every bump. A smooth base gives a flawless finish. Take your time to fix imperfections well.
Measuring And Cutting
Measuring and cutting vinyl wraps is a key step in the wrapping process. Getting it right saves time and prevents waste. Careful measurements ensure the wrap fits perfectly on the surface. Cutting the vinyl accurately helps avoid mistakes and rough edges.
Accurate Measurements
Start by cleaning the surface you want to wrap. Use a tape measure to get exact dimensions. Measure length, width, and any curves or edges. Write down each measurement clearly. Double-check measurements to avoid errors. Accurate numbers help cut the vinyl to the right size.
Cutting Tips
Use a sharp utility knife or vinyl cutter. Cut on a flat, clean surface to keep control. Score lightly first, then cut deeper for precision. Keep your hand steady to avoid jagged edges. Leave a small margin to trim later. Use a ruler or straight edge to guide your cuts.
Planning The Layout
Plan how the vinyl will cover the surface. Consider the direction of patterns or textures on the wrap. Position the vinyl to minimize seams and overlaps. Mark the vinyl with light pencil lines for guidance. Arrange pieces so they fit together smoothly. Good planning helps the wrap look neat and professional.
Applying The Vinyl
Applying vinyl wrap is a careful process. It needs attention and patience. Proper application makes the wrap look smooth and last longer. This section covers key steps to apply vinyl wrap successfully.
Positioning The Wrap
Start by cleaning the surface well. Dirt or dust can cause issues. Peel the backing slightly to expose the adhesive. Place the vinyl on the surface carefully. Align it to the edges and corners. Use light pressure to keep it in place. Check the position before fully sticking it down.
Using Heat For Flexibility
Heat helps the vinyl become soft and flexible. Use a heat gun or hairdryer on low heat. Warm the vinyl gently while applying it. This allows the material to stretch over curves and edges. Avoid overheating as it can damage the vinyl. Heat small areas at a time for better control.
Avoiding Bubbles And Wrinkles
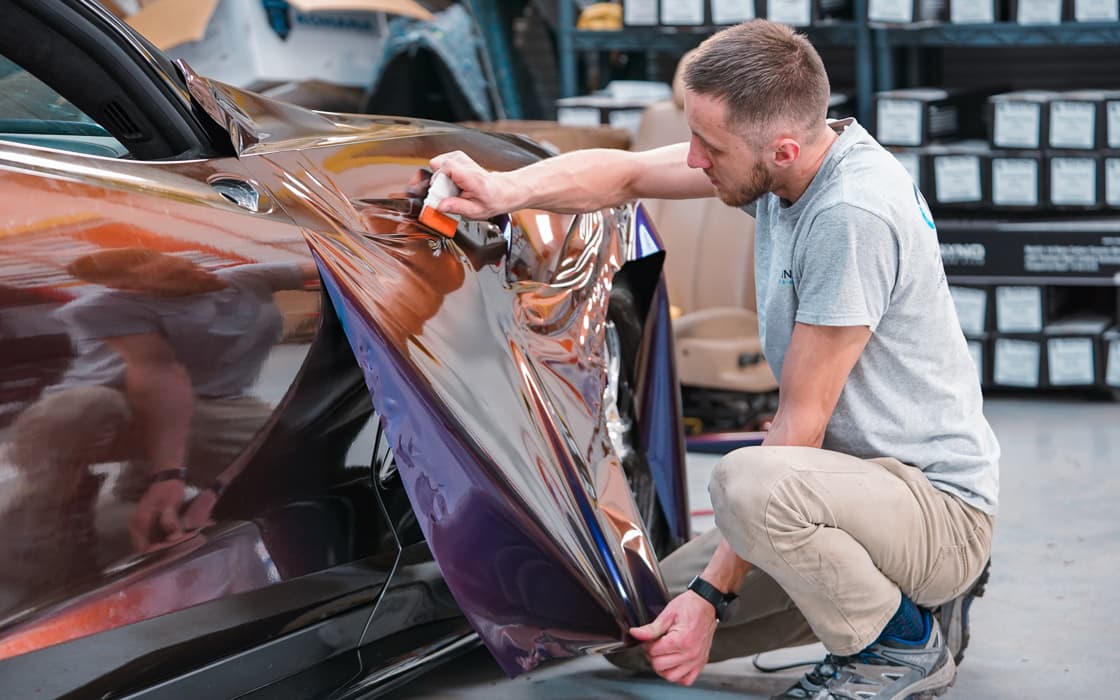
Use a squeegee to smooth the vinyl from the center outwards. Press firmly to push air bubbles out. Work slowly and check for wrinkles. If a bubble appears, lift the vinyl carefully and reapply. Use heat to soften stubborn wrinkles. Smooth the surface until it looks even and flat.
Finishing Touches
Finishing touches are key to a perfect vinyl wrap. They help the wrap last longer and look neat. Careful steps at this stage protect your work from damage and wear. Focus on trimming, sealing, and curing to complete the job well.
Trimming Excess Material
Trim the extra vinyl carefully with a sharp blade. Cut close to the edges but avoid cutting the surface below. Use a straight edge to guide your cuts for clean lines. Remove small scraps to prevent lifting or peeling later.
Sealing Edges
Seal edges with a heat gun or a roller to secure them. Heat softens the vinyl, helping it stick better to curves and corners. Press edges firmly to avoid air bubbles or lifting. Sealed edges stop moisture and dirt from getting underneath.
Curing And Setting
Let the vinyl wrap cure for at least 24 hours. Avoid washing or touching the wrap during this time. Heat helps vinyl settle and bond to the surface. Proper curing keeps the wrap flexible and strong over time.
Credit: www.tintingchicago.com
Common Mistakes To Avoid
Making vinyl wraps can be fun and rewarding. Many people face common problems that ruin their work. Avoiding these mistakes saves time and money. Focus on these key areas to get the best results.
Surface Preparation Errors
Cleaning the surface is very important. Dirt or grease stops the vinyl from sticking well. Always wash the area with soap and water. Use alcohol to remove any leftover oils. Dry the surface completely before starting. Skipping this step causes bubbles and peeling later.
Incorrect Application
Applying vinyl too fast leads to wrinkles and air pockets. Take your time and work slowly. Stretching the vinyl too much can make it lose shape. Avoid pulling hard or it will shrink back. Use gentle pressure to smooth the vinyl evenly. Work from the center outwards to push out air.
Improper Tool Use
Using the wrong tools damages the vinyl. A hard scraper can scratch the material. Use a soft squeegee or felt edge instead. Keep tools clean to avoid dirt marks. Sharp knives should cut only excess vinyl, not the surface. Handle tools carefully for a smooth finish.
Maintenance Tips
Proper maintenance keeps vinyl wraps looking fresh and new. It helps protect your investment and extends the life of the wrap. Simple care steps make a big difference in appearance and durability.
Cleaning Wrapped Surfaces
Use a soft cloth or sponge for cleaning. Choose mild soap mixed with water. Avoid harsh chemicals or abrasive cleaners. Rinse with clean water to remove soap residue. Dry with a soft towel to prevent water spots. Clean regularly to stop dirt build-up and stains.
Protecting Against Damage
Park in shaded areas to avoid sun damage. Avoid sharp objects that can scratch the wrap. Use a quality wax to add a protective layer. Do not use automatic car washes with brushes. Hand washing is safer and reduces risk of peeling.
Long-term Care
Check the wrap edges for lifting or peeling. Repair small damages quickly to prevent spreading. Store the vehicle indoors if possible. Keep the wrap dry and clean during storage. Regular inspections help maintain a smooth, flawless look.

Credit: www.youtube.com

Credit: www.mby.com
Frequently Asked Questions
What Tools Are Needed To Make Vinyl Wraps?
Essential tools include a vinyl cutter, squeegee, heat gun, knife, and measuring tape. These help cut, apply, and smooth the vinyl precisely.
How Long Does It Take To Apply A Vinyl Wrap?
Applying a vinyl wrap usually takes 2 to 4 hours. This depends on surface size and installer experience.
Can Vinyl Wraps Be Removed Without Damage?
Yes, vinyl wraps can be removed safely. Heat softens the adhesive, allowing clean removal without harming the underlying surface.
What Surfaces Work Best For Vinyl Wraps?
Smooth, clean, and non-porous surfaces like cars, laptops, and walls work best. Textured or dirty surfaces reduce adhesion quality.
Conclusion
Making vinyl wraps can be simple and fun. Start with clean surfaces and take your time. Use good tools and follow each step carefully. Practice helps you get better and avoid mistakes. Vinyl wraps protect and change the look of your items.
Anyone can try this craft with patience and care. Keep learning and enjoy the process. Soon, you will create smooth and neat wraps with confidence. Give it a try today!


