
Are you tired of seeing annoying bubbles ruining the smooth look of your vinyl wrap? Those tiny air pockets can make even the best wrap look messy and unprofessional.
But don’t worry—removing bubbles is easier than you think. You’ll discover simple, effective tricks to get a flawless finish every time. Keep reading, and you’ll learn how to fix those bubbles quickly so your vinyl wrap looks perfect and lasts longer.
Causes Of Vinyl Wrap Bubbles
Vinyl wrap bubbles appear for several common reasons. Understanding these causes helps prevent and fix them. Bubbles reduce the wrap’s smooth look. They also shorten its lifespan. Knowing why bubbles form improves your wrapping results.
Trapped Air During Application
Air trapped under the vinyl is the main cause of bubbles. This happens when the wrap is not laid flat. Small pockets of air get stuck. These pockets push the vinyl away from the surface. The result is visible bubbles or blisters.
Using a squeegee slowly removes air. Pressing firmly helps the vinyl stick well. Skipping this step leads to more trapped air.
Surface Contaminants
Dirt, dust, or grease on the surface cause bubbles. These contaminants stop the vinyl from sticking properly. Even tiny particles create small bumps under the wrap. The wrap lifts up around them, forming bubbles.
Cleaning the surface thoroughly before applying vinyl is crucial. A clean surface ensures better adhesion and fewer bubbles.
Temperature Effects
Temperature plays a big role in vinyl bubbles. Cold weather makes vinyl stiff and hard to stretch. This can trap air or cause creases that look like bubbles. Hot weather softens the vinyl too much. It may stretch unevenly and form bubbles.
Applying vinyl in moderate temperatures works best. It allows the vinyl to lay flat and stick well.
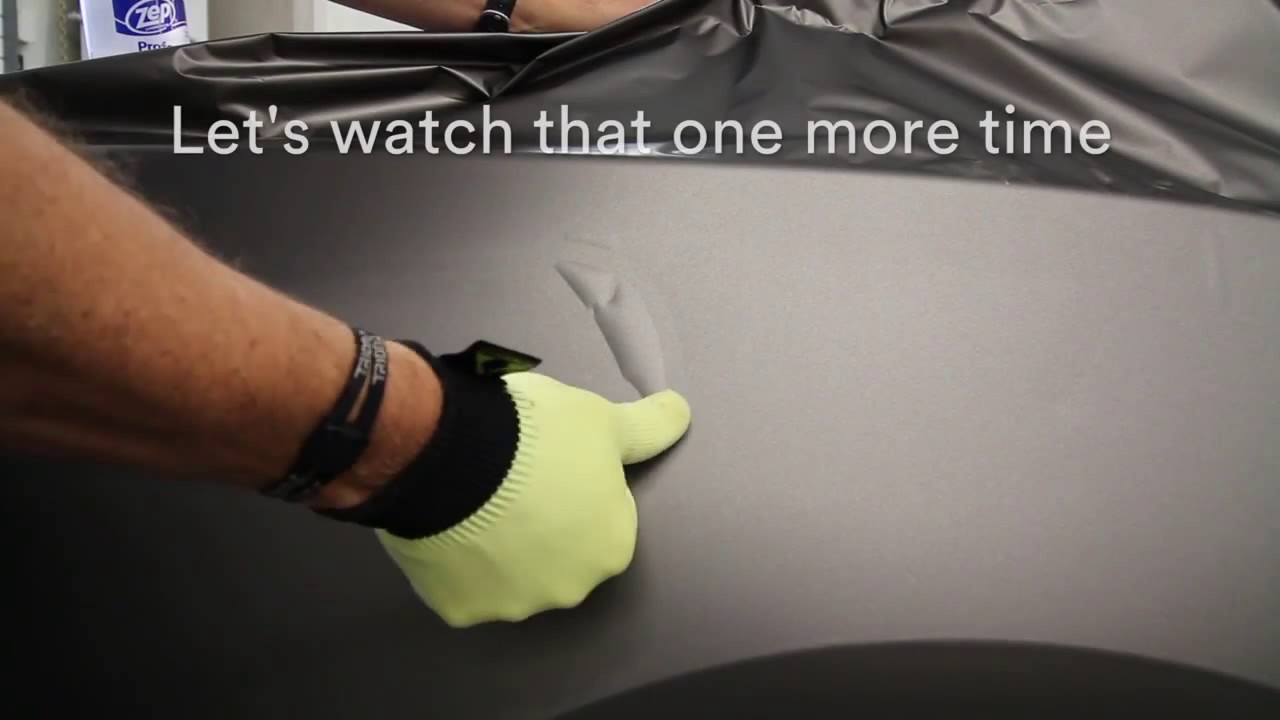
Credit: www.youtube.com
Tools Needed For Bubble Removal
Removing bubbles from vinyl wrap requires a few simple tools. These tools help smooth out the surface and fix air pockets quickly. Using the right items makes the job easier and gives a clean look.
Squeegee Options
A squeegee is essential for pushing out air bubbles. Plastic squeegees with soft edges work best. They prevent scratches on the vinyl. You can also use felt-edge squeegees for a smoother finish. Choose one that fits comfortably in your hand.
Heat Gun Or Hair Dryer
Heat helps soften the vinyl and release trapped air. A heat gun or hair dryer works well for this. Keep the heat source moving to avoid damage. Warm the bubble area gently before pressing it flat with a squeegee.
Pin Or Needle
A pin or needle creates tiny holes in stubborn bubbles. This allows trapped air to escape. Use it carefully to avoid tearing the vinyl. After poking, press the bubble flat with a squeegee. This method works best for small, difficult bubbles.
Step-by-step Bubble Removal Methods
Removing bubbles from a vinyl wrap makes the surface smooth and clean. It also helps the wrap last longer and look better. Follow these simple steps to fix bubbles quickly. Each method works well for different bubble sizes and types. Use the right one to keep your vinyl wrap perfect.
Using A Squeegee To Smooth Bubbles
Start by pressing the bubble with a squeegee. Push the air out gently toward the edges. Use firm but steady pressure. Move slowly to avoid tearing the vinyl. This method works best for small to medium bubbles. It also helps prevent new bubbles from forming.
Applying Heat To Release Air
Warm the vinyl wrap with a heat gun or hair dryer. Heat softens the vinyl and makes it flexible. Once heated, use a squeegee to smooth out the bubbles. Be careful not to overheat or burn the vinyl. This method works well for stubborn or large bubbles.
Puncturing And Pressing Out Small Bubbles
For tiny bubbles that do not move, use a sharp pin. Gently puncture the bubble to release trapped air. Press down with a squeegee right after. This lets the vinyl stick back down flat. Avoid making the hole too large to prevent damage.
Preventing Bubbles During Application
Preventing bubbles during vinyl wrap application is key to a smooth finish. Bubbles spoil the look and reduce durability. Simple steps before and during application help avoid these issues. Focus on preparation and technique for the best results.
Cleaning The Surface Thoroughly
Start by cleaning the surface well. Dirt, dust, and grease cause bubbles under the vinyl. Use soap and water first, then wipe with alcohol. Make sure the surface is dry before applying the wrap. A clean surface helps the vinyl stick evenly.
Proper Wrapping Techniques
Apply the vinyl slowly and carefully. Peel back a small section at a time. Use a squeegee to press out air bubbles as you go. Work from the center outward to push air away. Avoid stretching the vinyl too much to stop new bubbles.
Ideal Temperature Conditions
Work in a moderate temperature, between 60°F and 80°F (15°C to 27°C). Too cold makes the vinyl stiff and harder to apply. Too hot causes the vinyl to stretch and bubble. Stable temperature helps the vinyl settle smoothly on the surface.
When To Seek Professional Help
Removing bubbles from a vinyl wrap can be tricky. Some bubbles are easy to fix at home. Others need expert care to avoid damage. Knowing when to seek professional help saves time and money. It also keeps the wrap looking great for longer.
Large Or Persistent Bubbles
Big bubbles that do not go away with simple fixes need a pro. These bubbles can trap air deep under the vinyl. Trying to fix them without skill may tear the wrap. Experts have tools and methods to remove these safely.
Damage To The Vinyl Wrap
If the vinyl wrap has scratches, tears, or wrinkles, call a professional. Trying to fix damaged vinyl alone can make it worse. Professionals can repair or replace parts of the wrap. This keeps your vehicle or surface looking smooth.
Complex Surface Areas
Curves, edges, and textured surfaces are hard to wrap perfectly. Bubbles often form in these tricky spots. Professionals understand how to handle complex shapes. They know how to stretch and smooth the vinyl without damage.

Credit: raxtify.com
Credit: metrorestyling.com
Frequently Asked Questions
How Do I Get Rid Of Air Bubbles In Vinyl Wrap?
To remove air bubbles, use a small pin to puncture the bubble gently. Then, smooth the area with a squeegee to push out trapped air evenly.
What Tools Help Remove Bubbles From Vinyl Wrap?
A squeegee, heat gun, and pin are essential tools. The heat gun softens the vinyl, the pin releases air, and the squeegee smooths the surface.
Can Heat Remove Bubbles From Vinyl Wrap?
Yes, applying gentle heat softens the vinyl, making bubbles easier to smooth out. Use a heat gun or hairdryer carefully to avoid damage.
Why Do Bubbles Form Under Vinyl Wrap?
Bubbles form due to trapped air or dust during application. Improper surface cleaning or quick installation without smoothing also causes bubbles.
Conclusion
Removing bubbles in vinyl wrap takes patience and the right steps. Start with a clean surface and use a squeegee to smooth the wrap. Small bubbles can pop with a pin, then press flat again. Work slowly to avoid damage and get the best result.
With practice, your vinyl wrap will look smooth and neat every time. Keep these tips handy for your next project. Perfect wraps are possible with care and attention.

