
Are you struggling to remove those stubborn wheel bolt covers on your car? You’re not alone.
These small pieces can be tricky to get off without the right technique. But don’t worry—once you learn the simple steps, you’ll save time and avoid damage to your wheels. You’ll discover easy, effective methods to remove wheel bolt covers quickly and safely.
Keep reading, and you’ll master this task like a pro.
Tools Needed
Removing wheel bolt covers requires a few simple tools. These tools help you take off the covers without damage. Using the right tools makes the job easier and faster. Prepare these tools before starting the removal process.
Flathead Screwdriver
A flathead screwdriver helps pry off the bolt covers gently. Choose one with a small or medium tip. It fits well between the cover and wheel. Use it carefully to avoid scratching the wheel surface.
Plastic Pry Tool
A plastic pry tool is safer for delicate surfaces. It reduces the risk of scratches and dents. Use it if the bolt covers are tight or stuck. The tool slides easily under the cover edge.
Gloves
Wear gloves to protect your hands from dirt and sharp edges. Gloves improve grip and comfort while working. They keep your hands clean during the removal process.

Credit: www.reddit.com
Safety Measures
Removing wheel bolt covers needs care to avoid injury or damage. Safety is the first step before starting any work on your vehicle. Simple precautions keep you safe and protect your car parts.
Wear protective gloves to protect your hands from sharp edges and dirt. Use safety glasses to keep your eyes safe from dust or debris. Work on a flat, stable surface to stop the car from moving unexpectedly.
Use the right tools for removing the bolt covers. Avoid forcing parts off to prevent damage to the covers or bolts. Take your time to avoid slips or accidents.
Wear Protective Gloves
Gloves protect your hands from cuts and dirt. They give a better grip on tools and covers. Choose gloves that fit well and allow easy movement.
Use Safety Glasses
Safety glasses shield your eyes from dust or small particles. They prevent eye injuries during removal. Always wear them when working near wheels.
Work On A Stable Surface
A flat surface stops the car from rolling or shifting. It keeps you safe during the process. Use wheel chocks to block the wheels if needed.
Choose The Right Tools
Use tools made for wheel bolt covers. Wrong tools can damage parts or cause slips. A plastic pry tool is best for gentle removal.
Avoid Forceful Removal
Force can break covers or bolts. Remove covers slowly and carefully. If stuck, try a different angle or tool.
Locating The Bolt Covers
Finding the wheel bolt covers is the first step in removing them. These covers protect the wheel bolts from dirt and damage. They also keep the wheel looking clean and neat.
Wheel bolt covers sit right on top of the wheel bolts. Each wheel usually has several bolts, and each bolt may have a cover. These covers can be plastic or metal. Their size and shape depend on the car model.
Sometimes, the covers blend with the wheel’s color. This makes them harder to spot. Look carefully around the center of the wheel. The bolt covers are often arranged in a circle.
Check The Wheel Center Area
Start by looking at the wheel’s center. The bolt covers are near the lug nuts. They may appear as small caps or plugs. These are easy to miss if they match the wheel color.
Identify Different Cover Types
Some covers snap on, others twist or pull off. Knowing the type helps in removal. Plastic covers usually snap on. Metal covers might need a tool to twist or pry.
Use Light To Spot Covers
Bright light helps find covers hidden in shadows. Shine a flashlight around the wheel bolts. This reveals edges and shapes of covers. It makes removal easier and safer.
Credit: www.visualsp.com
Removing Bolt Covers By Hand
Removing wheel bolt covers by hand is simple and quick. These covers protect the bolts but can be taken off without tools in many cases. Doing this carefully avoids damage to the covers and the wheel.
Start by checking the cover’s fit. Some covers snap on tightly, while others are looser. Knowing this helps you decide how much force to use.
Locate The Edge Of The Bolt Cover
Find a small gap or edge where the cover meets the wheel. This is where you can start prying the cover off. Look closely for any space you can use as a grip point.
Use Your Fingers To Pull The Cover
Grip the edge with your fingers and pull gently. Wiggle the cover back and forth to loosen it. Do not pull too hard to avoid breaking the cover.
Apply Even Pressure Around The Cover
If the cover feels stuck, press around its edge evenly. This helps release any clips holding it in place. Press carefully to avoid bending or cracking the cover.
Check For Clips Or Tabs
Some bolt covers have small clips or tabs. Feel around the cover’s edge to find these. Press or lift the clips gently to free the cover.
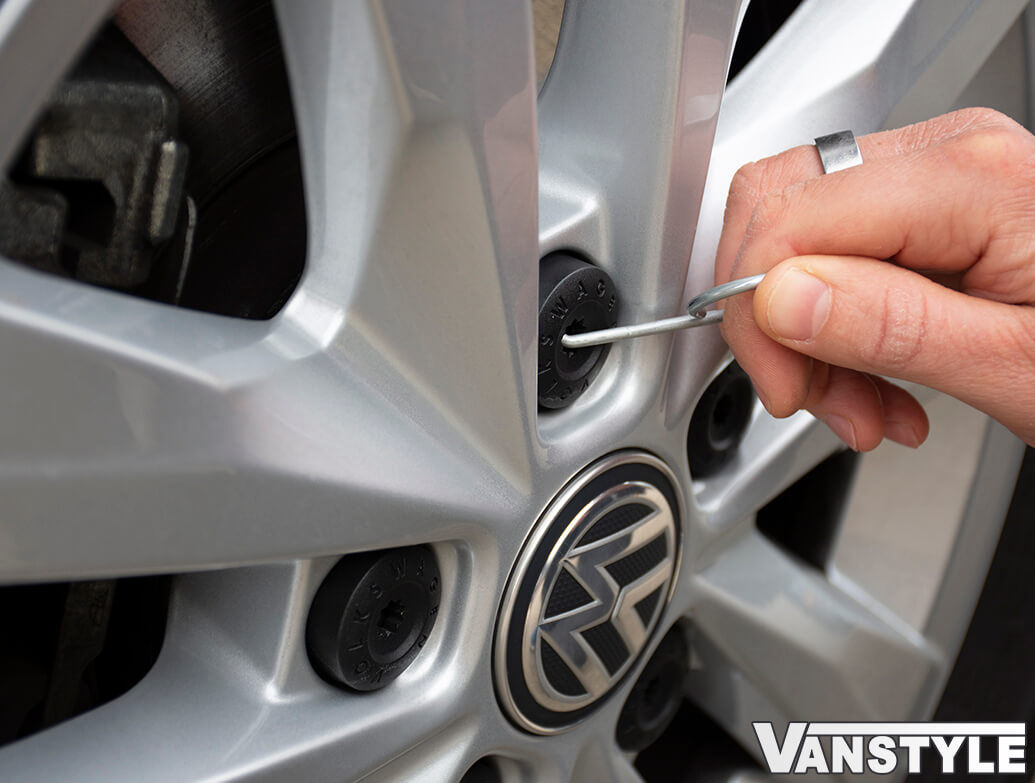
Using A Pry Tool
Using a pry tool is a common method to remove wheel bolt covers safely. The tool helps lift the cover without damaging it or the wheel. This technique requires care and the right tool to avoid scratches or breaks. Follow simple steps to remove the covers smoothly.
Choosing The Right Pry Tool
Select a pry tool with a thin, flat edge. Plastic pry tools work best as they reduce the risk of scratching. Avoid metal tools unless covered with tape for protection. The tool should fit easily under the edge of the bolt cover. This makes lifting easier and safer.
Proper Pry Technique
Insert the pry tool gently under the edge of the bolt cover. Apply slow, steady pressure to lift the cover. Do not force the tool too hard to avoid damage. Work your way around the cover if it does not come off quickly. Lift evenly to prevent bending or cracking the cover.
Dealing With Stubborn Covers
Sometimes, wheel bolt covers stick tight. Dirt, rust, or old age can make them hard to remove. Stubborn covers need careful handling. Rushing may damage the cover or wheel. Use gentle methods to ease them off. Patience helps avoid frustration and harm.
Applying Lubricant
Spray a small amount of lubricant around the cover base. Let it sit for a few minutes. This helps loosen rust and dirt. Use a lubricant safe for metal and rubber parts. Avoid spraying too much to prevent mess. After waiting, try to pull the cover gently. Repeat if needed.
Gentle Tapping Method
Tap the cover lightly with a rubber mallet or wooden block. The gentle taps help break the seal holding the cover. Avoid using metal tools that can scratch or damage. Tap around the edges evenly. After tapping, pull the cover slowly. This method works well with covers stuck from rust.
Cleaning The Area
Cleaning the area around the wheel bolts is an important step before removing the bolt covers. Dirt and grime can make the covers stick tight. A clean surface helps tools grip better and prevents damage. Take your time to clean carefully.
Preparing The Tools And Materials
Gather a soft brush, clean cloth, and mild soap. Use water to rinse dirt away. Avoid harsh chemicals that can harm the wheel finish. Have everything ready before you start cleaning.
Removing Loose Dirt And Debris
Use the soft brush to remove dust and loose dirt. Brush gently around the bolts and covers. This prevents scratching the wheel surface. Clear away all particles before moving on.
Washing The Area
Mix mild soap with water in a bucket. Dip the cloth into the soapy water. Wipe the area around the wheel bolts carefully. Clean all sides of the bolt covers. Rinse the cloth and wipe again with clean water.
Drying The Surface
Use a dry cloth to remove moisture. Make sure the area is completely dry. Wet surfaces can cause tools to slip. A dry area ensures better grip and safer removal.

Credit: www.youtube.com
Installing New Or Replacing Covers
Installing new wheel bolt covers or replacing old ones can freshen up your vehicle’s look. This task is simple and requires no special tools. Focus on choosing the right covers for your wheels. Proper installation helps keep the covers secure and protects your wheel bolts.
Ensuring A Perfect Fit
Select covers that match your wheel’s size and shape. Check the diameter and design before buying. A snug fit prevents covers from falling off during driving. Test the fit by placing the cover over a bolt. It should click or slide on easily without too much force.
Securing The Covers
Press each cover firmly onto the wheel bolt. Use even pressure around the edges for a tight hold. Avoid pushing too hard to prevent damage. Double-check that covers do not wiggle or move. Secure covers stay in place and protect bolts from dirt and rust.
Frequently Asked Questions
How Do I Safely Remove Wheel Bolt Covers?
Use a flathead screwdriver or a plastic pry tool. Gently pry around the cover edge to avoid damage. Work slowly to prevent scratching the wheel or cover.
What Tools Are Needed To Remove Wheel Bolt Covers?
A flathead screwdriver or plastic pry tool is best. Avoid metal tools that can scratch. Gloves may help improve grip and protect your hands.
Can I Remove Wheel Bolt Covers Without Damaging Them?
Yes, use gentle prying and avoid forcing the cover. Use plastic tools or wrap metal tools with tape to protect surfaces. Take your time to prevent cracks or breaks.
Why Remove Wheel Bolt Covers From My Car?
Removing covers allows access to wheel bolts for tire changes or maintenance. It helps inspect bolts for rust or damage. It also enables cleaning or replacement of worn covers.
Conclusion
Removing wheel bolt covers is simple with the right steps. Use basic tools and a little patience. Protect your wheels by handling covers carefully. Clean the area before reattaching new covers. Regular checks keep your wheels looking neat and safe.
Taking these steps helps maintain your car’s appearance. Keep your wheels in good shape with easy care. Small efforts can make a big difference. Try these tips next time you need to remove covers.


