
If you own a Mercury outboard engine, you know how important it is to keep it running smoothly. One simple way to do that is by replacing your fuel filter regularly.
But maybe you’re wondering, how exactly do you replace the fuel filter on a Mercury outboard? Don’t worry—you’re about to learn an easy, step-by-step method that anyone can follow. By the end of this guide, you’ll save money, avoid engine trouble, and feel confident handling this important maintenance task yourself.
Let’s get started!
Tools And Materials Needed
Replacing the fuel filter on a Mercury outboard requires a few basic tools and materials. Having these ready makes the job easier and safer. Each item plays a key role in ensuring the fuel system works properly after the replacement.
Gather the right tools before starting. This helps avoid interruptions and keeps the process smooth. The materials must fit your specific Mercury outboard model for the best results.
Fuel Filter Replacement Kit
This kit usually includes the new fuel filter and necessary seals. Choose one designed for your Mercury outboard model. The filter cleans fuel and protects the engine from dirt and debris.
Wrenches And Screwdrivers
Use wrenches to loosen fuel line fittings. Screwdrivers help remove clamps or covers. Keep a set of both types handy to handle different fasteners.
Fuel Line Clamps
Clamps secure fuel lines to the filter. Old clamps may wear out and leak. Replace them with new ones for a tight seal and safe fuel flow.
Clean Rags Or Towels
Fuel spills can happen. Use rags to wipe up spills quickly. Keep the work area clean to avoid hazards and dirt entering the fuel system.
Container For Fuel Drainage
Fuel may leak when removing the old filter. Use a small container to catch any fuel. This prevents messes and protects the environment.
Gloves And Safety Glasses
Protect your hands and eyes from fuel and debris. Gloves prevent skin contact with fuel. Safety glasses shield your eyes during the process.
Credit: boatengine.com
Locating The Fuel Filter
Finding the fuel filter on a Mercury outboard is the first step to replacing it. This part cleans the fuel and protects the engine from dirt and debris. Knowing its exact location saves time and prevents mistakes.
Fuel filters on Mercury outboards are usually easy to access. They are placed where the fuel line connects to the engine or inside the fuel system. Understanding the layout helps to spot the filter quickly.
Fuel Filter Position On Different Mercury Models
Older Mercury outboards often have a clear plastic fuel filter. It is found near the engine, attached to the fuel line. Newer models might use a cartridge-style filter inside the engine compartment.
Check your model’s manual for exact details. The fuel filter location varies by horsepower and design.
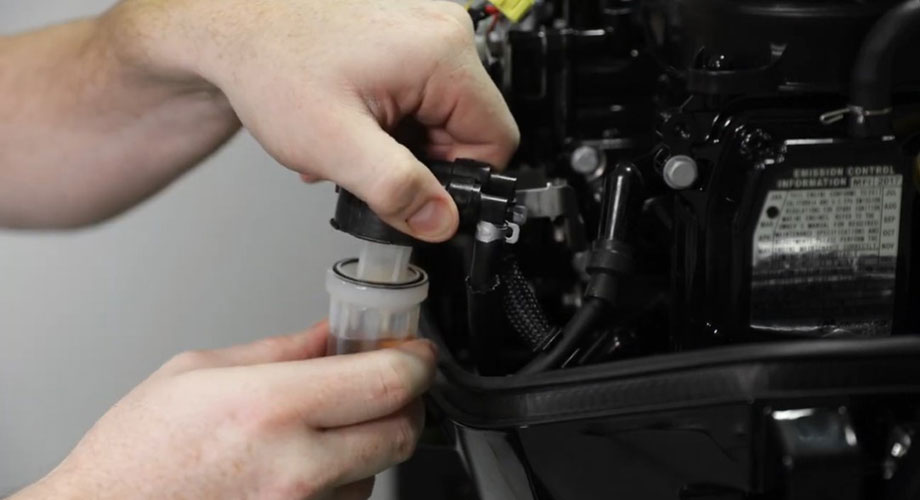
How To Identify The Fuel Filter
The fuel filter looks like a small cylinder or canister. It connects to the fuel hose with clamps or fittings. Some filters are transparent, showing the fuel inside.
Look for the part between the fuel tank and the engine. The filter is usually close to the engine for easy access.
Tools To Help Locate The Fuel Filter
A flashlight helps to see inside tight spaces. Gloves protect your hands from fuel and dirt. A mirror on a stick can show hidden areas behind the engine.
Having the owner’s manual nearby helps confirm the filter’s place. Diagrams in the manual give a clear visual guide.
Preparing The Outboard For Replacement
Preparing your Mercury outboard for a fuel filter replacement is important. Proper preparation helps avoid accidents and ensures the job goes smoothly. Follow these simple steps before starting the replacement.
Safety Precautions
Work in a well-ventilated area to avoid fuel fumes. Keep a fire extinguisher nearby. Wear gloves to protect your hands from fuel and dirt. Avoid open flames or sparks near the engine. Keep a clean cloth handy to wipe spills quickly.
Turning Off The Engine
Make sure the engine is completely off before starting work. Turn the ignition key to the off position. Remove the key to prevent accidental starting. Let the engine cool down to avoid burns. Check that the engine stops running before moving on.

Credit: www.youtube.com
Removing The Old Fuel Filter
Removing the old fuel filter is a key step in replacing the fuel filter on your Mercury outboard. This process keeps your engine running smoothly. It also helps avoid fuel problems and engine damage.
Start by preparing your workspace. Make sure the engine is off and cool. Have a container ready to catch any fuel spills. Wear gloves to protect your hands from fuel.
Disconnecting Fuel Lines
Locate the fuel lines connected to the filter. Use pliers to loosen the clamps holding the lines. Gently pull the fuel lines off the filter fittings. Some fuel may leak out, so catch it with a cloth or container. Keep the lines from bending or kinking during removal.
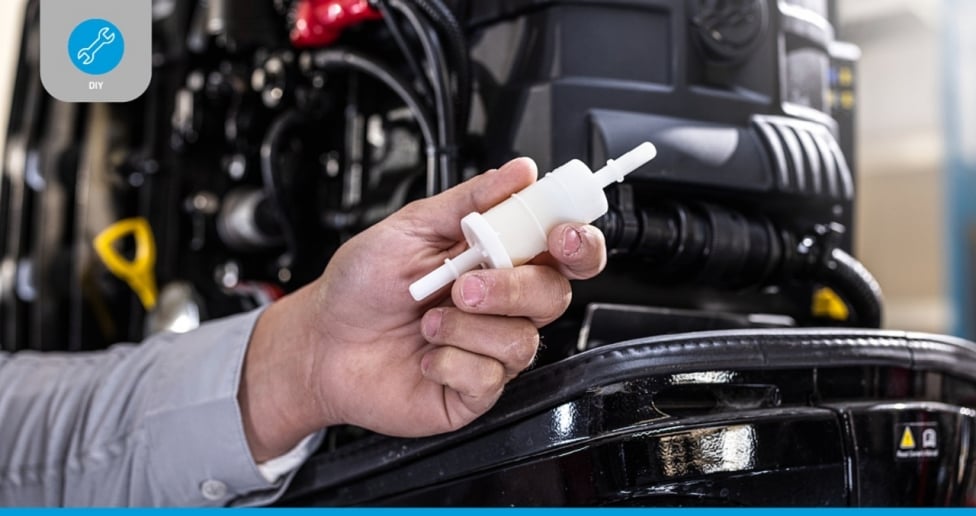
Taking Out The Filter
Look for the mounting bracket or clips holding the fuel filter. Use a screwdriver or your hands to release the filter from its holder. Carefully remove the old filter. Avoid spilling fuel by holding the filter upright. Dispose of the old filter according to local regulations.
Installing The New Fuel Filter
Priming the fuel system is a key step after replacing the fuel filter on your Mercury outboard. It helps remove air from the fuel lines and makes sure fuel flows smoothly to the engine. Without priming, the engine might not start or could run rough.
This process is simple but important. It prepares the fuel system to work properly, preventing damage and improving performance.
Identifying The Primer Bulb
Look for the clear, round bulb on the fuel line. This is the primer bulb. It is usually located between the fuel tank and the engine. The bulb feels soft and squeezes easily by hand.
How To Squeeze The Primer Bulb
Press the bulb slowly until it feels firm. Fuel will move through the lines. Repeat this until the bulb stays firm and no air bubbles appear. This means fuel fills the lines completely.
Checking For Leaks
While priming, watch the fuel lines and filter. Look for any leaks or cracks. Tighten clamps or replace damaged parts if needed. A sealed system is important for good engine function.
Starting The Engine After Priming
Once the bulb stays firm, try starting the engine. It should run smoothly without sputtering. If it struggles, prime the bulb again. Sometimes air needs extra time to clear out.
Priming The Fuel System
Checking for leaks and testing your Mercury outboard after replacing the fuel filter is crucial. It ensures the engine runs smoothly and safely. Small leaks can cause big problems. Testing confirms the fuel flows correctly. Follow these steps to avoid issues and keep your boat ready.
Inspecting Fuel Lines And Connections
Start by looking closely at all fuel lines. Check where the fuel filter attaches to the lines. Make sure the clamps are tight. Look for cracks or damage in the hoses. Any sign of wear means replacement is needed. Tight connections prevent fuel leaks and loss of pressure.
Starting The Engine And Observing
Turn on the engine carefully. Watch the fuel filter and connections while the engine runs. Look for drips or wet spots. Fuel should not leak from any part. If you see leaks, stop the engine immediately. Fix the problem before running the engine again.
Checking Engine Performance
Listen to the engine sound after the filter change. It should run steady without sputtering. A rough or uneven sound can mean air in the fuel system. Air can enter if the filter is not sealed well. Restart the engine after fixing any leaks. Good engine performance shows a successful filter change.
Credit: www.quicksilver-products.com
Frequently Asked Questions
How Often Should I Replace The Fuel Filter On Mercury Outboard?
Replace the fuel filter every 100 hours or annually. This prevents clogging and ensures smooth engine performance. Regular replacement protects the engine from dirt and water contamination.
What Tools Are Needed To Replace Mercury Outboard Fuel Filter?
You need a wrench, screwdrivers, and a new fuel filter. Also, have a container ready to catch fuel spills. Safety gloves and eye protection are recommended during the process.
Can I Replace The Fuel Filter Myself On Mercury Outboard?
Yes, replacing the fuel filter is a simple DIY task. Follow the manual instructions carefully and disconnect the fuel line safely. Proper installation ensures better engine efficiency and longevity.
What Signs Indicate A Clogged Fuel Filter On Mercury Outboard?
Symptoms include engine stalling, rough idling, and loss of power. Poor fuel flow causes these issues. Replace the filter immediately if you experience these problems.
Conclusion
Replacing the fuel filter on your Mercury outboard keeps the engine running smooth. Clean fuel helps avoid engine problems and saves money on repairs. Follow the steps carefully to do the job right. Check the filter regularly for dirt and wear.
A simple task, but important for your boat’s health. Keep your outboard ready for every trip on the water. Regular care extends the life of your engine. Take time now, enjoy better performance later.


