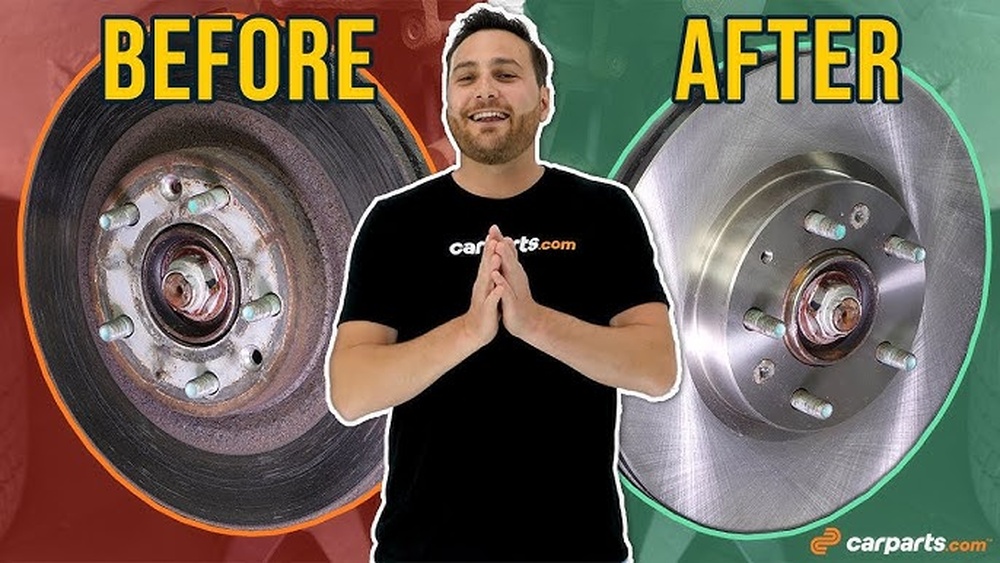
Are your brakes making strange noises or feeling less smooth than before? Your brake rotors might be the problem.
Knowing how to restore brake rotors can save you money and keep your car running safely. In this guide, you’ll discover simple, step-by-step methods to bring your rotors back to life. Whether you’re a beginner or just want to understand more about your car, this article is made for you.
Keep reading to learn how to fix your rotors quickly and confidently.

Credit: www.kbs-coatings.com
Signs Of Worn Brake Rotors
Brake rotors wear down over time and affect your car’s safety. Knowing the signs helps avoid costly repairs and accidents. Worn rotors can cause uneven braking and strange noises. Early detection keeps your brakes working well and your drives safe.
Check your rotors regularly to spot any damage or wear. Ignoring signs can lead to bigger problems. Understanding symptoms guides you on when to act and restore the rotors properly.
Common Symptoms
One common symptom is a vibration or shaking when braking. This means the rotors are uneven or warped. You might hear squealing or grinding noises during braking. These sounds indicate rotor surface damage or worn brake pads. Another sign is longer stopping distances, which reduce brake effectiveness. Visual inspection may show grooves, cracks, or rust on the rotor surface.
When To Inspect Rotors
Inspect rotors every 12,000 miles or at least once a year. Check them if you notice any strange noises or vibrations. Also inspect after brake pad replacement to ensure rotor condition. Inspect before long trips or heavy loads for safety. Early checks prevent rotor damage and keep braking smooth.

Credit: www.kbs-coatings.com
Tools And Materials Needed
Restoring brake rotors requires specific tools and materials. Having the right equipment makes the job easier and safer. Preparing all items before starting saves time and effort.
This section lists the essential tools and safety gear needed for rotor restoration. Each item plays a key role in achieving a smooth and effective repair.
Essential Tools
A good set of tools is crucial for brake rotor restoration. Start with a jack and jack stands to lift and secure your vehicle. You will need a lug wrench to remove the wheels safely.
Use a socket set and ratchet to take off the brake caliper bolts. A C-clamp or brake caliper tool helps compress the caliper piston. A wire brush cleans rust and debris from the rotor surface.
Sandpaper or a brake rotor resurfacing tool smooths out rotor imperfections. A torque wrench ensures bolts tighten to the correct specification. Finally, a brake cleaner spray removes dust and grease.
Safety Gear
Safety gear protects you during the restoration process. Always wear safety goggles to shield your eyes from dust and particles. Use gloves to protect your hands from sharp edges and chemicals.
A dust mask prevents inhaling brake dust, which can be harmful. Work in a well-ventilated area to avoid breathing in fumes from cleaners. Wear sturdy shoes to protect your feet from dropped tools or parts.
Using proper safety gear lowers the risk of injury and keeps your work safe and efficient.
Preparing Your Vehicle
Preparing your vehicle is the first step to restoring brake rotors. This step ensures safety and easy access to the brake system. Proper preparation helps prevent accidents and damage. Follow each step carefully for a smooth process.
Lifting And Securing The Car
Start by parking your car on a flat surface. Use wheel chocks to block the wheels that stay on the ground. This stops the car from rolling.
Next, find the car’s jack points. These points support the car’s weight safely. Place a jack under the point closest to the wheel you will work on.
Lift the car slowly with the jack until the wheel is off the ground. Then, place jack stands under the frame to secure the car. Never rely on the jack alone to hold the car.
Removing The Wheels
Loosen the lug nuts on the wheel before lifting the car. This prevents the wheel from spinning while loosening.
Once the car is lifted and secure, remove the lug nuts completely. Keep them in a safe place for later use.
Pull the wheel straight off the hub. Set the wheel aside carefully to avoid damage.
Removing The Brake Rotors
Removing brake rotors is an essential step in restoring them. Proper removal ensures safety and prepares the parts for cleaning or replacement. Take time to work carefully and follow the steps below.
Detaching Brake Components
Start by loosening the wheel lug nuts. Then, lift the vehicle with a jack and secure it on stands. Remove the wheel to access the brake assembly.
Next, remove the brake caliper bolts. Gently slide the caliper off the rotor. Use a hanger or rope to hold the caliper. Avoid letting it hang by the brake hose.
Take off the brake pads from the caliper bracket. Sometimes, you need to remove the caliper bracket bolts to free the rotor. Keep all bolts safe for reassembly.
Taking Off The Rotor
Check for retaining screws on the rotor. Remove them with a screwdriver if present. Tap the rotor gently with a rubber mallet if it feels stuck.
Pull the rotor straight off the wheel hub. If the rotor is rusted or stuck, apply penetrating oil and wait. Avoid using excessive force to prevent damage.
Clean the hub surface before installing a new or restored rotor. Removing the rotor carefully helps keep brake parts in good condition.
Cleaning And Inspecting Rotors
Cleaning and inspecting brake rotors is a key step in rotor restoration. Dirt, rust, and damage reduce braking power. Clean rotors work better and last longer.
Start with a careful cleaning process. Then, check the rotor for any signs of damage. This helps decide if the rotor can be reused or must be replaced.
Surface Cleaning Techniques
Begin by removing loose dirt and rust using a wire brush. Use brake cleaner spray to remove grease and oil. Spray the cleaner evenly on the rotor surface. Wipe the rotor with a clean cloth until it looks clean. Avoid using water as it can cause rust quickly.
Light rust spots can be removed using fine sandpaper or a scouring pad. Rub gently in a circular motion to avoid deep scratches. Do not use harsh tools that can damage the rotor surface.
Checking For Damage
Inspect the rotor surface for cracks, deep grooves, or scoring. Small scratches are normal but deep marks can reduce brake efficiency. Check for rust build-up on the edges and surface. Measure rotor thickness using a caliper to ensure it meets safety standards. Rotors thinner than the minimum thickness should be replaced.
Look for warping by spinning the rotor and watching for wobble. Warped rotors cause brake vibration and noise. If damage or wear is too severe, replacement is safer than repair.
Resurfacing The Rotors
Resurfacing the rotors is a key step in restoring brake rotors. It smooths the surface and removes grooves or rust. This process helps brakes work better and last longer. Proper resurfacing ensures safe and quiet braking.
Using A Rotor Resurfacer
A rotor resurfacer is a tool designed to grind the rotor surface evenly. It removes small imperfections and creates a flat, smooth finish. Professionals often use this tool for accurate results. The rotor is mounted on the machine, which spins and cuts the surface gently. This method restores the rotor to near-new condition without removing too much material.
Using a rotor resurfacer requires safety gear and some skill. It is best done in a clean workspace. The process takes about 30 minutes per rotor. After resurfacing, check the rotor thickness to ensure it meets safety standards.
Diy Methods For Minor Repairs
Minor rotor issues can be fixed at home with simple tools. Light rust and small scratches can be removed with sandpaper or a wire brush. Sand the rotor surface evenly in circular motions. Clean the rotor with brake cleaner afterward to remove dust.
DIY resurfacing is best for small problems only. Deep grooves or heavy damage need professional resurfacing or replacement. Always check rotor thickness before and after repair. This helps avoid unsafe brake conditions.
Reinstalling Brake Components
Reinstalling brake components is a vital step after restoring brake rotors. Proper reinstallation ensures your brakes work safely and smoothly. Taking care during this step helps avoid issues like noise or poor braking.
Follow each step carefully. Use the right tools. Check every part fits well before moving on.
Mounting The Rotor
Place the rotor on the wheel hub. Align it with the bolt holes. The rotor should sit flat without wobbling. Use the screws or bolts to secure it tightly. Tighten bolts evenly to prevent rotor warping. Clean the rotor surface with brake cleaner before mounting.
Reattaching Brake Calipers And Pads
Slide the brake pads into the caliper bracket. Make sure pads sit firmly without moving. Compress the caliper piston with a tool to fit over the rotor. Position the caliper over the rotor and pads carefully. Secure the caliper bolts tightly but do not overtighten. Check that the caliper moves smoothly and the pads contact the rotor correctly.
Final Checks And Test Drive
After restoring your brake rotors, perform final checks before driving. This step ensures safety and proper brake function. Double-checking saves time and prevents accidents. The test drive confirms the repair success and rotor performance.
Torque Specifications
Tighten all bolts to the correct torque. Use a torque wrench for accuracy. Over-tightening can damage parts. Under-tightening may cause loose components. Check the vehicle manual for exact torque values. Proper torque keeps the rotor secure and safe.
Brake Performance Testing
Start with slow stops in an empty area. Feel the brake pedal for firmness. Listen for unusual noises or vibrations. Test at different speeds to check response. If brakes feel spongy, recheck the system. Safe braking means confident driving on the road.
Maintenance Tips For Longevity
Maintaining brake rotors extends their life and ensures safe driving. Simple habits and checks help avoid costly repairs. Follow these tips to keep your rotors in good shape.
Regular Inspection Schedule
Check brake rotors every 10,000 miles or during tire changes. Look for grooves, cracks, or rust on the surface. Thin or warped rotors need replacement or resurfacing. Use a micrometer to measure rotor thickness. Compare with manufacturer’s minimum thickness. Inspect brake pads too; worn pads damage rotors quickly. Early detection prevents bigger problems and saves money.
Driving Habits To Protect Rotors
Avoid hard braking whenever possible. Gradual stops reduce rotor heat and wear. Do not ride the brakes on downhill roads. Use engine braking to lower speed safely. Avoid driving through water or mud at high speed. Sudden temperature changes can warp rotors. Regular driving at moderate speeds keeps rotors cool. Gentle driving improves rotor life and brake performance.

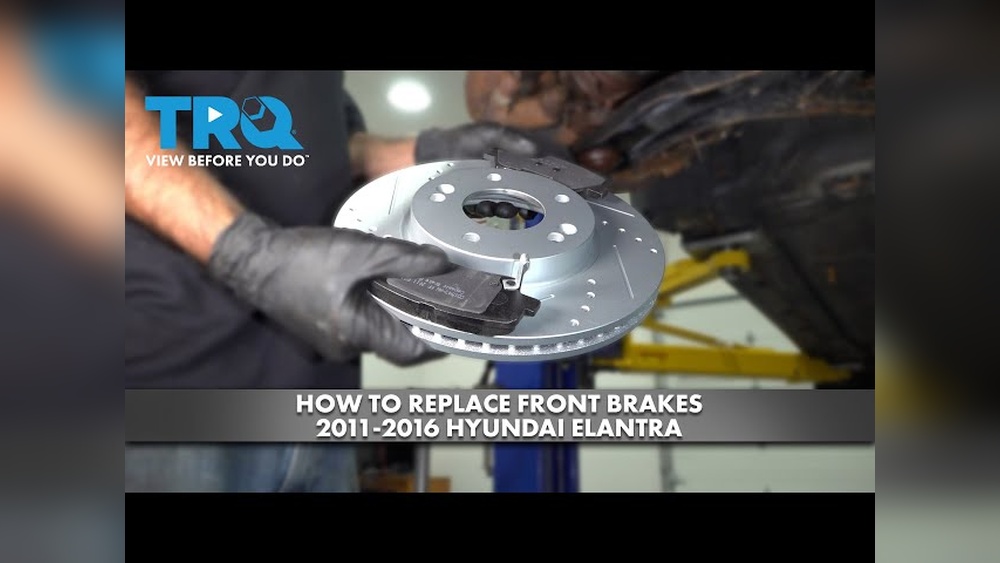
Credit: www.youtube.com
Frequently Asked Questions
How Do I Know When To Restore Brake Rotors?
You should restore brake rotors when you notice vibrations, squeaking, or uneven wear. Regular inspection helps identify damage early. If rotors are warped or have deep grooves, restoration or replacement is necessary for safe braking performance.
Can I Restore Brake Rotors At Home Safely?
Yes, you can restore brake rotors at home with proper tools like a lathe or sanding equipment. Always follow safety guidelines and ensure the rotors meet thickness specifications after restoration. If unsure, seek professional help.
What Tools Are Needed To Restore Brake Rotors?
Essential tools include a brake lathe or rotor resurfacing machine, sandpaper, calipers, and safety gear. These tools help remove surface imperfections and restore rotor smoothness for optimal braking.
How Long Does It Take To Restore Brake Rotors?
Restoring brake rotors typically takes 30 to 60 minutes per rotor, depending on damage severity and equipment used. Proper cleaning and precise resurfacing ensure effective restoration and improved brake performance.
Conclusion
Restoring brake rotors keeps your car safe and running smooth. Clean, sand, or resurface the rotors carefully for best results. Check for deep grooves or warping before starting work. Use the right tools and take your time with each step.
Regular maintenance helps prevent costly repairs later. A well-maintained brake system gives you confidence on the road. Keep your brakes in good shape to protect yourself and others. Simple care goes a long way toward safer driving.