If you want to keep your car running smoothly, knowing how to take off brake rotors is a skill you need. Maybe your brakes are making noise, or you want to upgrade your parts.
Whatever the reason, removing brake rotors might seem tricky at first—but it doesn’t have to be. In this guide, you’ll learn simple steps to safely and easily take off your brake rotors, saving you time and money. Ready to get your hands dirty and take control of your car maintenance?
Let’s dive in.
Tools Needed
Removing brake rotors requires the right tools. Using proper tools makes the job safer and easier. Below is a list of essential tools you need before starting.
Essential Hand Tools
A good set of hand tools is a must. You need a socket wrench with different socket sizes. A breaker bar helps to loosen tight bolts. Screwdrivers, both flathead and Phillips, come in handy. A rubber mallet can help tap the rotor gently. Also, a C-clamp or brake caliper tool helps compress the brake caliper piston.
Safety Equipment
Safety should be your top priority. Always wear safety glasses to protect your eyes. Use gloves to avoid cuts and keep hands clean. A dust mask helps prevent breathing brake dust. Closed-toe shoes protect feet from falling tools or parts.
Optional Helpful Tools
Some extra tools can make the task smoother. A torque wrench ensures bolts are tightened correctly. Penetrating oil helps loosen rusty bolts. A wire brush cleans rust from the rotor and hub. A jack and jack stands safely lift and hold your vehicle.

Credit: www.wikihow.com
Preparing The Vehicle
Preparing the vehicle is the first step to take off brake rotors safely. Proper preparation helps avoid accidents and damage. It also makes the job easier and faster. Follow these simple steps to get your vehicle ready for rotor removal.
Securing The Car
Park the car on a flat surface. Engage the parking brake firmly. Place wheel chocks behind the wheels still on the ground. This stops the car from rolling. Use a jack to lift the vehicle at the correct jacking point. Then, support the car with sturdy jack stands. Never rely on the jack alone to hold the car up.
Removing The Wheel
Loosen the lug nuts before lifting the car. After the car is raised and stable, remove the lug nuts completely. Pull the wheel straight off the hub. Place the wheel aside in a safe spot. This gives clear access to the brake assembly and rotor.
Inspecting Brake Components
Check the brake pads for wear or damage. Look for cracks or grooves on the rotor surface. Examine the caliper for leaks or rust. Identifying issues now helps plan repairs or replacements. Clean the area around the brake parts to remove dust and dirt.
Removing The Brake Caliper
Removing the brake caliper is a key step in taking off brake rotors. The caliper holds the brake pads and presses them against the rotor to stop the car. Taking it off carefully keeps the system safe and ready for reassembly.
Locating Caliper Bolts
Start by finding the caliper bolts. They usually sit on the back of the caliper. Look for two bolts holding the caliper to the bracket. These bolts can be hidden behind dust or dirt.
Use a flashlight if needed. Clean the area for better access. This helps prevent damage to bolts or surrounding parts.
Safely Detaching The Caliper
Use the right size socket or wrench to loosen the bolts. Turn them slowly to avoid stripping. Once loose, remove the bolts and gently pull the caliper away from the rotor.
Do not force the caliper off. If it sticks, tap it lightly with a rubber mallet. This frees it without causing damage.
Supporting The Caliper
Never let the caliper hang by the brake hose. This can cause damage or leaks. Use a sturdy wire or hook to hang the caliper from the suspension or frame.
Supporting the caliper keeps the brake line safe and avoids extra repairs. Take your time to secure it properly before moving on.
Credit: www.youtube.com
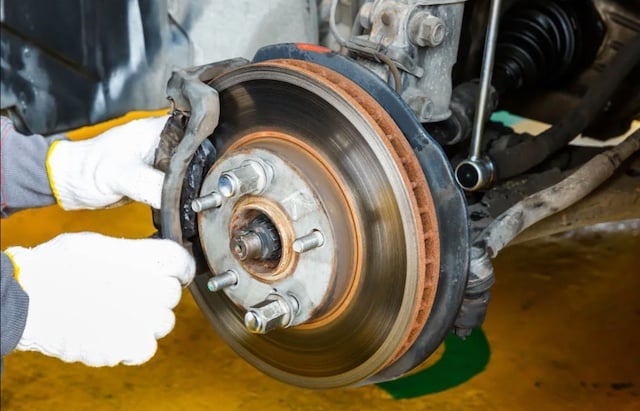
Detaching The Brake Rotor
Detaching the brake rotor is a key step in brake maintenance and repair. It requires care and the right tools. Proper removal avoids damage to other parts. This section guides you through the process of taking off the rotor safely.
Removing Retaining Screws
Retaining screws hold the rotor firmly in place. Use a screwdriver or impact driver to remove them. Turn the screws counterclockwise to loosen. Keep the screws safe for reassembly. Some vehicles have no screws, so check your model first.
Handling Rust And Corrosion
Rust often builds up around the rotor hub. Spray a rust remover or penetrating oil on the affected areas. Let it sit for several minutes to loosen rust. Use a wire brush to clean off corrosion. This step helps the rotor come off more easily.
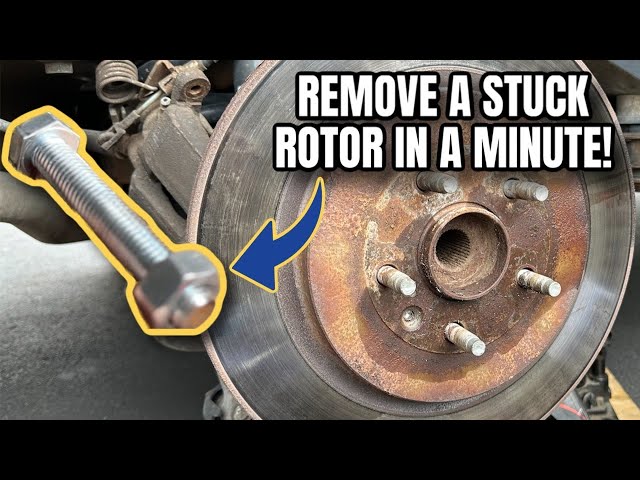
Using A Mallet For Stuck Rotors
Sometimes rotors get stuck due to rust or tight fit. Use a rubber mallet to tap the rotor gently. Hit near the edge, not the center, to avoid damage. Rotate the rotor while tapping to loosen it evenly. Avoid using excessive force to prevent parts from breaking.
Safety Tips
Taking off brake rotors requires care and attention to safety. Ignoring safety can cause injury or damage. Follow these safety tips to work smart and safe.
Preventing Injury
Wear safety glasses to protect your eyes from dust and debris.
Use gloves to avoid cuts and skin irritation from sharp edges.
Work on a flat surface and keep the car stable with jack stands.
Do not rush the process. Take your time to avoid slips.
Avoiding Damage To Parts
Use the right tools to loosen bolts without stripping them.
Remove parts gently to avoid bending or breaking components.
Do not hit the rotor hard; this can crack or warp it.
Keep bolts and screws organized to prevent losing them.
Cleaning And Storage
Clean rotors with brake cleaner to remove grease and dirt.
Store rotors in a dry place to prevent rust.
Place them on a soft surface to avoid scratches or dents.
Label parts if needed to keep track of their position.
Credit: www.buybrakes.com
Frequently Asked Questions
How Do I Safely Remove Brake Rotors?
First, lift the vehicle and remove the wheel. Then, take off the brake caliper and caliper bracket. Finally, slide the rotor off the hub. Use a rubber mallet if it’s stuck. Always wear safety gear and follow vehicle-specific instructions.
What Tools Are Needed To Take Off Brake Rotors?
You need a jack, lug wrench, socket set, and screwdriver. A rubber mallet helps loosen stuck rotors. Brake cleaner and a wire brush are useful for cleaning parts. Always have safety gloves and eye protection handy.
Can I Remove Brake Rotors Without Removing Calipers?
No, removing brake calipers is necessary to free the rotors. The calipers hold the brake pads against the rotors. Removing them prevents damage and allows rotor removal. Always support the caliper to avoid stressing brake lines.
How Do I Loosen Stuck Brake Rotors?
Apply penetrating oil around the rotor hub and let it sit. Tap the rotor gently with a rubber mallet to break rust bonds. Avoid using excessive force that may damage parts. Patience and proper tools help loosen stubborn rotors safely.
Conclusion
Taking off brake rotors is simple with the right steps. Always keep safety first and use the right tools. Clean and check parts as you work. This helps your brakes last longer and work better. Practice makes the process faster and easier.
You can save money by doing this yourself. Remember, careful work keeps your car safe on the road.