
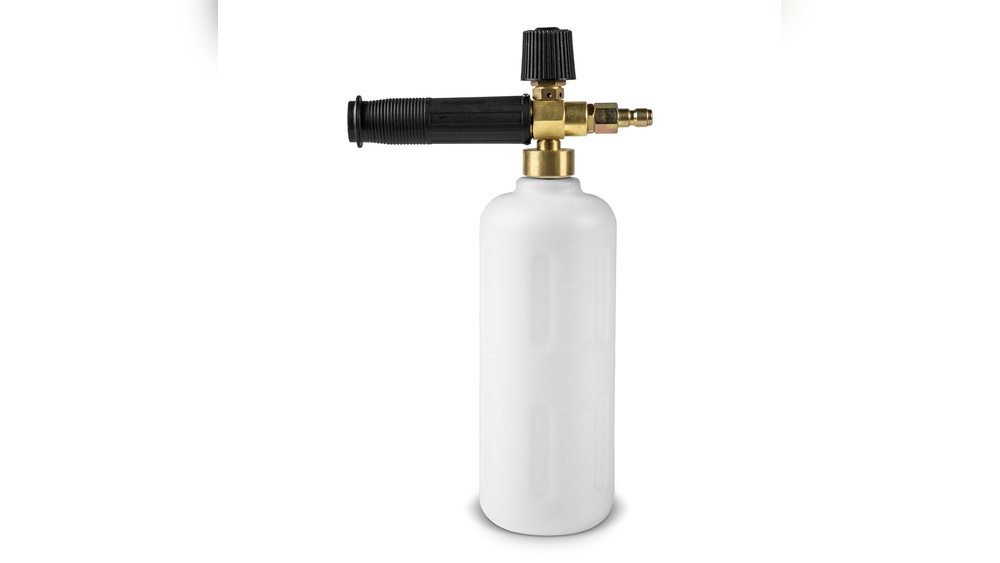
If you want your car to look spotless without spending hours scrubbing, a Karcher foam cannon is your secret weapon. Imagine covering your vehicle in thick, clinging foam that lifts dirt away effortlessly.
You might be wondering how to get the best results with it. In this guide, you’ll discover simple steps to use your Karcher foam cannon like a pro. By the end, you’ll know exactly how to save time, protect your paint, and enjoy a shine that turns heads.
Ready to transform your car wash routine? Let’s dive in.
Choosing The Right Foam Cannon
Choosing the right foam cannon is key to getting the best cleaning results with your Karcher pressure washer. The right foam cannon helps you cover surfaces evenly with soap, making dirt and grime easier to remove. It also saves time and water, giving you a better wash every time.
Types Of Foam Cannons
Foam cannons come in different shapes and sizes. Some have adjustable nozzles to control foam thickness. Others offer fixed spray patterns for quick use. A good foam cannon should be easy to fill and clean. Look for models made of durable materials like plastic or metal. Some foam cannons include extra features like measuring cups or soap filters. Choose one that fits your cleaning needs and budget.
Compatibility With Pressure Washers
Not all foam cannons fit all pressure washers. Check your Karcher model for pressure and flow rate limits. Most foam cannons connect with a quick-release or threaded fitting. Make sure the foam cannon matches your washer’s connectors. Using an incompatible foam cannon may cause leaks or poor foam spray. Always read product details to confirm compatibility before buying.
Best Foam For Different Surfaces
Choose the right foam soap for each surface. Car wash foam cleans paint without damage. Heavy-duty foam works well on trucks and machinery. Use gentle foam on glass and plastic parts. Some foams include wax or conditioners for extra shine. Avoid harsh chemicals on delicate surfaces. Test foam on a small area first to avoid harm.
Setting Up Your Foam Cannon
Setting up your Karcher foam cannon is simple and quick. Proper setup ensures even foam coverage and effective cleaning. Follow these steps to get your foam cannon ready.
Assembling The Parts
Start by attaching the foam cannon’s bottle to the main unit. Screw the bottle tightly to avoid leaks. Check that the nozzle and connectors are secure. Use the included parts only for best results.
Connecting To The Pressure Washer
Attach the foam cannon to the pressure washer’s spray gun. Push the connector firmly until it clicks. Ensure the connection is tight to prevent air leaks. Use the correct adapter if needed for your washer model.
Adjusting The Nozzle And Spray Pattern
Turn the nozzle to adjust the spray width. A narrow spray covers less area but is stronger. A wide spray covers more surface but with less pressure. Adjust the foam mix by turning the dial on the bottle.
Mixing The Soap Solution
Mixing the soap solution correctly is key to getting the best results with your Karcher foam cannon. The right mix creates thick foam that sticks to your car and cleans well. Too much soap or too little water can cause problems. Follow simple steps to make the perfect solution.
Start with the right detergent and mix it in the correct ratio. Avoid common mistakes to protect your equipment and your vehicle’s paint.
Selecting The Right Detergent
Choose a detergent made for foam cannons or pressure washers. These soaps produce rich foam and rinse off easily. Avoid harsh chemicals or household cleaners that can damage your car’s paint. Use biodegradable soaps for an eco-friendly option.
Recommended Soap-to-water Ratios
Most foam cannons work well with a ratio of 1 part soap to 10 parts water. This mix creates thick foam without wasting detergent. Some soaps may require a different ratio. Always check the detergent label for specific instructions.
Avoiding Common Mixing Mistakes
Never fill the foam cannon bottle with soap first. Always add water before the soap. Shake the bottle gently to mix the solution. Avoid using too much soap; it can clog the cannon. Rinse the foam cannon after use to keep it clean.
Applying Foam For Effective Cleaning
Applying foam with a Karcher foam cannon makes cleaning easier and more effective. The thick foam clings to surfaces, loosening dirt and grime. Using the right techniques helps get the best results and saves time.
Follow these tips to apply foam correctly and clean thoroughly.
Proper Spraying Techniques
Hold the foam cannon about 12 inches from the surface. Spray in smooth, even strokes. Avoid staying in one spot too long to prevent dripping. Move slowly to cover all areas evenly. Use a consistent pressure for steady foam flow.
Coverage Tips For Different Surfaces
For cars, cover the entire body in overlapping passes. For windows and glass, use a lighter foam layer to avoid streaks. On rough surfaces, apply more foam to reach crevices. Adjust foam thickness using the cannon’s settings to suit each surface.
Optimal Dwell Time For Foam
Let the foam sit on the surface for 5 to 10 minutes. This time lets the foam break down dirt and grime. Avoid letting foam dry out, as it can leave spots. Rinse off thoroughly with water after dwell time ends.
Rinsing And Final Touches
Rinsing and final touches are key steps after using the Karcher foam cannon. Proper rinsing removes all soap and dirt. It helps protect your vehicle’s surface from damage. The final touches give your car a clean, shiny look. Follow simple steps for the best results.
Best Practices For Rinsing
Start rinsing with clean water at low pressure. Hold the spray nozzle about 12 inches from the surface. Rinse from top to bottom to avoid streaks. Remove all foam and dirt completely. Take your time to rinse every part.
Spot Cleaning And Stubborn Stains
Check the surface for leftover dirt or stains. Use a soft cloth or sponge for spot cleaning. Apply a small amount of car shampoo if needed. Gently scrub the stubborn stains without scratching. Rinse the spot again after cleaning.
Drying And Maintenance Tips
Dry your vehicle using a clean microfiber towel. Pat dry instead of rubbing to avoid scratches. Dry all areas, including mirrors and door handles. Store the foam cannon and accessories in a dry place. Clean the foam cannon after each use for longer life.

Credit: www.youtube.com
Troubleshooting Common Issues
Troubleshooting common issues with your Karcher foam cannon can save time and improve cleaning results. Many problems have simple fixes. Understanding these can keep your foam cannon working well.
Foam Cannon Not Producing Foam
Check if the soap bottle has enough detergent. Use a soap suitable for foam cannons. Clean the nozzle if it is clogged. Make sure the water pressure is strong. Adjust the soap mix ratio for better foam.
Uneven Foam Application
Inspect the spray pattern for blockages. Clean the nozzle and spray tip regularly. Adjust the nozzle angle to get an even spread. Check the foam cannon’s connection to the pressure washer. Tighten loose parts to avoid leaks.
Leaks And Connection Problems
Examine all connections for tightness. Replace worn or damaged seals and O-rings. Avoid overtightening to prevent damage. Use thread tape on threaded joints. Keep hoses free from kinks and sharp bends.
Maintaining Your Foam Cannon
Maintaining your Karcher foam cannon ensures it works well for a long time. Regular care keeps the parts clean and prevents damage. Simple steps make your foam cannon ready for every wash session.
Cleaning After Use
Rinse the foam cannon with clean water after each use. Remove leftover soap from the container and nozzle. Run plain water through the cannon to clear any soap inside. This stops clogs and keeps the spray smooth.
Storage Recommendations
Store the foam cannon in a dry place away from sun. Avoid freezing temperatures to protect the seals and plastic parts. Keep it in a clean area to prevent dust buildup. Store the foam cannon upright to avoid leaks.
Replacing Worn Parts
Check the nozzle and seals regularly for cracks or wear. Replace parts that look damaged or do not fit well. Use original Karcher parts for the best fit and performance. Timely replacement keeps the foam cannon working like new.

Credit: washme.ie

Credit: www.amazon.com
Frequently Asked Questions
How Do I Attach The Karcher Foam Cannon?
To attach the Karcher foam cannon, connect it securely to your pressure washer’s spray gun. Ensure the connection is tight to prevent leaks. Fill the cannon with soap solution, then adjust the nozzle for desired foam thickness before use.
What Soap Is Best For Karcher Foam Cannon?
Use a pH-neutral, car-safe soap designed for foam cannons. Avoid harsh detergents or household cleaners that can damage your car’s paint. Proper soap ensures thick foam and effective cleaning without harming surfaces.
How To Adjust Foam Thickness On Karcher Cannon?
Adjust foam thickness by turning the nozzle or mixing ratio dial. Increasing soap concentration or reducing water flow creates thicker foam. Experiment with settings for optimal foam coverage and cleaning power on your vehicle.
Can I Use Karcher Foam Cannon On All Surfaces?
Karcher foam cannons work best on painted vehicles and smooth surfaces. Avoid using on delicate materials like untreated wood or fabric. Always test a small area first to ensure no damage or discoloration occurs.
Conclusion
Using a Karcher foam cannon makes car cleaning easier and faster. It helps cover your vehicle with thick foam that lifts dirt gently. Always follow the steps for the best results. Clean your foam cannon after each use to keep it working well.
Regular washing keeps your car shiny and protected. Try different foam mixtures to find what works best. Enjoy a cleaner car with less effort every time you wash. Simple tools can make a big difference in car care.
