
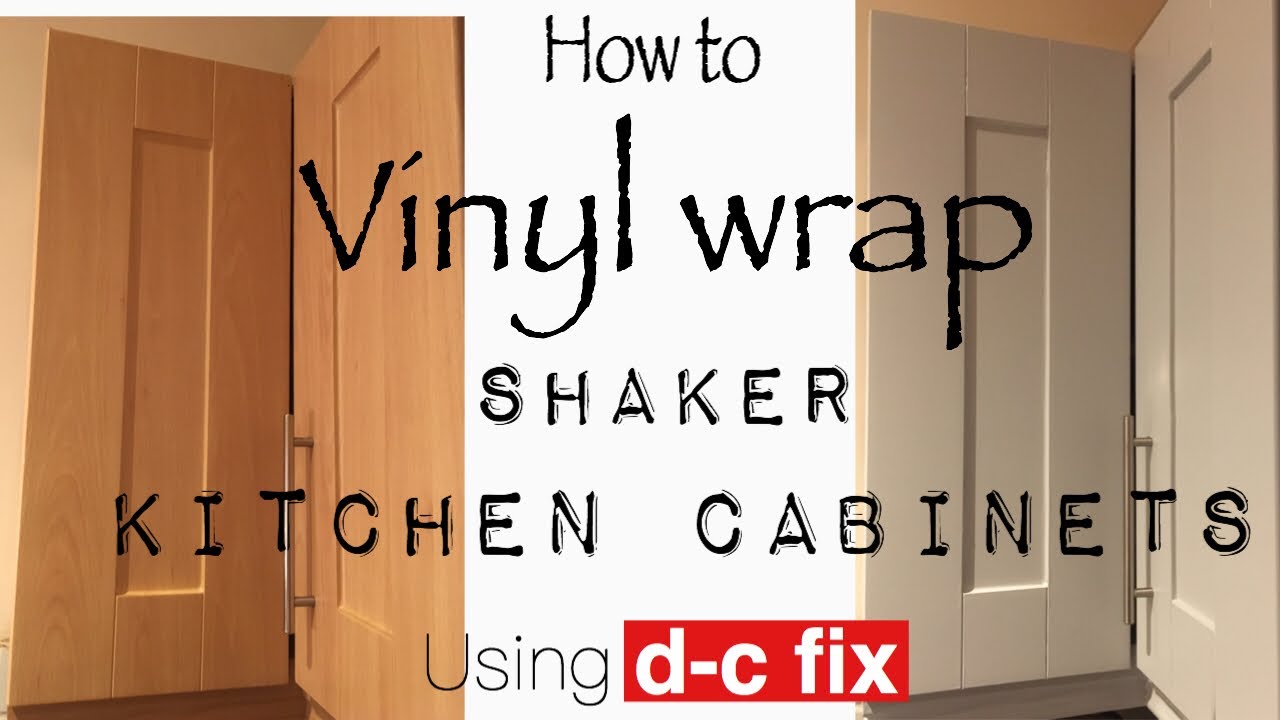
Are your cabinet doors looking tired or outdated? You don’t have to replace them to give your kitchen or bathroom a fresh, modern look.
Vinyl wrapping your cabinet doors is a simple, affordable way to transform your space quickly. In this guide, you’ll discover easy steps to achieve a smooth, professional finish that lasts. Whether you’re a DIY beginner or just want to save money, you’ll find tips that make the process clear and stress-free.
Ready to give your cabinets a stunning makeover? Let’s dive in and get started!

Credit: www.thekitchendoorcompany.com.au
Materials And Tools Needed
Before starting to vinyl wrap your cabinet doors, gather all necessary materials and tools. Having the right supplies makes the process easier and faster. It also helps to get a smooth, lasting finish. This section covers the basics you need to begin.
Choosing The Right Vinyl Wrap
Pick vinyl wrap designed for cabinets or furniture. These have a strong adhesive and flexible texture. Choose a color or pattern that fits your room style. Matte finishes hide fingerprints better than glossy ones. Measure your doors to buy enough vinyl without waste.
Essential Tools For Wrapping
Use a squeegee to smooth out air bubbles and wrinkles. A sharp utility knife helps trim excess vinyl precisely. Keep a heat gun or hairdryer to soften vinyl around curves. Clean cloths and rubbing alcohol remove dirt and grease. A tape measure and pencil help mark cutting lines.
Preparing Your Workspace
Work in a clean, flat area with good lighting. Clear the space from dust and clutter. Lay a soft cloth or mat to protect your vinyl. Organize all tools within easy reach. Open windows or use a fan for fresh air during work.
Credit: www.youtube.com
Preparing Cabinet Doors
Preparing cabinet doors is the first step to a smooth vinyl wrap project. Proper preparation ensures the vinyl sticks well and lasts longer. It also gives the doors a clean and fresh look after wrapping.
Removing Hardware
Remove all knobs, handles, and hinges from the cabinet doors. Use a screwdriver to take off screws carefully. Place hardware parts in a safe spot to avoid losing them. This step helps you wrap the entire surface without bumps.
Cleaning And Sanding Surfaces
Clean the cabinet doors thoroughly with soap and water. Remove grease, dirt, and dust for better vinyl adhesion. Let the doors dry completely before sanding.
Lightly sand the surface using fine-grit sandpaper. Sanding creates a rough texture that helps the vinyl stick. Wipe off sanding dust with a clean cloth afterward.
Fixing Imperfections
Check the doors for dents, scratches, or holes. Use wood filler to fill any imperfections. Let the filler dry and sand it smooth to match the surface. A smooth door surface makes the vinyl wrap look flawless.
Cutting And Measuring Vinyl
Cutting and measuring vinyl is a key step in wrapping cabinet doors. It ensures the vinyl fits perfectly without wrinkles or bubbles. Taking time to measure and cut carefully saves effort later.
Measuring Doors Accurately
Start by removing the cabinet doors from their hinges. Lay each door flat on a clean surface. Use a tape measure to get the width and height of the door. Measure both sides and the edges if you want full coverage. Write down the numbers clearly to avoid mistakes. Add an extra inch to each side for trimming and folding. This extra space helps when wrapping the edges smoothly.
Cutting Vinyl To Size
Roll out the vinyl on a large flat area. Place the door measurements on the back of the vinyl. Use a pencil or marker to mark the cutting lines. Cut the vinyl carefully with a sharp utility knife or scissors. Cut slowly to keep straight edges. Keep the extra inch for folding around edges. Make sure the vinyl piece is slightly larger than the door. This allows room to adjust and prevent gaps.
Applying The Vinyl Wrap
Applying the vinyl wrap is the key step in transforming your cabinet doors. This stage requires patience and a steady hand to get a smooth, professional look. The goal is to lay the vinyl flat without wrinkles or bubbles. Take your time to position the wrap correctly before pressing it down.
Positioning The Vinyl
Start by peeling a small section of the vinyl backing. Align the top edge of the vinyl with the cabinet door. Hold the vinyl taut but not stretched. Slowly press the exposed part onto the door. Gradually pull the backing away while smoothing the vinyl down. Check that the wrap covers the entire surface evenly.
Smoothing Out Air Bubbles
Use a plastic squeegee or a credit card to smooth out bubbles. Push from the center toward the edges. Small bubbles may disappear as you press. For stubborn bubbles, lift the vinyl gently and reapply. Work carefully to avoid stretching the vinyl too much. Smooth surfaces make the wrap last longer.
Trimming Excess Material
After smoothing, trim extra vinyl around the edges. Use a sharp utility knife for clean cuts. Cut close to the door edges but avoid cutting into the cabinet. Take your time to follow the door shape precisely. Removing excess vinyl prevents peeling and gives a neat finish.
Finishing Touches
Finishing touches give your vinyl wrapped cabinet doors a polished look. These final steps protect your work and make the cabinets last longer. Proper care and simple fixes keep the wrap smooth and neat.
Reattaching Hardware
Remove screws and knobs carefully before wrapping. After wrapping, align holes and reattach hardware slowly. Tighten screws just enough to hold firmly. Avoid over-tightening to prevent damage to the vinyl. Check that doors open and close smoothly.
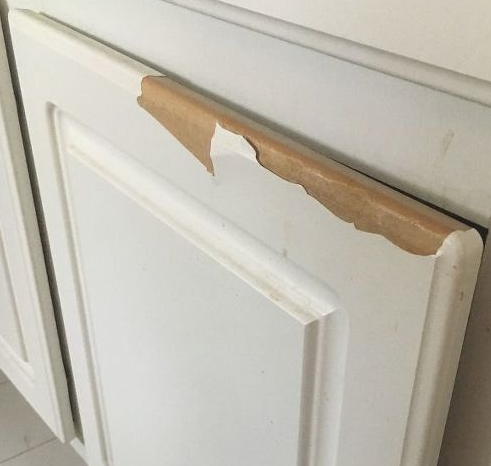
Sealing Edges
Edges can peel without proper sealing. Use a clear, strong adhesive or edge sealer to protect corners. Press edges firmly with a plastic squeegee or your fingers. Make sure no bubbles or wrinkles remain near edges. Sealing stops moisture and dirt from getting under the wrap.
Caring For Wrapped Cabinets
Clean wrapped surfaces with a soft, damp cloth. Avoid harsh chemicals or abrasive cleaners that can ruin vinyl. Wipe spills quickly to prevent stains. Use gentle motion to keep the wrap smooth and shiny. Regular care keeps your cabinets looking fresh for years.
Common Mistakes To Avoid
Vinyl wrapping cabinet doors can transform your space. Avoiding common mistakes ensures a smooth, clean finish. Small errors can cause wrinkles, bubbles, or peeling. Take time to do it right.
Skipping Surface Preparation
Surface preparation is key. Dirt, grease, or old paint stop vinyl from sticking well. Clean the cabinet doors with soap and water. Dry them completely. Sand rough spots lightly for a smooth surface. Skip this step, and the vinyl may peel quickly.
Incorrect Vinyl Placement
Place the vinyl carefully from the start. Align it properly before pressing down. Avoid stretching the vinyl too much; it can warp or tear. Use a squeegee to smooth it out slowly. Wrong placement leads to wrinkles and uneven edges.
Ignoring Air Bubbles
Air bubbles ruin the look and feel. Use a squeegee to push bubbles toward the edges. If bubbles remain, prick them gently with a pin. Press flat again to remove trapped air. Ignoring bubbles causes uneven surfaces and reduces vinyl life.
Tips For Long-lasting Wraps
Keeping your vinyl-wrapped cabinet doors looking fresh takes care and attention. Small habits make a big difference in how long the wrap lasts. Follow simple tips to protect your investment and enjoy a neat, stylish kitchen for years.
Focus on preventing damage from moisture, cleaning gently, and fixing small problems quickly. These steps keep the wrap strong and smooth.
Avoiding Excessive Moisture
Water can weaken the adhesive under the vinyl. Wipe spills immediately with a dry cloth. Avoid using wet mops or soaking the cabinet doors. Use a damp cloth instead. Keep steam away by opening windows or using a fan during cooking.
Regular Cleaning Techniques
Clean the vinyl gently to keep it bright and smooth. Use mild soap mixed with water. Apply with a soft cloth or sponge. Avoid harsh chemicals or abrasive scrubbers. Dry the surface with a clean towel after wiping. Clean regularly to stop dirt buildup.
Handling Minor Repairs
Small scratches or bubbles can appear over time. Press bubbles out gently with a plastic card. For tiny tears, use vinyl repair kits found online or in stores. Fix issues quickly before they get worse. This keeps the wrap looking new longer.
Credit: www.wesprayupvc.co.uk
Frequently Asked Questions
How Do I Prepare Cabinet Doors For Vinyl Wrapping?
Clean the doors thoroughly to remove dirt and grease. Sand lightly to create a smooth surface. Remove all hardware before applying vinyl wrap. Proper preparation ensures better adhesion and a flawless finish.
What Tools Are Needed For Vinyl Wrapping Cabinet Doors?
You need a squeegee, heat gun, utility knife, and measuring tape. These tools help in applying, smoothing, and trimming the vinyl wrap accurately. Having the right tools makes the process easier and more professional.
How Long Does Vinyl Wrapping Cabinet Doors Take?
The process usually takes 1 to 3 hours per door. Time varies depending on door size and your skill level. Allow additional time for surface preparation and drying.
Can I Use Any Vinyl Wrap For Cabinet Doors?
Use high-quality adhesive vinyl designed for furniture and cabinets. Low-quality vinyl may peel or bubble over time. Choose vinyl with a protective finish for durability and easy cleaning.
Conclusion
Vinyl wrapping cabinet doors can change your space easily. It saves money and adds a fresh look. Careful measuring and cutting bring the best results. Take your time to smooth out bubbles. Choose a vinyl that fits your style and needs.
Small steps lead to big improvements in your cabinets. This project suits beginners and experts alike. Enjoy your new cabinet look without a full remodel. Try it and see how simple updates brighten your home.


