
Are you ready to give your car’s interior a fresh, stylish look without spending a fortune? Vinyl wrapping your car’s interior trim is a smart way to transform your ride quickly and easily.
Imagine turning dull, scratched panels into sleek, eye-catching surfaces that reflect your personality. In this guide, you’ll discover simple steps to wrap your car’s interior trim like a pro. Whether you want a matte black finish, a carbon fiber look, or a pop of color, this article will help you achieve it with confidence.
Keep reading to unlock the secrets that will make your car’s interior truly stand out.
Tools And Materials Needed
Preparing the right tools and materials is key for a smooth vinyl wrap job. Having everything ready helps you work faster and cleaner. It also improves the quality of the wrap on your car’s interior trim.
This section lists the supplies you need, the best tools for installation, and how to pick the right vinyl wrap for your project.
Essential Vinyl Wrap Supplies
Start with high-quality vinyl wrap sheets. Choose a size that fits your trim pieces.
Use cleaning products to remove dust and grease. Clean surfaces help the vinyl stick well.
Get a soft cloth or microfiber towel for wiping. Avoid scratches on delicate trim parts.
Have a sharp utility knife or blade for trimming excess vinyl. Precise cuts make the wrap look neat.
Recommended Tools For Installation
A heat gun or hairdryer helps soften the vinyl for easy shaping.
Use a squeegee or plastic card to smooth out bubbles and wrinkles.
Tweezers or small picks help lift edges without damaging the vinyl.
Use gloves to avoid fingerprints and keep the vinyl clean.
Choosing The Right Vinyl Wrap
Pick vinyl made for automotive interiors. It resists heat and moisture.
Choose a finish that suits your style: matte, gloss, or satin.
Check the vinyl’s thickness. Thicker vinyl lasts longer and covers better.
Buy from trusted brands to ensure quality and durability.
Preparing The Interior Trim
Preparing the interior trim is the first step in a successful vinyl wrap project. This step ensures the wrap sticks well and looks smooth. Clean and smooth surfaces help avoid bubbles and peeling later on. Proper preparation saves time and effort during installation.
Cleaning And Removing Dirt
Start by wiping the trim pieces with a soft cloth. Use soap and water to remove dust and dirt. Avoid harsh chemicals that can damage the surface. Dry the trim completely to prevent moisture from trapping under the vinyl. A clean surface helps the vinyl stick better.
Removing Old Adhesive
Old glue or adhesive can cause bumps under the vinyl. Use an adhesive remover or rubbing alcohol on a cloth. Gently rub the sticky areas until all residue is gone. Avoid using sharp tools that might scratch the trim. Clean surfaces make the vinyl smooth and long-lasting.
Disassembling Trim Pieces
Remove the trim pieces from the car if possible. This makes wrapping easier and more precise. Use the right tools to avoid breaking clips or fasteners. Label or organize the pieces to help with reassembly. Wrapping off the car gives better control and a cleaner finish.
Measuring And Cutting Vinyl
Measuring and cutting vinyl correctly is key to a smooth car interior wrap. Precise measurements help avoid waste and ensure the vinyl fits well. Cutting the vinyl with care saves time and makes the wrapping process easier.
Taking Accurate Measurements
Use a tape measure to get the exact size of each trim piece. Measure length and width carefully. Write down each measurement. Double-check to avoid mistakes. Measure twice, cut once. Small errors can cause big problems later.
Cutting Vinyl To Size
Place the vinyl on a flat surface before cutting. Use sharp scissors or a utility knife for clean edges. Cut slowly along your marked lines. Keep the vinyl steady to avoid jagged cuts. Trim extra vinyl after fitting if needed.
Allowing For Stretch And Overlap
Add a few extra inches to each piece for stretching. Vinyl stretches slightly during application. Extra material helps cover curves and corners. Overlap edges to avoid gaps. This gives a smooth, seamless look to the trim.
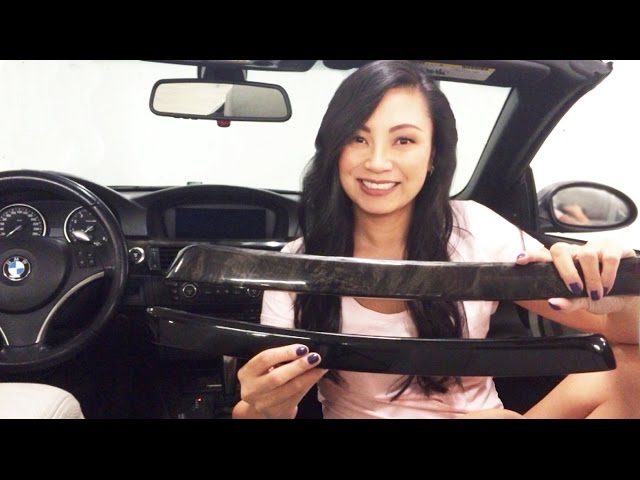
Credit: www.youtube.com
Applying The Vinyl Wrap
Applying vinyl wrap on your car’s interior trim requires care and patience. This step shapes the final look and feel of the wrap. Proper application prevents bubbles and wrinkles. It helps the vinyl stick well and last longer. Follow these steps to apply the wrap smoothly and neatly.
Positioning The Vinyl On Trim
Place the vinyl over the trim part carefully. Align edges to cover the entire surface. Leave a little extra vinyl on all sides. This extra margin helps during stretching and cutting. Check the fit before peeling off the backing paper. Adjust the vinyl to avoid folds or creases.
Using Heat To Stretch And Mold
Use a heat gun or hair dryer on low heat. Warm the vinyl gently to make it flexible. Stretch the vinyl slowly over curves and corners. Heat helps the vinyl mold tightly to trim shapes. Avoid overheating to prevent damage or bubbles. Work on small sections, reheating as needed.
Smoothing Out Bubbles And Wrinkles
Start smoothing from the center outwards. Use a soft squeegee or cloth to push air out. Apply steady pressure to remove bubbles under the vinyl. Small wrinkles can be heated and stretched again. Take your time to make the surface flat. Smooth vinyl looks professional and lasts longer.
Finishing Touches
The finishing touches make your vinyl wrap look clean and professional. Small details matter for a smooth, lasting finish. This step ensures your interior trim stands out and lasts longer.
Trimming Excess Vinyl
Use a sharp blade to cut away extra vinyl. Cut carefully along edges for a neat fit. Avoid cutting too deep to protect the trim surface. Take your time to prevent mistakes.
Reassembling Trim Components
Put all trim pieces back in place carefully. Check that clips and screws fit correctly. Ensure the vinyl does not wrinkle or peel during reassembly. Press firmly on all parts to secure them.
Cleaning And Maintaining Wrapped Surfaces
Clean the wrapped trim with a soft cloth and mild soap. Avoid harsh chemicals that can damage the vinyl. Wipe regularly to keep dust and dirt away. Protect the vinyl from direct sunlight when possible.
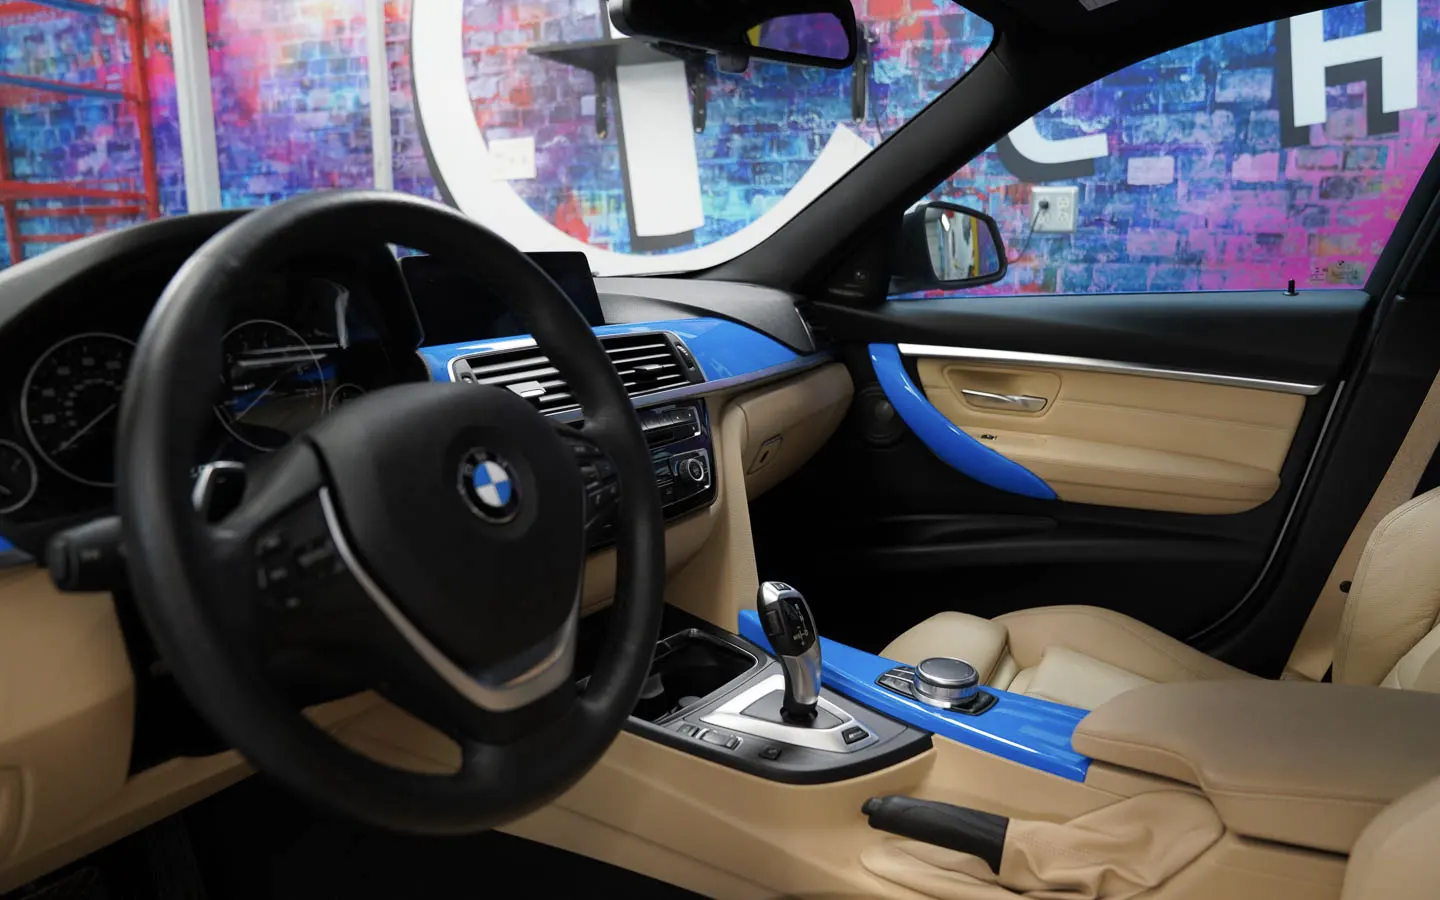
Credit: www.tintingchicago.com
Troubleshooting Common Issues
Vinyl wrapping car interior trim can be tricky. Small mistakes may cause problems that affect the final look. Knowing how to fix common issues saves time and keeps your work neat. Below are simple ways to solve typical problems during vinyl wrapping.
Fixing Air Bubbles
Air bubbles often form under the vinyl during application. Use a pin to gently poke a tiny hole in the bubble. Press the air out with a soft cloth or squeegee. Work slowly from the center to the edges. Avoid stretching the vinyl too much. This method helps the surface stay smooth and clean.
Handling Wrinkles And Creases
Wrinkles appear when the vinyl folds during wrapping. Warm the vinyl slightly with a heat gun or hair dryer. Heat softens the vinyl, making it easier to stretch and smooth. Use a squeegee to push wrinkles out toward the edges. Take care not to overheat, as this can damage the vinyl or trim.
Dealing With Adhesion Problems
Poor adhesion happens if the surface is dirty or oily. Clean the trim with alcohol or a mild cleaner before wrapping. Press the vinyl firmly using a squeegee to improve stickiness. For stubborn areas, gently heat the vinyl to activate the adhesive. Proper surface prep and pressure ensure the vinyl stays in place for a long time.
Tips For Long-lasting Wraps
Keeping your vinyl wrap looking fresh and new takes some care. Simple steps help the wrap last longer and stay smooth. Protecting the wrap from damage keeps your car’s interior trim stylish and clean for years.
Avoiding Harsh Chemicals
Harsh chemicals can break down vinyl quickly. Avoid cleaners with alcohol, acetone, or strong solvents. Use mild soap and water for cleaning. Gentle products keep the vinyl flexible and bright. Always test any cleaner on a small area first.
Protecting From Sun Damage
Sunlight fades and weakens vinyl over time. Park in the shade or use sunshades inside the car. Window tints also reduce UV exposure. Keeping the car cool helps prevent vinyl from peeling. Cover the interior trim if the car stays outside long.
Regular Care And Inspection
Check the vinyl wrap often for bubbles or tears. Fix small issues quickly before they grow. Clean the wrap gently every week or two. Avoid sharp tools that can scratch the surface. Regular care stops damage and keeps the wrap smooth.
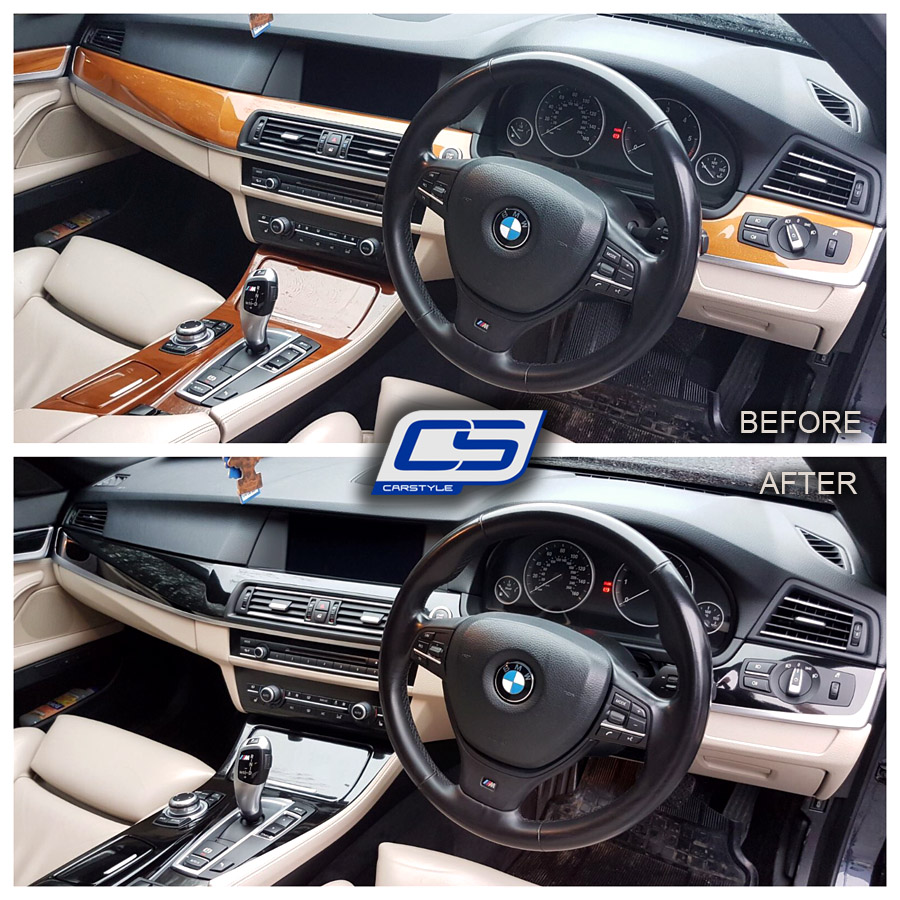
Credit: carstyle.ie
Frequently Asked Questions
What Tools Are Needed To Vinyl Wrap Car Interior Trim?
You need vinyl wrap film, a heat gun, a squeegee, a utility knife, and cleaning supplies. These tools ensure smooth application and a professional finish.
How Long Does Vinyl Wrapping Interior Trim Take?
Vinyl wrapping interior trim usually takes 1 to 3 hours depending on trim complexity and experience. Preparation and patience are key for quality results.
Can I Remove Vinyl Wrap Without Damage?
Yes, vinyl wrap can be removed without damage if done carefully. Use heat to soften adhesive and peel slowly to avoid residue or surface harm.
Is Vinyl Wrap Durable For Car Interiors?
Vinyl wrap is durable and resistant to scratches and fading. However, avoid harsh cleaning chemicals to maintain its appearance and prolong lifespan.
Conclusion
Vinyl wrapping your car’s interior trim is a smart way to refresh its look. It saves money compared to replacing parts. You control the style and color easily. Take your time and work carefully for best results. Small details make a big difference in appearance.
With patience, anyone can improve their car’s interior. Try it step by step and enjoy the new feel inside your car. A simple change can make your drive more enjoyable every day.


