
Are you looking to give your car a fresh, stylish look without spending a fortune? Vinyl wrapping your car trim is one of the easiest and most affordable ways to transform your vehicle’s appearance.
Imagine turning dull, scratched, or faded trim into sleek, glossy accents that catch every eye on the road. In this guide, you’ll learn simple, step-by-step tips to vinyl wrap your car trim like a pro—even if you have no prior experience.
Keep reading, and by the end, you’ll have the confidence to upgrade your car’s style quickly and effectively.
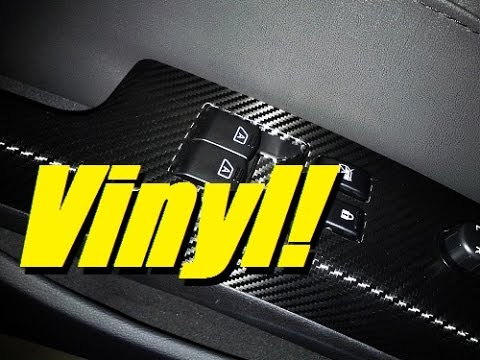
Credit: www.youtube.com
Tools And Materials Needed
Preparing to vinyl wrap car trim starts with gathering the right tools and materials. This step is crucial for a smooth and successful wrap. Using proper supplies helps the vinyl stick well and look professional. It also makes the job easier and faster. Below are key items to get before you begin.
Choosing The Right Vinyl
Select vinyl made specifically for automotive use. It should be flexible and durable to fit car trim curves. Look for cast vinyl, as it stretches without tearing. Glossy or matte finishes depend on your style choice. Pick a high-quality brand for better adhesion and longer life.
Essential Tools Checklist
Gather these tools to prepare and apply the vinyl trim:
- Heat gun or hair dryer to soften the vinyl
- Plastic squeegee to smooth out bubbles
- Sharp utility knife for precise cuts
- Isopropyl alcohol and lint-free cloth for cleaning surfaces
- Masking tape to hold vinyl in place before sticking
- Gloves to avoid fingerprints on vinyl
- Measuring tape or ruler for accurate sizing
Having these tools ready helps achieve a neat and lasting wrap.

Credit: www.amazon.com
Preparing The Car Trim
Preparing the car trim is a key step before applying vinyl wrap. Proper preparation helps the vinyl stick well and last longer. Clean and smooth surfaces create the best results. Spend time on this stage for a neat finish.
Every detail matters. Dirt or old glue can cause bubbles and peeling. Remove anything that blocks the vinyl from touching the trim directly. A clean trim means a clean wrap.
Cleaning The Surface
Start by washing the trim with soap and water. Remove all dirt, dust, and grease. Use a microfiber cloth to avoid scratches. Dry the surface completely before moving on.
Next, use an alcohol-based cleaner. It removes oils and residues that water cannot. Wipe the trim gently but thoroughly. Let the surface air dry for a few minutes.
Removing Old Trim Or Decals
Old trim or decals must come off for a smooth wrap. Peel them slowly to avoid damage. Use a plastic scraper to lift edges carefully.
Sticky glue left behind needs removal. Apply adhesive remover or rubbing alcohol. Rub gently with a cloth until all residue is gone. Clean the area again after removing glue.
Measuring And Cutting Vinyl
Measuring and cutting vinyl is a key step in wrapping car trim. Accuracy here saves time and prevents waste. Taking precise measurements ensures the vinyl fits perfectly. Cutting properly helps the vinyl wrap smoothly around curves and edges.
Careful handling during this stage leads to a clean, professional look. Small mistakes can cause bubbles, wrinkles, or peeling later. This section explains how to measure and cut vinyl confidently for your car trim.
Accurate Measurement Tips
Start by cleaning the trim surface. Use a soft cloth and mild cleaner. Measure the length and width of the trim piece carefully. Use a flexible tape measure for curved areas.
Add extra length to your measurement. About 1 to 2 inches is enough. This extra vinyl allows for adjustments and wrapping around edges. Write down your measurements before cutting.
Double-check all measurements before moving forward. Accurate numbers help avoid mistakes during cutting.
Cutting For Curves And Edges
Use sharp scissors or a precision knife for cutting vinyl. Start by cutting straight lines along the measured length. Cut slowly near curves to avoid jagged edges.
Make small snips along the edges to help vinyl bend smoothly. Do not cut too deep to avoid damaging the backing paper. Trim the excess vinyl gradually while fitting it to the trim.
Keep the vinyl slightly larger than needed at curves. This extra material helps stretch the vinyl without tearing. Trim the vinyl carefully after wrapping to get a clean finish.
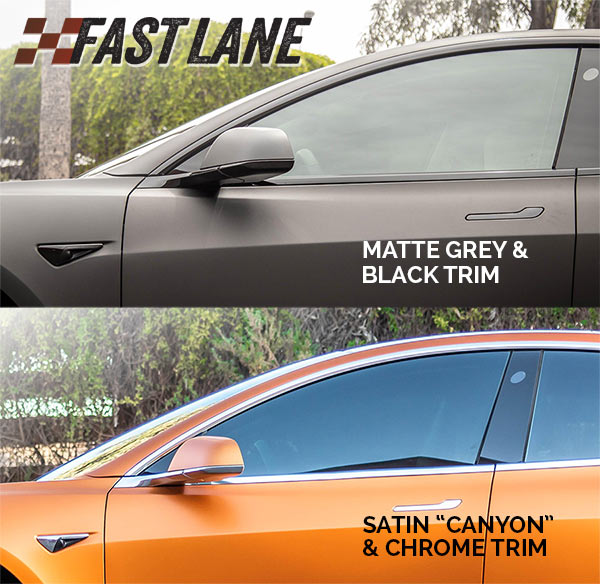
Credit: fastlanetints.com
Applying The Vinyl Wrap
Applying the vinyl wrap to your car trim is a key step. It sets the base for a smooth, professional look. Care and patience during this process help avoid wrinkles and bubbles. This section shows how to handle the vinyl carefully and get it to stick well.
Positioning The Vinyl
Start by placing the vinyl gently over the trim. Align it so all edges are covered. Do not pull too hard. Let the vinyl rest lightly on the surface. This makes it easier to adjust the position before sticking it down fully.
Using Heat For Flexibility
Use a heat gun or hair dryer to warm the vinyl. Heat makes the vinyl soft and stretchable. This helps it fit curved or uneven parts of the trim. Warm the vinyl slowly and evenly. Avoid overheating to prevent damage.
Smoothing Out Bubbles
Press the vinyl down with a squeegee or cloth. Start from the center and push outward. This moves trapped air to the edges. Work slowly and carefully. Small bubbles can be popped with a pin. Smooth vinyl looks clean and lasts longer.
Finishing Touches
Finishing touches make your vinyl wrap look neat and last longer. These final steps protect the wrap and keep it tight on the trim. Take your time. Small details matter.
Trimming Excess Vinyl
Cut away extra vinyl carefully. Use a sharp blade for clean cuts. Avoid cutting too close to the trim edges. Leave a tiny margin to prevent peeling. Work slowly along curves and corners. Clean cuts help the wrap fit perfectly.
Sealing Edges For Durability
Seal the edges to stop dirt and water from getting under the wrap. Use heat from a heat gun to soften the vinyl edges. Press them firmly against the trim with a squeegee or cloth. This step locks the vinyl in place. Proper sealing stops lifting and extends wrap life.
Maintenance Tips
Maintaining your vinyl wrapped car trim keeps it looking fresh and new. Proper care helps the wrap last longer and prevents damage. Simple steps can protect your investment and keep your car stylish.
Cleaning Wrapped Trim
Use a soft cloth or sponge with mild soap and water. Avoid harsh chemicals or abrasive cleaners that can harm the vinyl. Rinse gently and dry with a microfiber cloth to prevent water spots. Clean regularly to remove dirt and dust buildup.
Avoiding Damage
Stay away from sharp objects near the wrapped trim. Avoid high-pressure washers, which can peel the vinyl. Park in shaded areas to reduce sun damage and fading. Be careful when opening doors or loading items near the trim. Regular checks help spot small tears before they grow.
Frequently Asked Questions
What Tools Do I Need To Vinyl Wrap Car Trim?
You need vinyl wrap film, a heat gun, a squeegee, scissors, and cleaning supplies. These tools ensure smooth application and a clean finish.
How Do I Prepare Car Trim For Vinyl Wrapping?
Clean the trim thoroughly to remove dirt and grease. Use isopropyl alcohol for best results. Dry completely before applying vinyl.
Can Vinyl Wrap Damage Car Trim?
Properly applied vinyl wrap does not damage trim. It acts as a protective layer. Removing it carefully prevents any surface damage.
How Long Does Vinyl Wrap On Car Trim Last?
Vinyl wrap can last 5 to 7 years with proper care. Avoid harsh chemicals and prolonged sun exposure to extend its life.
Conclusion
Vinyl wrapping car trim can change your car’s look quickly. It protects the trim from scratches and weather. Take your time to clean and measure well before starting. Use heat carefully to smooth out bubbles and wrinkles. Practice helps you get better results each time.
With patience, your car trim will look fresh and neat. Enjoy the process and the new style you create. This skill adds value and personal touch to your vehicle. Keep your tools ready for future touch-ups or projects.


