Want to give your small items a fresh, stylish look without spending a lot? Vinyl wrapping is the perfect solution for you.
It’s easy, affordable, and lets you customize your belongings exactly how you want. Whether it’s your phone, laptop, or even a gaming console, vinyl wrap can transform ordinary objects into eye-catching pieces. In this guide, you’ll learn simple steps to vinyl wrap small items like a pro.
Keep reading, and discover how to make your things stand out effortlessly!

Credit: raxtify.com
Choosing The Right Vinyl
Choosing the right vinyl is key for a smooth wrapping job. The vinyl you select affects the look and durability of your item. Small items need vinyl that fits well and sticks properly. Different types of vinyl work best for different surfaces and shapes. Color and finish also matter for the final style. Understanding these points helps you pick the perfect vinyl for your project.
Types Of Vinyl Films
There are several types of vinyl films. Cast vinyl is thin and flexible. It molds easily around curves and edges. Calendered vinyl is thicker and less flexible. It works well on flat or simple curved surfaces. For small items, cast vinyl often gives the best fit. It lasts longer and resists cracking.
Adhesive Qualities
Adhesive strength varies between vinyl brands. Some adhesives are permanent, while others are removable. Permanent adhesive sticks strongly and lasts longer. Removable adhesive lets you peel off the vinyl without damage. Choose adhesive based on how long you want the wrap to stay. Good adhesive prevents bubbles and peeling.
Color And Finish Options
Vinyl comes in many colors and finishes. Matte finish offers a smooth, non-shiny look. Glossy finish reflects light and appears bright. Satin finish is between matte and glossy. Metallic and textured finishes add unique effects. Pick colors and finishes that match your style and item use. This choice impacts the final appearance greatly.
Preparing Small Items
Preparing small items for vinyl wrapping is a key step. Proper preparation helps the vinyl stick well and last longer. This process includes cleaning, removing old wraps, and smoothing surfaces. Each step ensures a neat and smooth finish on your small items.
Cleaning Surfaces
Start by cleaning the item thoroughly. Use a mild soap and water mix or a gentle cleaner. Remove all dirt, grease, and dust. Dry the item completely with a soft cloth. A clean surface helps the vinyl stick better and prevents bubbles.
Removing Old Wrapping
Check if the item has old vinyl or stickers. Peel off any old wrapping carefully. Use a plastic scraper to avoid scratches. If residue remains, apply rubbing alcohol to clean it. Removing old layers ensures the new vinyl sticks properly.
Sanding And Smoothing
Feel the surface for bumps or rough spots. Lightly sand rough areas with fine-grit sandpaper. Sanding creates a smooth surface for better vinyl adhesion. After sanding, wipe the item with a damp cloth. Let it dry before applying vinyl wrap.
Gathering Essential Tools
Before you start vinyl wrapping small items, gather the right tools. These tools make the process smoother and help you get neat results. Having everything ready saves time and reduces mistakes. Focus on three main tool types: cutting tools, application tools, and heat sources. Each plays an important role in wrapping small objects well.
Cutting Tools
Sharp cutting tools are key for clean edges. Use a precision knife or craft blade. Scissors can work but may not cut vinyl smoothly. A cutting mat protects surfaces and helps you cut straight lines. Always keep blades sharp for easy, safe cutting. Replace dull blades to avoid tearing the vinyl.
Application Tools
Use a squeegee to smooth out air bubbles. Soft cloths help press vinyl gently on curved areas. A plastic card can also push out wrinkles without scratching. Keep these tools clean to avoid dirt under the vinyl. Good application tools help the vinyl stick well and look smooth.
Heat Sources
Heat makes vinyl flexible and easier to shape. A heat gun is best for small items. It warms the vinyl without burning it. A hairdryer works but is less precise. Heat helps the vinyl wrap tight corners and curves. Use heat carefully to avoid damage.

Credit: www.youtube.com
Measuring And Cutting Vinyl
Measuring and cutting vinyl is a key step in wrapping small items. Precise measurements ensure the vinyl fits perfectly. Cutting the vinyl carefully prevents mistakes and waste. This process sets the foundation for a smooth and neat wrap.
Taking Accurate Measurements
Start by measuring the item’s surface. Use a ruler or tape measure for exact numbers. Write down length and width clearly. Check curves or edges that need wrapping too. Double-check measurements before cutting the vinyl.
Cutting Techniques For Small Items
Place the vinyl on a flat surface. Use sharp scissors or a craft knife for clean cuts. Cut slowly along the measured lines. Keep your hand steady to avoid jagged edges. Small items need careful handling for a neat finish.
Avoiding Waste
Plan your cuts to use vinyl efficiently. Cut pieces slightly larger than the item to allow adjustments. Save leftover vinyl for future projects. Avoid cutting too much at once. Careful cutting saves money and materials.
Applying The Vinyl Wrap
Applying vinyl wrap to small items requires care and patience. This step shapes the overall look and feel of the wrap. Follow simple techniques to place the vinyl smoothly and neatly.
Positioning The Vinyl
Start by peeling a small section of the backing paper. Align the vinyl carefully over the item’s surface. Hold the vinyl in place before sticking it down fully. Adjust the position gently to avoid wrinkles. Once aligned, press the center of the vinyl first. Work outward slowly to secure the edges.
Smoothing Out Air Bubbles
Use a soft squeegee or cloth to smooth the vinyl. Push air bubbles toward the edges to remove them. Small bubbles can be lifted and pressed again. For stubborn bubbles, prick a tiny hole with a pin. Press the area gently after releasing trapped air.
Working Around Curves And Edges
Heat the vinyl lightly with a heat gun or hair dryer. This makes the vinyl more flexible and easier to stretch. Stretch the vinyl carefully over curves without tearing it. Use fingers or a squeegee to press down edges firmly. Trim excess vinyl with a sharp blade for a clean finish.
Using Heat For A Perfect Fit
Using heat helps vinyl wrap small items smoothly. It makes the vinyl soft and easy to shape. Heat also helps the vinyl stick tightly without bubbles or wrinkles. This step is key for a neat, professional look.
Heat Gun Techniques
Use a heat gun on low or medium setting. Keep it moving to avoid burning the vinyl. Hold the heat gun about 6 inches from the surface. Heat the vinyl evenly for best results. Focus on curves and edges where stretching is needed.
Stretching The Vinyl
Heat the vinyl gently to make it flexible. Pull the vinyl slowly to fit the item’s shape. Stretch it little by little to avoid tears. Heat again if the vinyl feels stiff. Stretching while warm helps the vinyl settle smoothly.
Cooling And Setting
Let the vinyl cool naturally to harden its shape. Avoid touching it until fully cool. Cooling sets the vinyl in place firmly. Use a soft cloth to press down edges. This step ensures a clean, tight wrap without lifting.
Trimming Excess Vinyl
Trimming excess vinyl is a key step in wrapping small items. It helps achieve a clean, professional look. Removing extra vinyl prevents peeling and keeps edges smooth. Take your time for the best results.
Precise Cutting Methods
Use a sharp craft knife or scissors for cutting vinyl. Cut slowly along the edges of the item. Avoid rushing to keep lines straight and clean. Small, gentle cuts work better than one big cut. Replace blades often for sharpness.
Protecting The Item’s Surface
Place a soft cloth or paper under the item. This protects the surface from scratches during trimming. Hold the item steady to avoid slips. Work on a flat, stable surface. Keep the vinyl stretched but not too tight.
Final Touches
Check edges for any leftover vinyl bits. Use a heat gun or hairdryer on low to soften edges. Press edges down with a squeegee or your finger. Smooth out bubbles or wrinkles carefully. A neat finish makes the wrap last longer.
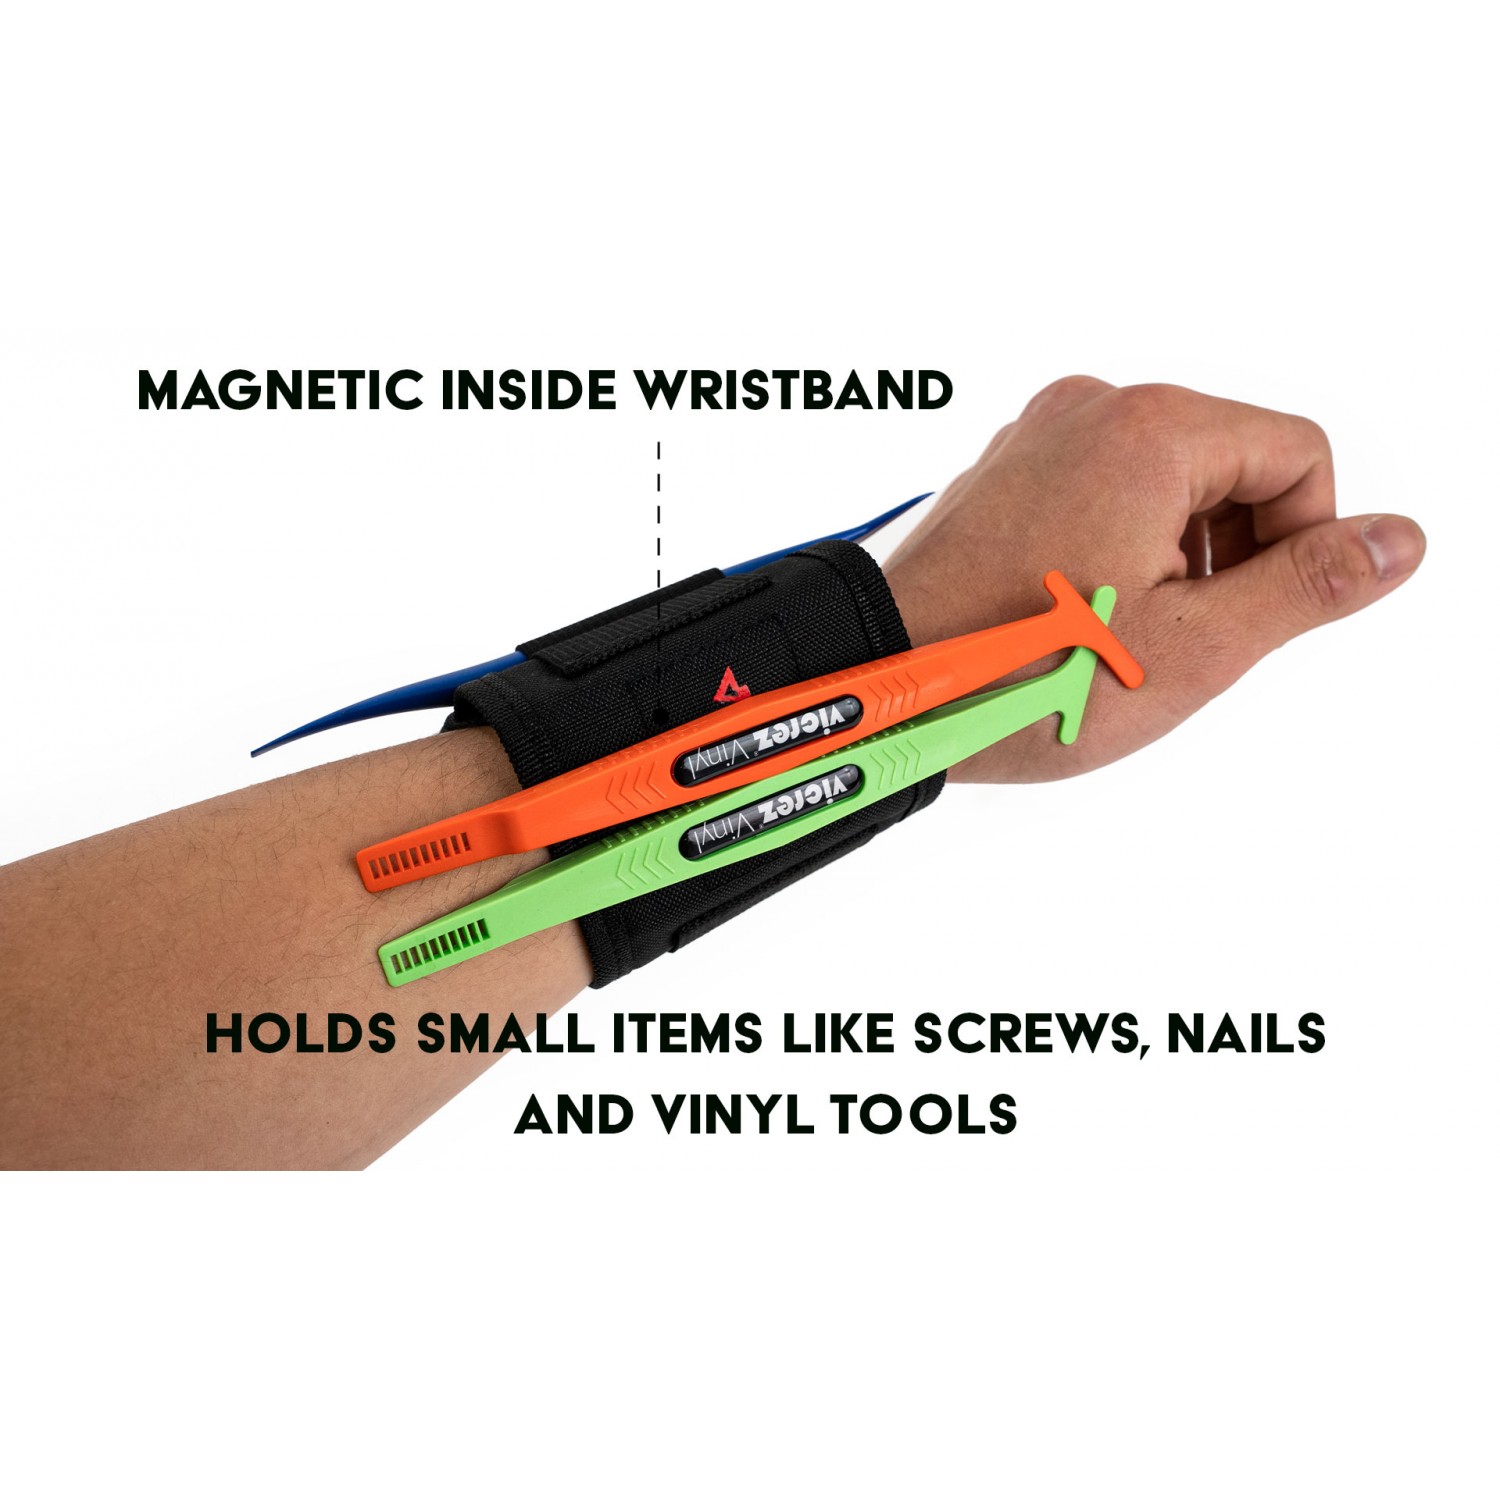
Credit: www.vicrez.com
Maintenance Tips
Maintaining vinyl wraps on small items helps keep them looking fresh and new. Proper care protects the vinyl from damage and fading. Simple steps can extend the life of your wrap significantly.
Cleaning Wrapped Items
Use a soft cloth or sponge for cleaning. Avoid rough materials that can scratch the vinyl. Mild soap mixed with water works best. Gently wipe the surface without scrubbing hard. Rinse with clean water and dry with a soft towel. Avoid harsh chemicals or abrasive cleaners that damage the wrap.
Avoiding Damage
Keep wrapped items away from sharp objects. Do not use knives or sharp tools near the vinyl. Avoid excessive heat or direct sunlight for long periods. Handle with care to prevent peeling or lifting edges. Store items in safe places to reduce wear and tear. Regular checks help spot small damages early.
Longevity Of Vinyl Wrap
Quality vinyl lasts longer with good care. Avoid exposing the wrap to extreme weather. Clean the surface regularly to prevent dirt buildup. Use protective sprays designed for vinyl materials. Small repairs can stop damage from spreading. Proper maintenance keeps your wrap looking vibrant for years.
Frequently Asked Questions
What Tools Do I Need For Vinyl Wrapping Small Items?
You need a squeegee, heat gun, sharp knife, cleaning cloth, and vinyl wrap film. These tools help ensure a smooth, bubble-free finish.
How Do I Prepare Small Items For Vinyl Wrapping?
Clean the item thoroughly with soap and water. Remove dust and oils. Dry completely before applying vinyl to ensure strong adhesion.
Can I Vinyl Wrap Curved Or Irregular Small Items?
Yes, use a heat gun to warm the vinyl. This makes it flexible and easier to conform to curves and edges.
How Do I Avoid Bubbles When Wrapping Small Items?
Apply vinyl slowly and use a squeegee to smooth out bubbles. Heat helps release trapped air under the vinyl film.
Conclusion
Vinyl wrapping small items is simple and fun to try. Take your time and work carefully for best results. Use the right tools to avoid bubbles or wrinkles. Practice on scrap pieces before starting your project. Small items look fresh and unique with a vinyl wrap.
Enjoy customizing your things with color and style. Keep your work area clean and well-lit for easier wrapping. Each step adds to a neat, smooth finish. Try different designs to find what you like best. You can create great-looking items with just a little effort.