
Are you ready to transform your car’s look without spending a fortune? Vinyl wrapping your car is a smart, affordable way to give it a fresh, new style that turns heads everywhere you go.
Imagine changing your car’s color or adding a sleek design that makes it truly yours—all without the hassle of a permanent paint job. In this guide, you’ll discover simple steps and insider tips that make vinyl wrapping easy, even if you’ve never tried it before.
Keep reading to unlock the secrets to a professional-looking wrap that will protect your car and boost its style instantly. Your ride deserves this upgrade, and you’re just moments away from making it happen.

Credit: www.turtlewax.com
Preparing Your Car
Preparing your car properly is key to a smooth vinyl wrap process. Skipping this step can cause bubbles, wrinkles, or poor adhesion. Take time to get your car ready. It will save effort later and give better results.
Every part of the car’s surface must be clean and free from dirt or oils. Remove anything that might block the wrap from sticking well. Also, find a good place to work. The right environment helps the vinyl stay smooth and easy to handle.
Cleaning The Surface
Wash your car thoroughly using soap and water. Remove dust, grease, and road grime. Use a microfiber cloth to dry the surface well. Then, wipe the car with isopropyl alcohol. This removes oils that soap misses. A clean surface helps the vinyl stick tightly and last longer.
Removing Obstacles
Take off parts like mirrors, badges, and trim pieces. These can block the vinyl and cause bubbles. Use tools carefully to avoid scratches. Remove windshield wipers or antenna if possible. Clear the workspace for an easier wrap job.
Choosing The Right Environment
Work indoors or under a covered area. Avoid direct sunlight or strong wind. A dry, dust-free space is best. Keep the temperature between 60-80°F (15-27°C). These conditions help the vinyl stretch and stick properly. It also prevents dust from sticking to the wrap.
Credit: www.tintingchicago.com
Selecting Vinyl Wrap Material
Choosing the right vinyl wrap material is the first step in wrapping your car. The material affects the final look and how long the wrap lasts. Selecting the proper type, color, and size ensures a smooth process and great results.
Types Of Vinyl Wraps
Vinyl wraps come in various types. Cast vinyl is flexible and durable. It molds well on curves and lasts longer. Calendered vinyl is less expensive but thicker and less flexible. It suits flat surfaces better. Choose cast vinyl for complex shapes and calendered for simple, flat areas.
Color And Finish Options
Vinyl wraps offer many colors and finishes. Glossy finishes shine and look like paint. Matte finishes give a smooth, flat look without shine. Satin finishes fall between glossy and matte. Specialty finishes include chrome, carbon fiber, and brushed metal. Pick a color and finish that match your style and car’s design.
Measuring For Accuracy
Measure your car carefully before buying wrap material. Include all parts you want to cover. Doors, bumpers, hood, and roof need separate measurements. Add extra length for mistakes and overlap. Accurate measuring avoids running out of material and extra costs.
Tools You’ll Need
Preparing to vinyl wrap your car means having the right tools at hand. The tools help you apply the vinyl smoothly and avoid mistakes. Some tools are must-haves. Others make the job easier but are not needed.
Knowing which tools to get saves time and effort. It also helps you achieve a clean, professional look. Below is a list of essential tools and some optional accessories for your project.
Essential Tools List
- Vinyl wrap film – the material to cover your car
- Squeegee – for smoothing out air bubbles and wrinkles
- Heat gun – softens vinyl for curves and edges
- Utility knife – cuts vinyl with precision
- Measuring tape – measures panels and vinyl size
- Spray bottle with soapy water – helps reposition vinyl
- Cleaning cloth and rubbing alcohol – cleans surface before wrapping
- Gloves – protect hands and keep vinyl clean
Optional Accessories
- Magnets – hold vinyl in place temporarily
- Felt edge squeegee – gentle on delicate surfaces
- Plastic scraper – helps remove dirt or bubbles
- Masking tape – marks cutting lines or holds vinyl
- Infrared thermometer – checks temperature of vinyl while heating
- Heat-resistant gloves – protects hands from hot tools

Credit: www.youtube.com
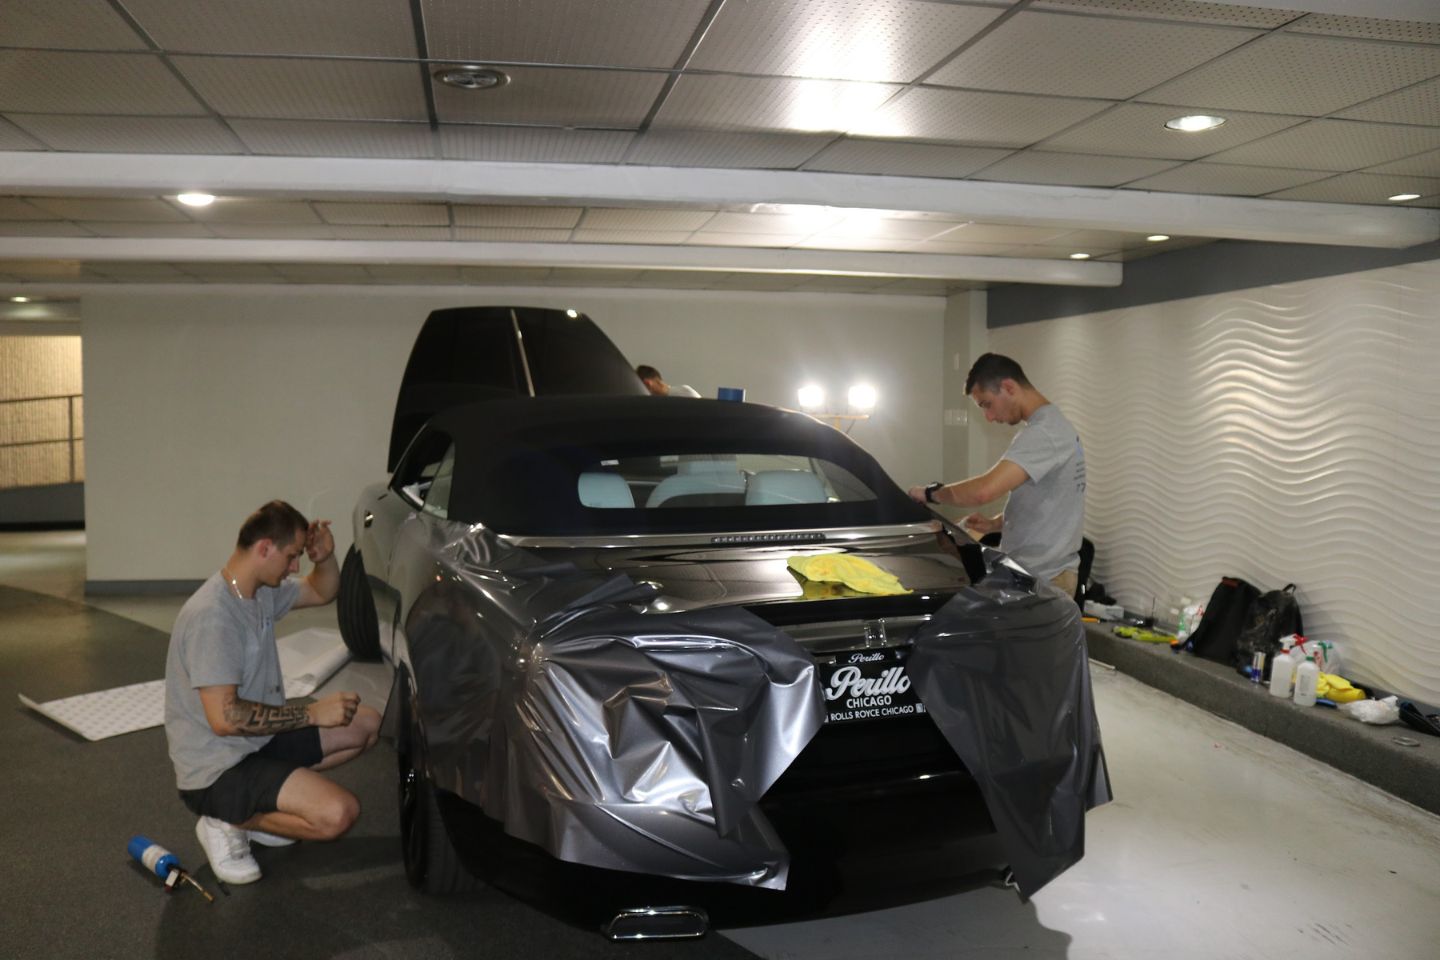
Applying The Vinyl Wrap
Applying the vinyl wrap is a key step in changing your car’s look. This process needs care and patience. A smooth application ensures a professional finish that lasts. Follow each step carefully for the best results.
Cutting And Positioning
Start by cutting the vinyl wrap to fit your car’s surface. Leave extra material around edges to trim later. Place the wrap gently on the car. Align it to cover the area fully. Use magnets or tape to hold it in place.
Smoothing Out Air Bubbles
Air bubbles can ruin the smooth look of your wrap. Use a squeegee to push bubbles toward the edges. Work slowly from the center outward. Small bubbles can pop with a pin carefully. This step makes the wrap look clean and flat.
Heating And Stretching Techniques
Heat the vinyl with a heat gun or hair dryer. Warm vinyl becomes soft and easy to stretch. Stretch the wrap to fit curves and corners well. Avoid overheating to prevent damage. Cooling the vinyl helps it keep its shape.
Trimming And Finishing Touches
Trimming and finishing touches bring your vinyl wrap job to life. This step shapes the final look and ensures durability. It removes excess vinyl and seals edges to prevent peeling. Proper care after application keeps the wrap fresh and lasting longer.
Cutting Excess Vinyl
Use a sharp blade or knife for clean cuts. Trim close to the edges without cutting the car paint. Work slowly to avoid mistakes. Remove small pieces around curves and corners carefully. This step makes the wrap look neat and professional.
Sealing Edges
Press the edges firmly with a squeegee or your fingers. Heat the edges gently with a heat gun to activate the adhesive. This helps the vinyl stick better and prevents lifting. Sealing stops dirt and moisture from getting under the wrap.
Post-application Care
Wait at least 24 hours before washing your car. Use gentle soap and water for cleaning. Avoid strong chemicals and pressure washers. Park in shade to reduce sun damage. Regular care keeps the vinyl looking new and protects your investment.
Troubleshooting Common Issues
Troubles can happen during vinyl wrapping. They slow down your work and affect the final look. Knowing how to fix common problems saves time and keeps your wrap smooth.
Fixing Wrinkles
Wrinkles appear when the vinyl folds or stretches too much. Use a heat gun to warm the vinyl gently. Heat makes the material soft and easier to stretch. Smooth wrinkles by pressing with a squeegee from the center outwards. Work slowly to avoid new wrinkles forming.
Removing Bubbles
Bubbles form when air traps under the vinyl. Use a sharp pin to poke small holes in the bubble. Press air out using a squeegee or your fingers. Large bubbles may need to be lifted carefully and re-applied. Always work slowly to keep the vinyl flat.
Dealing With Adhesion Problems
Adhesion issues occur when the vinyl does not stick well. Clean the car surface thoroughly before wrapping. Dirt or oil prevents good sticking. Warm the vinyl with a heat gun to activate the adhesive. Press down firmly with a squeegee to secure the vinyl. Avoid touching the adhesive side to keep it sticky.
Frequently Asked Questions
What Materials Do I Need To Vinyl Wrap My Car?
You need vinyl wrap film, a squeegee, heat gun, utility knife, cleaning supplies, and gloves for safe handling. Proper tools ensure a smooth, bubble-free application and professional finish.
How Long Does Vinyl Wrapping A Car Take?
Vinyl wrapping a car usually takes 1 to 3 days depending on car size and complexity. Preparation, application, and curing time affect the total duration.
Can I Vinyl Wrap My Car Myself?
Yes, you can DIY vinyl wrap with patience and practice. Follow step-by-step guides, use proper tools, and work in a dust-free environment for best results.
How Long Does A Car Vinyl Wrap Last?
A quality vinyl wrap lasts 5 to 7 years with proper care. Exposure to sunlight and harsh weather can reduce its lifespan.
Conclusion
Vinyl wrapping your car can change its look quickly and affordably. Take your time and follow each step carefully. Clean the surface well before applying the vinyl. Use the right tools to avoid bubbles or wrinkles. Practice makes perfect, so don’t rush the process.
A well-done wrap protects your car’s paint and adds style. Enjoy the new look and feel proud of your work. Vinyl wrapping is a smart way to customize your vehicle easily.


