
You want your car to shine like new, but those annoying swirl marks can ruin the finish. If you’ve ever tried waxing your car only to find tiny scratches all over the surface, you’re not alone.
The good news? You can learn how to wax your car without leaving swirl marks behind. In this guide, you’ll discover simple, effective steps that protect your paint and make your car look flawless. Keep reading to unlock the secrets that detailers don’t always share, and give your car the perfect shine it deserves.
Choosing The Right Wax
Choosing the right wax is key to protecting your car’s paint without causing swirl marks. The wrong wax can leave scratches and dull the surface. Selecting a wax that suits your car’s paint and use helps keep your vehicle shiny and safe. Below are important points to consider when picking the best wax.
Types Of Car Wax
Car wax comes in three main types: natural, synthetic, and hybrid. Natural wax uses carnauba, a plant-based ingredient. It gives a deep shine but wears off faster. Synthetic wax is made from polymers. It lasts longer and protects better against weather. Hybrid wax mixes both types. It balances shine and durability for everyday use.
Selecting Based On Paint Type
Different paints need different waxes. Soft paints need gentle wax to avoid damage. Hard paints can handle stronger formulas. Dark-colored cars benefit from wax that enhances gloss. Light colors may need wax that prevents yellowing. Always check your car’s paint type before buying wax.
Top Brands To Consider
Choose trusted brands known for quality and safety. Some popular options include Meguiar’s, Turtle Wax, and Mothers. These brands offer waxes designed to reduce swirl marks. They also provide clear instructions for easy application. Buying from well-known brands helps ensure good results and paint protection.
Credit: www.best-auto-detailing-tips.com
Preparing Your Car
Preparing your car is the first step before waxing. It ensures a smooth, clean surface. This helps the wax stick better and avoid swirl marks. Take your time with each step. A well-prepared car shows a better shine and lasts longer.
Washing And Drying
Start with a thorough wash. Use a car shampoo designed for automotive paint. Avoid household soaps. They can strip wax and damage paint. Rinse the car with clean water. Use a microfiber mitt to gently clean the surface. Rinse again to remove dirt and soap.
Dry the car carefully. Use a soft microfiber towel. Pat the surface instead of rubbing. This prevents scratches and swirl marks. Make sure no water spots remain. Water spots can affect the wax finish.
Clay Bar Treatment
Use a clay bar to remove embedded dirt. It lifts tiny particles that washing misses. Spray a clay lubricant on the surface. Gently rub the clay bar back and forth. Work in small sections. Check the clay often for dirt. Fold the clay to expose a clean side. This step makes the paint very smooth.
Removing Old Wax And Contaminants
Remove old wax before applying new wax. Use a wax remover or a gentle polish. This cleans the surface deeply. It prevents buildup and uneven shine. Apply the remover with a soft cloth. Work in circular motions. Wipe off with a clean microfiber towel. The paint is now ready for fresh wax.
Tools And Materials Needed
Waxing a car without swirl marks needs the right tools and materials. Using poor items can cause scratches and dull the paint. Good tools protect your car’s finish and make waxing easy. Prepare these tools before starting to save time and get the best results.
Applicator Pads
Applicator pads spread wax evenly on your car’s surface. Choose soft foam or microfiber pads. They hold wax well and prevent scratching. Use a new or clean pad each time. This avoids dirt or grit causing swirl marks. Apply wax in small sections for better control.
Microfiber Towels
Microfiber towels remove excess wax gently and buff the surface. Pick thick, high-quality towels that trap dirt and dust. Avoid cotton or rough cloths that can scratch paint. Use separate towels for wiping and buffing. Change towels often to keep the surface clean and smooth.
Buffers And Polishing Machines
Buffers and polishing machines speed up waxing and improve finish quality. Use a dual-action buffer for safer, swirl-free results. Match the machine’s pad softness with your wax type. Keep the buffer moving to avoid heat build-up. Use low speed settings to protect the paint.
Wax Application Techniques
Wax application techniques play a big role in preventing swirl marks on your car. Proper methods help spread the wax smoothly. This makes your car shine without damage. Following the right steps gives the best results and keeps your paint safe.
Applying Thin, Even Layers
Apply wax in thin, even layers. Thick layers take longer to dry and can cause streaks. Use a soft foam applicator to spread wax gently. Move in small circles or straight lines for uniform coverage. Thin layers allow better control and easier buffing.
Working In Small Sections
Work on small sections at a time. This stops wax from drying too fast. It also helps you focus on one area well. Divide the car into panels and finish each before moving on. Small sections mean less chance of missing spots or creating swirl marks.
Avoiding Direct Sunlight
Wax your car in the shade or indoors. Direct sunlight heats the surface quickly. This makes wax dry unevenly and harder to remove. Cool surfaces allow wax to set properly. Avoiding sunlight reduces streaks and swirl marks during application.
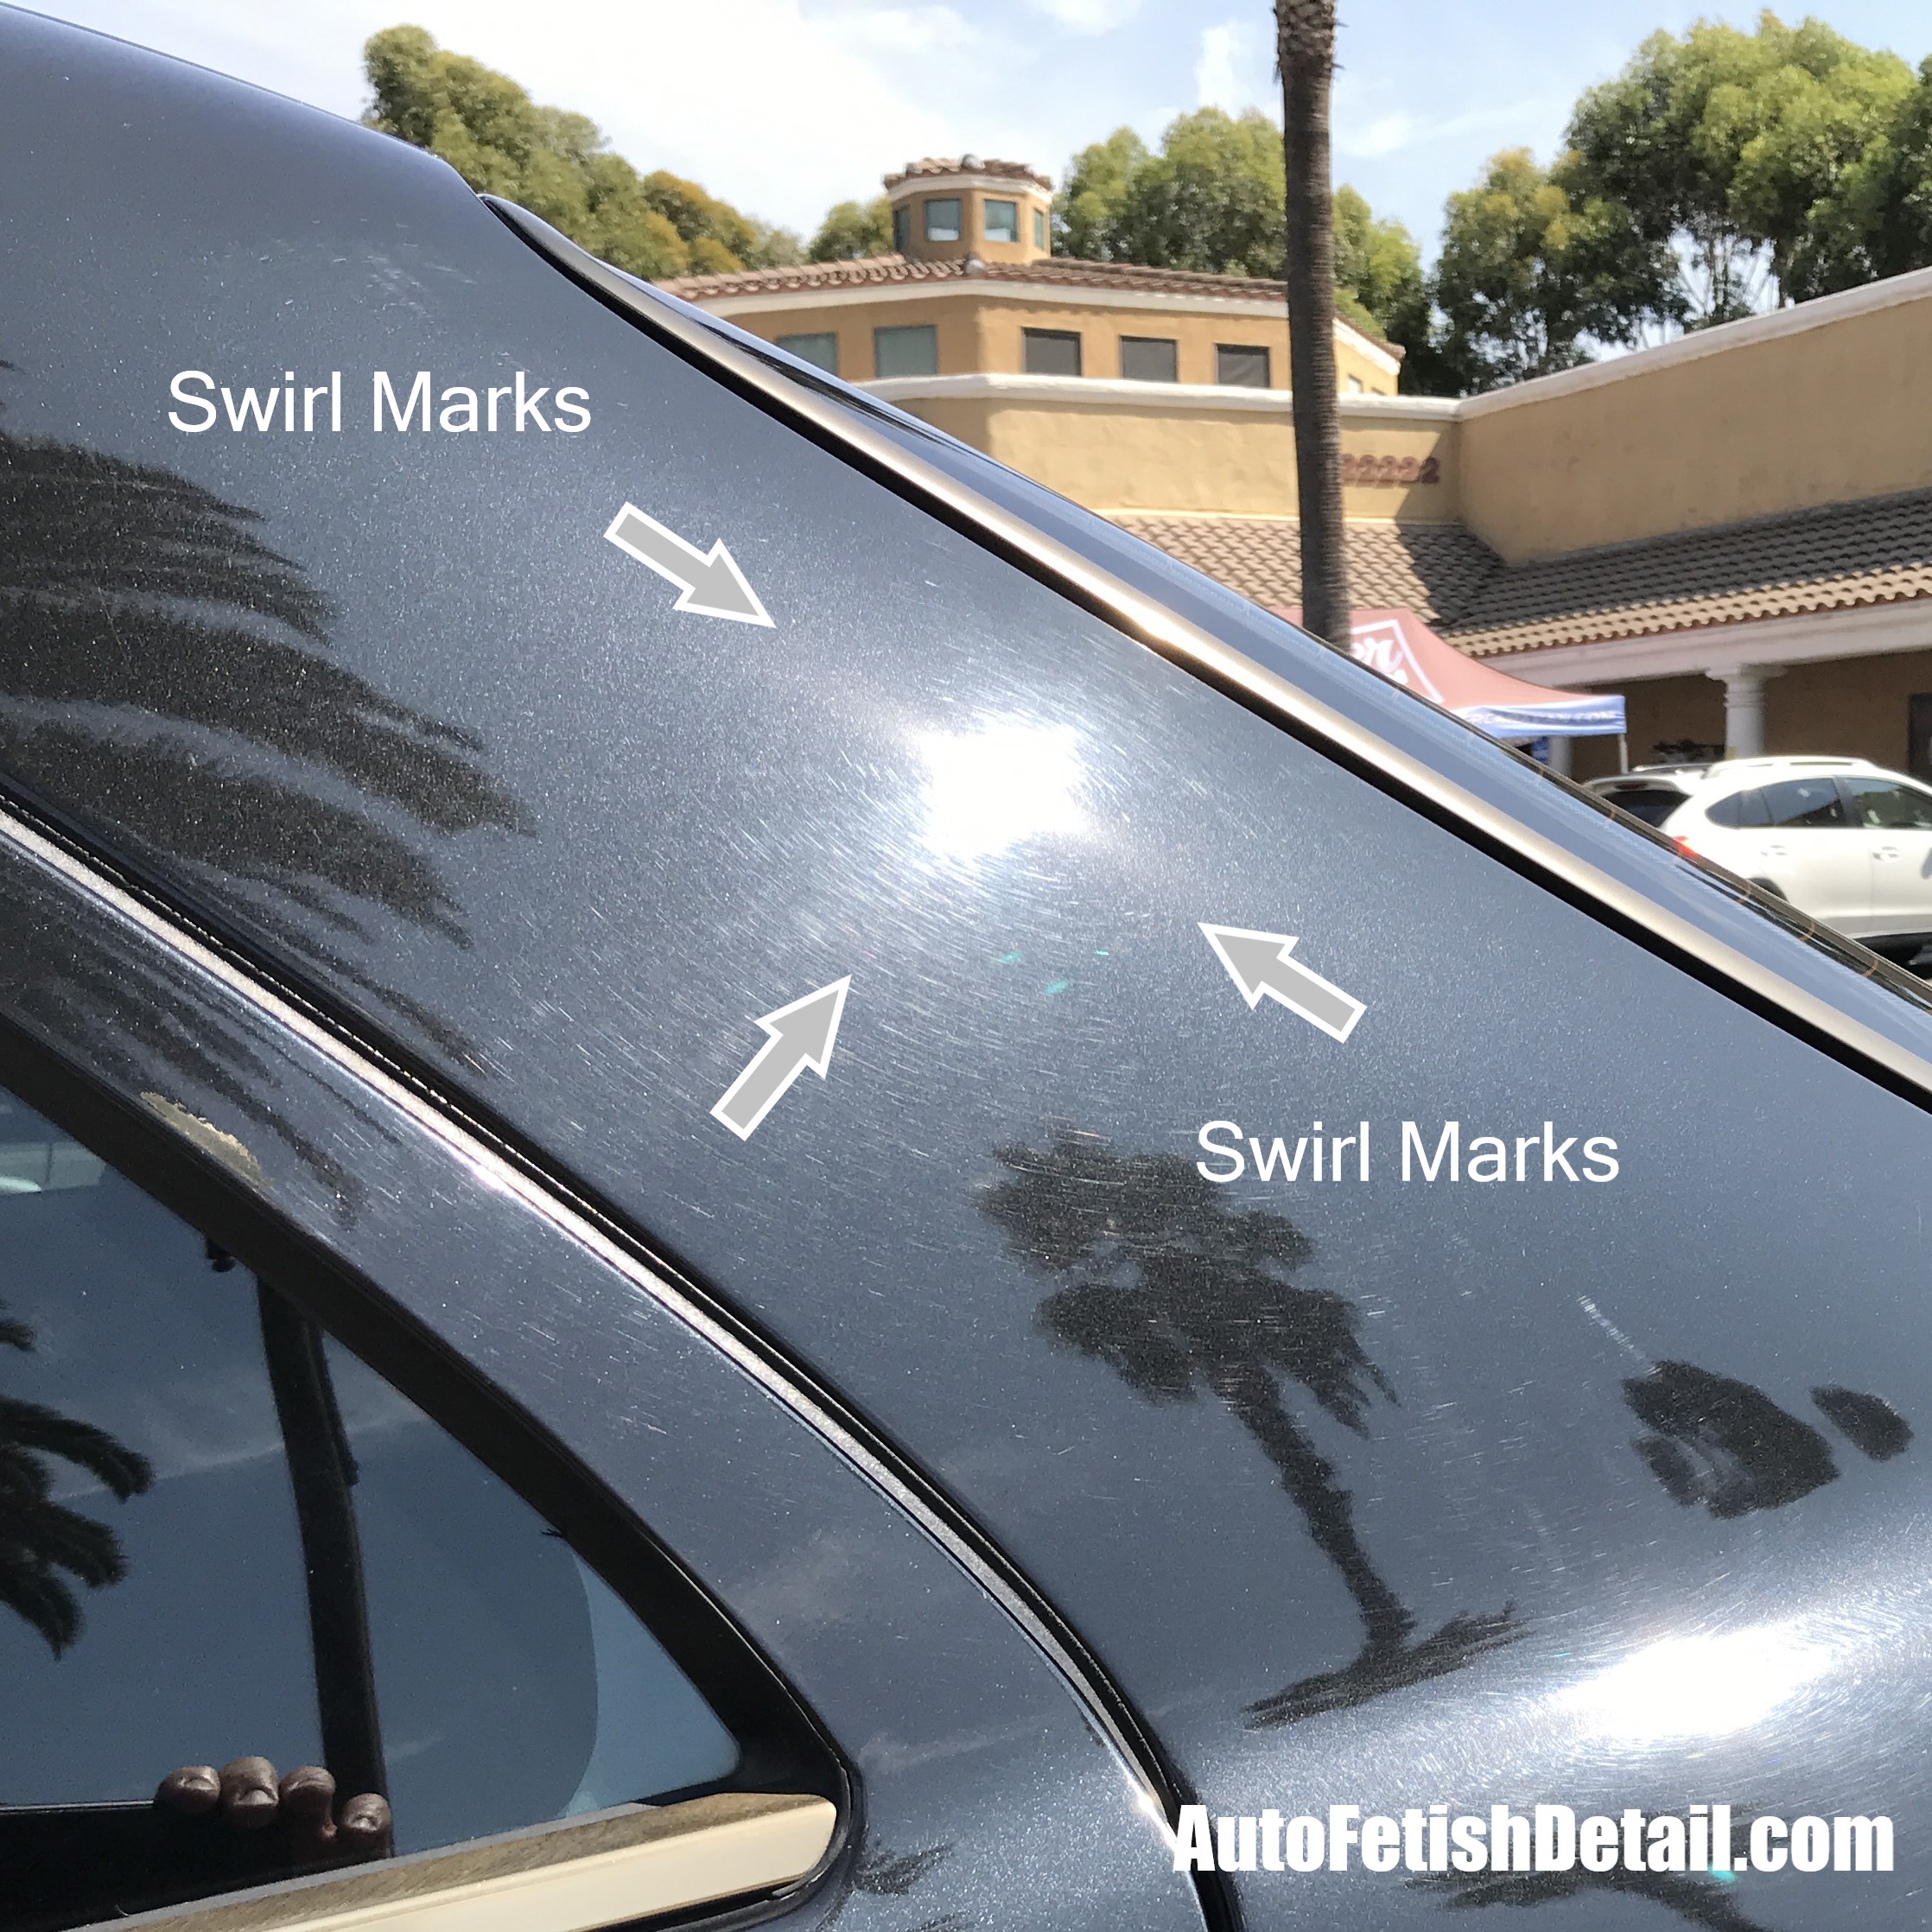
Preventing Swirl Marks
Preventing swirl marks is key to keeping your car’s paint smooth and shiny. Swirl marks are small scratches that happen from dirt, dust, or wrong waxing methods. Taking care during waxing stops these marks and protects your car’s look for a long time.
Using Clean, Soft Cloths
Always use clean cloths. Dirt or grit on cloths can scratch the paint. Soft cloths made of microfiber work best. They hold wax well and glide smoothly over the surface. Change cloths if they get dirty to avoid rubbing dirt into the paint.
Proper Circular Motion
Wax the car using small, gentle circles. This spreads wax evenly without scratching. Avoid back and forth scrubbing, which causes marks. Move slowly and cover a small area at a time. This helps the wax bond well with the paint.
Avoiding Excessive Pressure
Use light pressure when applying wax. Pressing hard can create scratches and swirl marks. Let the cloth do the work and move it softly. Too much force damages the paint surface and ruins the shine.
Credit: www.youtube.com
Buffing For Maximum Shine
Buffing is key to getting a deep, glossy shine on your car’s surface. It removes excess wax and smooths the finish. Done right, it avoids swirl marks and brings out the best look. Proper buffing makes wax last longer and protects paint better.
Timing The Wax Cure
Wait for the wax to dry but not harden completely. The wax should feel tacky or slightly cloudy. This usually takes 5 to 10 minutes. Too wet or too dry wax is hard to buff. Watch the surface closely for the perfect moment.
Buffing By Hand Vs. Machine
Hand buffing offers more control and less risk of damage. Use a soft microfiber cloth with gentle, circular motions. For large areas, a dual-action polisher speeds up the job. Keep the machine moving to avoid heat buildup. Always use a clean pad to prevent scratches.
Final Inspection Tips
Check the surface under good light. Look for missed spots or haze. Use a clean, dry cloth to remove any leftover wax. Run your fingers over the paint to feel smoothness. A swirl-free shine shows your buffing was careful and complete.
Maintenance For Long-lasting Shine
Maintaining a car’s shine after waxing is key to keeping it beautiful. Proper care helps the wax last longer and protects the paint. Simple habits make a big difference. Follow these easy steps to keep your car looking fresh and glossy every day.
Regular Washing Tips
Wash your car often to remove dirt and dust. Use a gentle car shampoo, not household soap. Rinse with clean water to avoid scratches. Dry the car with a soft microfiber towel. Avoid circular motions; pat or wipe straight lines instead.
Touch-up Waxing
Apply a light layer of wax every few weeks. Use a small, clean applicator pad. Work in small sections and use thin coats. Let the wax dry to a haze, then buff with a soft cloth. This keeps the shine fresh and protects the paint.
Protecting From Environmental Damage
Park in shaded areas to reduce sun damage. Cover your car if it stays outside for long. Avoid parking near trees that drop sap or bird droppings. Clean off any contaminants quickly to prevent stains. These steps help keep the wax and paint safe.

Credit: stonercarcare.com
Frequently Asked Questions
How Do Swirl Marks Form When Waxing A Car?
Swirl marks occur from improper waxing techniques. Using dirty cloths or applying excessive pressure causes tiny scratches. Always use clean, soft microfiber towels and gentle, circular motions to avoid swirl marks during waxing.
What Type Of Wax Prevents Swirl Marks?
Carnauba wax and synthetic sealants are best for preventing swirl marks. They create a smooth protective layer. Choose high-quality waxes that spread evenly and buff easily to minimize the risk of scratching your car’s paint.
How Should I Prepare My Car Before Waxing?
Wash and dry your car thoroughly before waxing. Remove dirt and debris to avoid scratching the paint. Use a clay bar if necessary to eliminate contaminants. A clean surface ensures an even wax application and reduces swirl marks.
Can Waxing Tools Cause Swirl Marks?
Yes, using rough or dirty tools can cause swirl marks. Always use clean, soft microfiber applicators and towels. Avoid automatic buffers unless you have experience. Proper tools and techniques help protect your car’s paint finish.
Conclusion
Waxing your car without swirl marks keeps the paint smooth and shiny. Use soft cloths and gentle motions to protect the surface. Clean the car well before applying wax. Work in small sections for better control. Avoid waxing in direct sunlight to prevent streaks.
Taking time and care gives the best results. Your car will look fresh and well-maintained. A little effort keeps swirl marks away and shine strong. Enjoy the smooth finish and protect your paint job.


