
Are you ready to transform your van into a rolling masterpiece? Wrapping your van in vinyl is one of the smartest ways to change its look without a costly paint job.
Imagine turning heads wherever you go, protecting your vehicle’s original paint, and even advertising your business—all with a sleek, custom vinyl wrap. But how do you get started? This guide will walk you through every step, making the process simple and doable for you.
Keep reading, and soon you’ll have the skills to wrap your van like a pro.
Credit: stonercarcare.com
Preparing Your Van
Preparing your van is the first step in wrapping it with vinyl. This stage sets the base for a smooth and long-lasting wrap. Taking time to prepare carefully helps avoid problems later. The surface must be clean, smooth, and ready for the vinyl to stick properly. Small details make a big difference in the final look.
Cleaning And Surface Prep
Start by washing your van thoroughly. Remove dirt, grease, and any grime. Use soap and water, then rinse well. Dry the surface with a clean cloth. Next, wipe the van with isopropyl alcohol. This removes leftover oils and residues. A clean surface helps the vinyl stick better and last longer.
Removing Accessories And Trim
Remove all accessories and trim pieces on the van. This includes mirrors, handles, and badges. Take off anything that sticks out or might block the vinyl. Removing these parts makes wrapping easier. It also prevents wrinkles and bubbles around edges. Keep the screws and parts safe for reassembly later.
Repairing Dents And Imperfections
Check the van for dents and scratches. Small dents can cause the vinyl to wrinkle. Fix dents using body filler or take the van to a professional. Sand the repaired areas smooth. Vinyl wraps better on flat, even surfaces. Repairing imperfections improves the final look and durability.
Choosing The Right Vinyl
Choosing the right vinyl is the first step to a perfect van wrap. The vinyl you pick affects how the wrap looks and lasts. It also makes the installation easier or harder. Understanding your options helps you make a smart choice. This section breaks down the types of vinyl, color and finish options, and tools you need.
Types Of Vinyl Films
There are several types of vinyl films for vehicle wraps. Cast vinyl is thin and flexible. It molds well to curves and lasts long. Calendered vinyl is thicker and less flexible. It works best on flat surfaces and is cheaper. There is also a specialty vinyl for textured surfaces. Choose cast vinyl for complex shapes and long use.
Color And Finish Options
Vinyl wraps come in many colors and finishes. Matte finishes give a smooth, non-shiny look. Glossy finishes shine and reflect light. Satin finish offers a balance between matte and glossy. You can find metallic, chrome, and even textured vinyl. Pick a color and finish that matches your style and brand.
Tools And Materials Needed
Good tools make wrapping easier and cleaner. You will need a squeegee to smooth vinyl and remove air bubbles. A heat gun helps stretch and shape the vinyl. A sharp utility knife cuts the vinyl precisely. Use cleaning solution and cloth to prep the van surface. Gloves protect your hands and keep the vinyl clean.
Measuring And Cutting Vinyl
Measuring and cutting vinyl correctly is key to a smooth van wrap. Precise measurements prevent waste and ensure a perfect fit. Cutting the vinyl carefully avoids damage and keeps edges clean. This step sets the foundation for a great-looking wrap.
Taking Accurate Measurements
Measure each van section carefully. Use a tape measure for length and width. Write down all numbers clearly. Double-check measurements to avoid mistakes. Measure curves and edges separately. Use a flexible tape for curved areas.
Creating Templates
Templates help cut vinyl in the right shape. Use paper or cardboard to make templates. Trace the van parts on the material. Cut out the templates neatly. Use them to mark the vinyl before cutting. This saves time and keeps shapes accurate.
Cutting Techniques
Use a sharp utility knife or vinyl cutter. Cut slowly to follow template lines. Keep the vinyl flat to avoid wrinkles. Use a straight edge as a guide. Cut slightly outside the template for trimming later. Avoid cutting too deep to protect the van’s surface.
Applying The Vinyl
Applying vinyl to a van is a key step in wrapping. It requires careful work and patience. The vinyl must be smooth and without bubbles. This part will explain how to place the vinyl correctly and make it stick well.
Positioning The Vinyl
Start by lifting the vinyl carefully. Align it with the van’s surface. Use magnets or tape to hold it in place. Check that the vinyl covers the area fully. Make small adjustments before sticking it down. Proper positioning saves time and avoids mistakes.
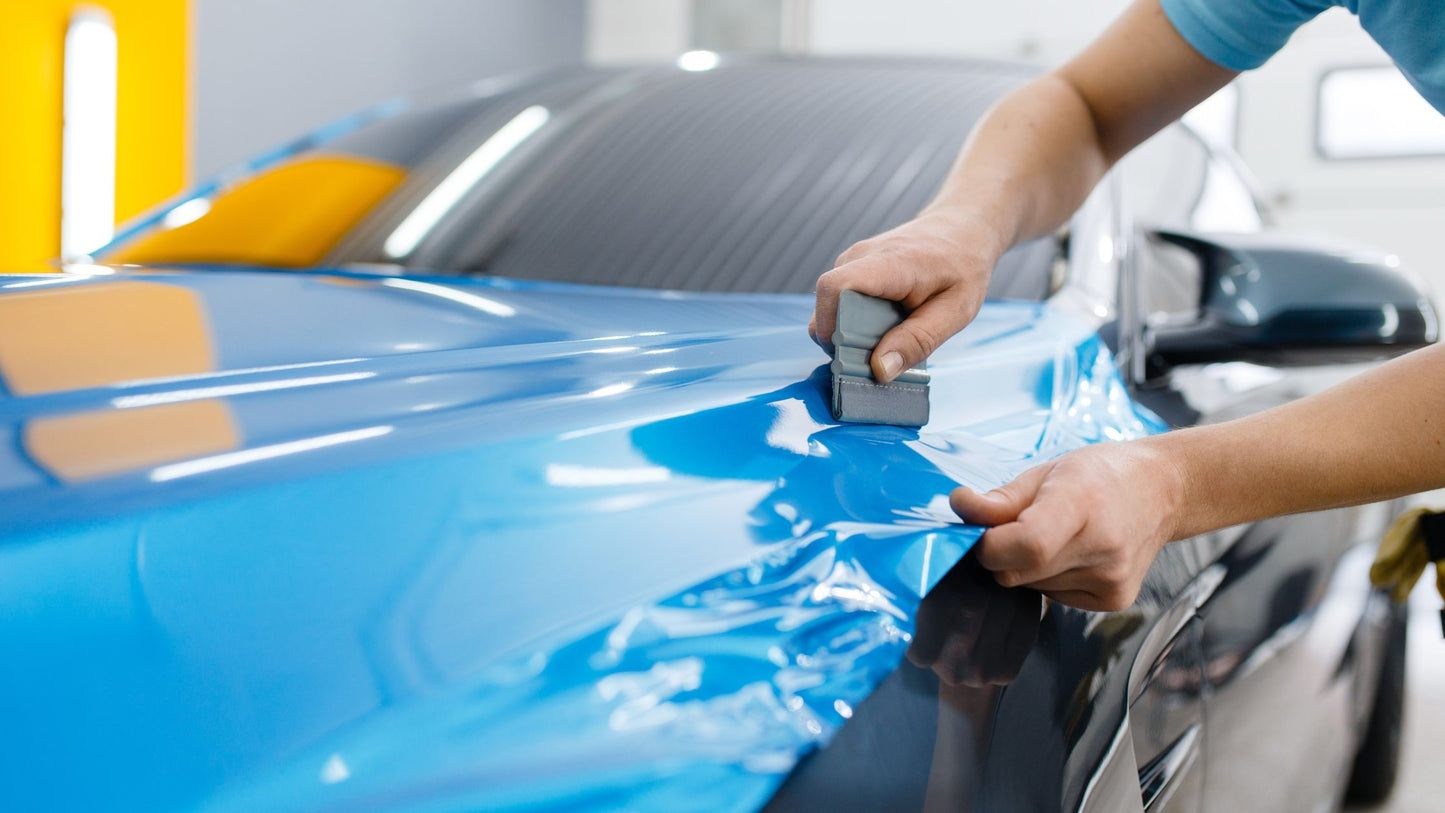
Using Heat And Squeegees
Use a heat gun to warm the vinyl slightly. Warm vinyl stretches and fits better. Move the heat gun slowly and evenly. Take a squeegee and start pressing from the center. Push air bubbles and wrinkles outwards. Work in small sections for best results.
Handling Curves And Edges
Curves and edges are tricky to cover. Apply heat to soften the vinyl here. Stretch it gently over the shape. Use the squeegee to press firmly. Cut excess vinyl carefully with a sharp blade. This ensures a neat and tight wrap on all parts.
Finishing Touches
The finishing touches are vital for a clean and lasting vinyl wrap. This step ensures the wrap looks smooth and stays on the van longer. Proper finishing protects the edges and prevents peeling. Follow these simple steps to complete your vinyl wrap project with care.
Trimming Excess Material
Use a sharp blade to trim extra vinyl around edges. Cut close but avoid cutting the van’s paint. Work slowly to get a neat line along windows, doors, and trim. Dispose of scraps carefully to keep the workspace clean. Sharp tools give cleaner cuts and reduce damage risk.
Sealing Edges
Apply edge sealer to all trimmed edges. This stops water and dirt from getting under the wrap. Use a small brush or cloth to spread the sealer evenly. Let it dry fully before moving the van. Proper sealing keeps the wrap tight and fresh-looking.
Curing And Maintenance Tips
Let the vinyl cure for at least 24 hours in a dry place. Avoid washing or driving in bad weather during this time. Clean the wrap gently with soap and water after curing. Use soft cloths to avoid scratches. Regular checks help spot any lifting or damage early.

Credit: wrapguys.com
Common Mistakes To Avoid
Wrapping a van in vinyl is a detailed task. Avoiding common mistakes helps get a clean, lasting finish. Many beginners face issues that can ruin the wrap. Knowing these pitfalls saves time and money.
Air Bubbles And Wrinkles
Air bubbles trap between the vinyl and van surface. They cause bumps and make the wrap look bad. Wrinkles happen when the vinyl stretches too much or folds. Both problems weaken the vinyl and shorten its life.
Use a squeegee to push out air slowly. Work from the center to the edges. Heat helps soften vinyl and avoid wrinkles. Take your time to smooth out every inch.
Improper Surface Prep
Dirty or oily surfaces stop vinyl from sticking well. Dust, grease, and old paint can cause peeling. Clean the van with soap and water first. Then use rubbing alcohol to remove all oils.
Dry the surface fully before applying vinyl. A clean, smooth surface ensures strong adhesion. Skipping this step leads to bubbles and early failure.
Rushing The Application
Speeding through the wrap causes many errors. Wrinkles, bubbles, and misalignment happen fast. Take breaks and work in small sections. Check your work before moving on.
Patience allows better control and accuracy. The result looks professional and lasts longer. Slow and steady wins the wrap race.
Credit: www.tintingchicago.com
Frequently Asked Questions
How Long Does Vinyl Wrap Last On A Van?
A vinyl wrap on a van typically lasts 5 to 7 years. Proper installation and care can extend its lifespan. Avoid harsh chemicals and frequent washing with abrasive tools to maintain the wrap’s quality and appearance.
Can I Wrap A Van Myself Or Hire A Professional?
You can wrap a van yourself if you have experience and tools. However, hiring a professional ensures a smooth, bubble-free finish and saves time. Professionals also guarantee durability and proper handling of complex curves.
What Materials Are Best For Van Vinyl Wrapping?
Cast vinyl is the best material for van wraps due to its flexibility and durability. It conforms well to curves and lasts longer than calendared vinyl. High-quality adhesive ensures strong bonding without damaging the van’s surface.
How Much Does It Cost To Wrap A Van In Vinyl?
The average cost to wrap a van ranges from $2,500 to $5,000. Prices vary based on van size, wrap complexity, and material quality. Custom designs and professional installation may increase the overall cost.
Conclusion
Wrapping a van in vinyl takes patience and care. Start with a clean surface and work slowly. Use the right tools to avoid bubbles and wrinkles. Heat the vinyl gently to help it stick well. Take time to smooth out edges and corners.
This process can change your van’s look easily. With practice, you can do it yourself. Enjoy the new style and protect your van’s paint. Keep these tips in mind for a good wrap job. Vinyl wrapping is a smart way to refresh your vehicle.


