
Are you looking to give your car’s interior a fresh, stylish makeover without spending a fortune? Wrapping your car interior with vinyl is a smart, cost-effective way to transform your ride and make it truly yours.
Imagine turning dull dashboards, door panels, or center consoles into sleek, eye-catching surfaces that reflect your personality. In this guide, you’ll discover simple, step-by-step tips to help you wrap your car’s interior like a pro—even if you’ve never tried it before.
Ready to unlock the secret to a stunning interior upgrade? Keep reading, and let’s get started!

Credit: www.youtube.com
Choosing The Right Vinyl
Choosing the right vinyl is key for a successful car interior wrap. It affects the look, feel, and lifespan of your project. Picking the best vinyl makes the process easier and the results better. Focus on the type, color, texture, durability, and care needs of the vinyl. These factors help you select the perfect material.
Types Of Vinyl For Interiors
Several types of vinyl work well inside cars. Cast vinyl is flexible and molds to curves easily. It is ideal for complex shapes. Calendared vinyl is thicker and less flexible. It works best on flat or simple surfaces. Some vinyl comes with special adhesives for strong sticking power. Choose vinyl that suits your car’s interior shape and surface.
Color And Texture Options
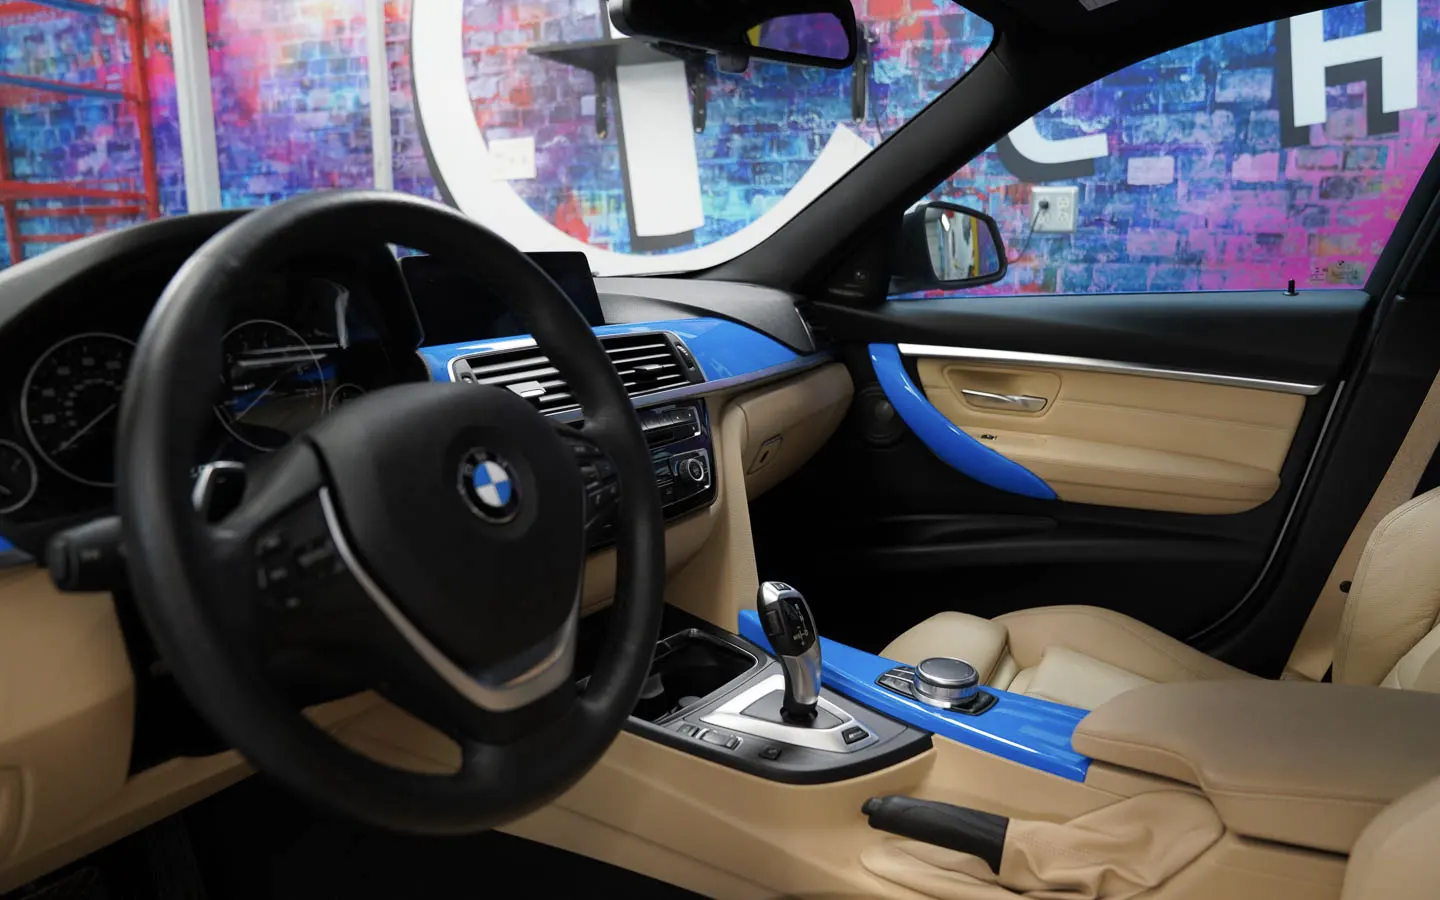
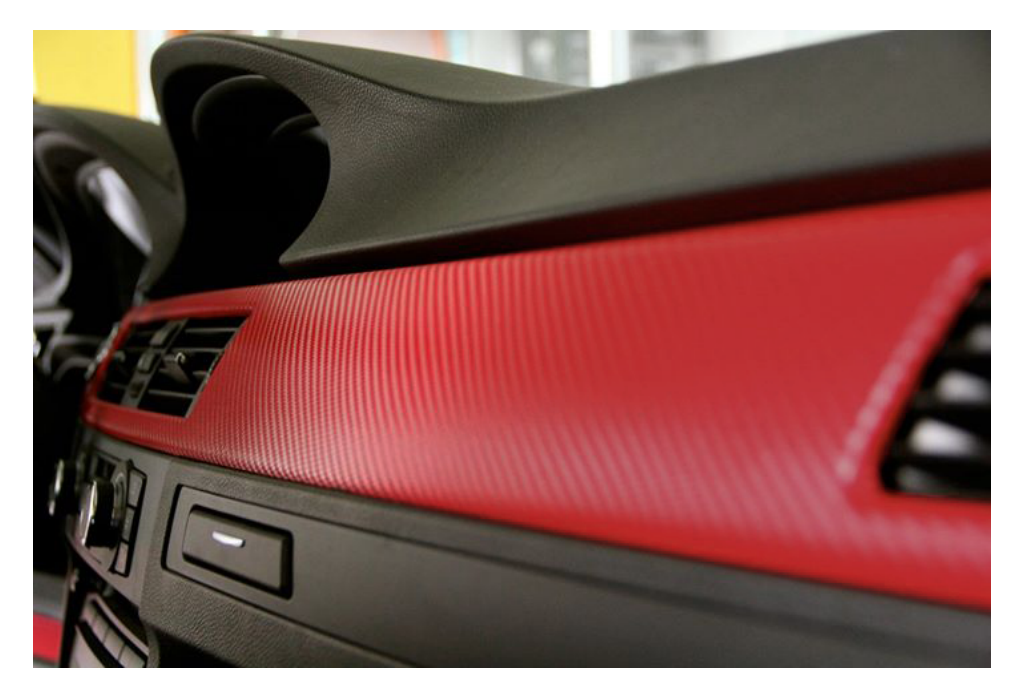
Vinyl comes in many colors and textures. Matte finishes give a smooth, modern look. Glossy vinyl adds shine and a bright feel. Textured vinyl can mimic leather, carbon fiber, or suede. Choose colors that match or contrast with your car’s interior. Textures add depth and style. Pick options that fit your taste and car design.
Durability And Maintenance
Durable vinyl lasts longer and resists wear. Look for vinyl that handles heat, moisture, and sunlight well. Easy-to-clean vinyl saves time and effort. Avoid vinyl that scratches or peels easily. Good vinyl keeps your car interior looking fresh. Regular cleaning helps maintain vinyl’s appearance and durability.
Credit: www.tintingchicago.com
Preparing The Car Interior
Preparing the car interior is the first step to a smooth vinyl wrap. It helps the vinyl stick well and last longer. Taking time to prepare the surface prevents bubbles and peeling later.
Clean, smooth surfaces make a big difference. Follow these steps carefully before applying vinyl.
Cleaning And Removing Dirt
Start by removing dust, dirt, and grease from the interior parts. Use a mild cleaner and a soft cloth. Avoid harsh chemicals that can damage surfaces. Make sure to clean every corner and crevice. Dirt can stop the vinyl from sticking properly.
Removing Old Material
Check for any old stickers, glue, or damaged vinyl. Peel off old materials gently. Use adhesive remover if needed. Leftover glue can cause bumps under the new vinyl. Removing old layers ensures a flat, clean base.
Sanding And Smoothing Surfaces
Sand rough or shiny areas lightly with fine-grit sandpaper. This creates a better grip for the vinyl. Wipe the dust off after sanding. Smooth surfaces help the vinyl wrap lay flat and last longer. Avoid sanding too hard to prevent damage.
Gathering Tools And Materials
Before starting to wrap your car interior with vinyl, gather all the tools and materials. Having everything ready makes the job easier and faster. Missing tools can cause delays or mistakes. Prepare a clean workspace and check your supplies carefully.
Essential Tools List
- Vinyl wrap sheets in your chosen color or pattern
- Heat gun to soften vinyl for bending and stretching
- Utility knife with sharp blades for precise cutting
- Squeegee to smooth out air bubbles and wrinkles
- Measuring tape for accurate measurements
- Microfiber cloths to clean surfaces before applying vinyl
- Gloves to protect your hands and avoid fingerprints
- Plastic trim tools to remove and replace car interior parts safely
Adhesives And Application Supplies
Most vinyl wraps come with a sticky backing that acts as adhesive. Still, having extra glue or spray adhesive can help in tricky spots. Use a good quality adhesive promoter for better vinyl grip on plastic or textured surfaces.
Apply isopropyl alcohol to clean surfaces before application. This removes grease and dust for stronger adhesion. Keep some lint-free towels handy for cleaning and drying.
Use masking tape to hold vinyl temporarily in place during fitting. It helps with alignment and cutting. Have a spray bottle with water and soap mix for wet application technique. This allows easy repositioning of vinyl before it sticks permanently.
Measuring And Cutting Vinyl
Measuring and cutting vinyl correctly ensures a smooth car interior wrap. Mistakes here cause wasted materials and poor results. Spend time on these steps to get the best fit.
Taking Accurate Measurements
Use a soft tape measure for curves and edges. Measure each part twice to avoid errors. Note the length and width clearly on paper. Add an extra inch to each measurement. This extra margin helps with adjustments during installation.
Focus on complex shapes like door panels or dashboard sections. Break large areas into smaller parts. This makes handling and cutting easier. Accurate measurements reduce stretching and bubbling later.
Cutting Techniques For Precision
Place vinyl on a clean, flat surface before cutting. Use a sharp utility knife or vinyl cutter for clean edges. Cut slowly along the marked lines for control. Avoid jagged or uneven cuts by steady hand movements.
Keep extra vinyl around the edges for final trimming. Use a ruler or straight edge to guide your cuts. Curved areas need small, careful snips instead of long cuts. Proper cutting saves time and improves the final look.
Applying Vinyl To Surfaces
Applying vinyl to your car’s interior surfaces requires care and patience. This step sets the foundation for a smooth and lasting finish. The vinyl must lie flat and fit perfectly over curves and edges. Every part of the process affects the final look and durability.
Positioning And Aligning Vinyl
Start by laying the vinyl loosely over the surface. Check the shape and size carefully. Align it so edges match the contours of the panel. Small adjustments help avoid wrinkles later. Use masking tape to hold the vinyl in place temporarily. Take your time to get the position right before pressing down.
Using Heat For Flexibility
Heat makes vinyl soft and easier to shape. Use a heat gun or hairdryer set on low. Warm the vinyl evenly, focusing on curves and corners. Avoid overheating to prevent damage. Heat allows the vinyl to stretch without tearing. Work slowly, reheating areas as needed to fit the surface perfectly.
Smoothing Out Bubbles And Wrinkles
After pressing the vinyl, smooth out air bubbles and wrinkles. Use a plastic squeegee or a soft cloth. Push from the center outward for the best results. Small bubbles can be pierced gently with a needle. Keep the vinyl warm while smoothing to maintain flexibility. This step ensures a clean, professional finish.
Trimming And Finishing Edges
Trimming and finishing edges is a key step in vinyl wrapping a car interior. It gives the wrap a neat look and helps it last longer. Rough or uneven edges can peel or catch dirt. Proper trimming and sealing make the wrap smooth and durable.
Cutting Excess Vinyl Cleanly
Use a sharp utility knife or blade for clean cuts. Avoid dull blades that tear or stretch the vinyl. Trim slowly along the edge to follow curves and corners. Leave a small margin to tuck the vinyl under trims or panels. Cut excess vinyl in small sections for better control.
Sealing Edges For Longevity
Seal edges with heat and pressure to prevent lifting. A heat gun softens vinyl, making it stick better around edges. Press edges firmly with a squeegee or roller. Use vinyl edge sealant or adhesive tape for extra hold. Well-sealed edges keep dirt and moisture out, extending the wrap’s life.
Reassembling Interior Components
After wrapping your car interior with vinyl, reassembling the components is the next key step. This stage requires patience and care to ensure everything fits perfectly. Proper reassembly keeps your interior looking smooth and professional. It also protects the vinyl wrap from damage during use.
Reinstalling Trim And Panels
Start by carefully reinstalling all trim pieces and panels you removed earlier. Align each part with its original clips and screws. Press firmly to snap clips back into place without forcing them. Use the correct screws to avoid stripping or breaking. Take time to check that every panel fits flush and sits evenly. Small gaps can let dirt and moisture in, harming the vinyl wrap. Keep a soft cloth handy to clean any fingerprints or dust before securing parts fully.
Final Inspection And Touch-ups
Once all parts are back, do a thorough inspection of your work. Look closely for bubbles, wrinkles, or loose edges on the vinyl. Use a heat gun or squeegee to smooth out minor imperfections carefully. Check all screws and clips to ensure nothing is loose. Clean the entire surface with a gentle cleaner suited for vinyl. This step enhances shine and removes any dust from the installation. A final check guarantees your wrapped interior looks neat and lasts longer.
Credit: vvividshop.com
Tips For Long-lasting Vinyl Wraps
Keeping vinyl wraps on your car interior fresh and durable needs some care. These tips help your wrap stay smooth and bright for a long time. Small actions can make a big difference.
Follow the advice below to avoid problems and keep your vinyl looking new. Proper maintenance also keeps dirt and damage away.
Avoiding Common Mistakes
Clean the surface before applying vinyl. Dust or oils stop the wrap from sticking well. Take time to smooth out air bubbles during installation. Use a heat gun carefully to avoid melting the vinyl. Do not stretch the vinyl too much. This can cause tears or peeling later.
Maintenance And Cleaning Advice
Use a soft cloth and mild soap to clean the wrap. Avoid harsh chemicals or abrasive tools that scratch the surface. Clean spills quickly to prevent stains. Avoid direct sunlight for long hours to stop fading. Regularly check for lifting edges and press them down gently. A little care helps your wrap last many years.
Frequently Asked Questions
What Materials Are Needed To Wrap Car Interior With Vinyl?
You need vinyl wrap sheets, a heat gun, a squeegee, scissors, and a cleaning solution. Clean surfaces well before applying vinyl. These tools help ensure a smooth, professional finish without bubbles or wrinkles.
How Long Does Vinyl Wrapping A Car Interior Take?
Wrapping a car interior typically takes 4 to 8 hours. Time depends on the size and complexity of the parts. Patience is crucial to achieve a neat, lasting application without rushing.
Can Vinyl Wrap Damage My Car’s Interior Surfaces?
Properly applied vinyl wrap does not damage interior surfaces. It is designed to be removable and safe on plastics and trims. Always clean and prepare surfaces properly to avoid any adhesive residue or damage.
Is It Necessary To Remove Car Parts Before Wrapping?
Removing parts like panels and trim makes wrapping easier and cleaner. It allows better access to edges and prevents vinyl from lifting. However, some simple areas can be wrapped without disassembly if done carefully.
Conclusion
Wrapping your car’s interior with vinyl can change its look easily. The process needs care, patience, and the right tools. Follow each step to avoid bubbles and wrinkles. Take your time to smooth the vinyl for the best finish. This DIY project saves money and adds personal style.
A neat wrap protects surfaces and feels great. Enjoy your refreshed car interior every time you drive. Try it yourself and see the difference vinyl makes.


