

Changing the brakes and rotors on your Honda Accord might sound tricky, but with the right steps, you can do it yourself and save time and money. Your brakes are one of the most important safety features on your car, so keeping them in top shape is a must.
Imagine driving with confidence, knowing your car stops exactly when you need it to. This guide will walk you through the process clearly and simply, even if you’re not a car expert. Ready to take control of your car’s maintenance and boost your confidence on the road?
Let’s get started.

Credit: www.reddit.com
Tools And Materials Needed
Changing brakes and rotors on a Honda Accord requires specific tools and materials. Having the right items makes the job easier and safer. Prepare everything before starting the work.
Basic Hand Tools
You need a socket set with various sizes. A wrench set is also important for bolts. A flathead screwdriver helps to remove clips and covers. A hammer may be necessary to loosen stuck parts.
Brake-specific Tools
A brake caliper tool or a C-clamp compresses the caliper piston. This tool helps fit the new brake pads properly. A brake cleaner spray removes dust and grime from parts. A brake grease or lubricant stops noise and wear.
Safety Equipment
Wear safety glasses to protect your eyes from dust and debris. Use gloves to keep hands clean and safe. A jack and jack stands lift and hold the car securely in place.
Replacement Parts
Buy new brake pads and rotors that fit your Honda Accord model. Check the part numbers for compatibility. It is best to use quality parts for safety and durability.
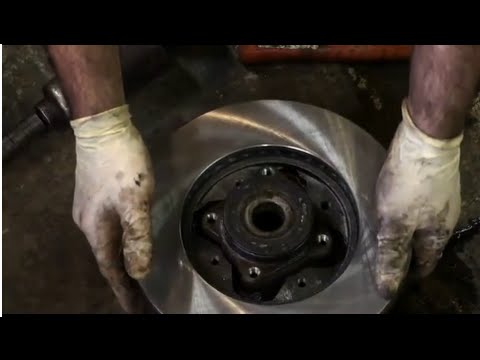
Credit: www.youtube.com
Preparing Your Vehicle
Preparing your Honda Accord for brake and rotor replacement is a key step. It helps ensure the work is done safely and correctly. Taking time to prepare prevents accidents and damage to your car. Follow these simple steps to get ready before starting the job.
Safety Precautions
Wear safety glasses to protect your eyes from dust and debris. Use gloves to keep your hands clean and safe. Park your car on a flat surface. Engage the parking brake to keep the car from moving. Keep a fire extinguisher nearby just in case. Never work under a car supported only by a jack.
Lifting The Car
Find the correct jacking points under your Honda Accord. Use a sturdy floor jack to lift the car. Lift the car slowly and steadily. Place jack stands under the car for extra support. Lower the car gently onto the jack stands. Make sure the car is stable before starting work.
Removing The Wheels
Use a lug wrench to loosen the wheel nuts. Do this before lifting the car to avoid slipping. Once the car is lifted and stable, remove the nuts completely. Keep the nuts in a safe place. Pull the wheels straight off the hub. Set the wheels aside carefully to avoid damage.
Removing Old Brakes And Rotors
Removing old brakes and rotors is the first step in brake replacement. This process lets you access worn parts that need changing. Proper removal ensures safety and prepares your Honda Accord for new brake components.
Detaching The Caliper
Start by loosening the caliper bolts. Use a wrench to remove them carefully. Then, gently pull the caliper away from the rotor. Support the caliper with a hanger or rope to avoid stress on the brake hose.
Removing Brake Pads
Once the caliper is off, slide out the brake pads. Check their position and note how they fit. Remove any clips or pins holding the pads in place. Keep the old pads aside for comparison with new ones.
Taking Off The Rotor
Rotors may be held by screws or just the wheel hub. Remove any screws using a screwdriver. If the rotor is stuck, tap it lightly with a rubber mallet. Pull the rotor straight off the hub to avoid damage.

Credit: www.reddit.com
Installing New Rotors
Installing new rotors on your Honda Accord is a key step in the brake replacement process. Proper installation ensures smooth braking and safety on the road. Take your time and follow each step carefully. This section guides you through cleaning the hub and mounting the rotor.
Cleaning The Hub
Start by cleaning the hub surface where the rotor will sit. Use a wire brush to remove rust and dirt. This helps the rotor fit snugly and prevents vibration. Wipe the hub with a clean cloth to remove loose debris. A clean hub ensures the rotor sits flat and tight.
Mounting The Rotor
Place the new rotor onto the hub carefully. Align the holes on the rotor with the studs on the hub. Press the rotor firmly against the hub. Use a few lug nuts to hold the rotor in place temporarily. This keeps the rotor steady while you continue with brake assembly.
Installing New Brake Pads
Installing new brake pads on your Honda Accord is a key step in brake maintenance. Fresh pads help your car stop safely and smoothly. This process needs care and attention to detail. Follow these steps to install your brake pads correctly.
Preparing The Caliper
First, clean the caliper to remove dirt and dust. Use a wire brush or rag for this. Next, compress the caliper piston with a brake tool or C-clamp. This makes space for the new, thicker brake pads. Be careful not to damage the piston or rubber seals.
Inserting Brake Pads
Take the new brake pads out of the packaging. Check for any protective films and remove them. Place the pads into the caliper bracket, matching the shape and position. Ensure the pads fit snugly and sit flush against the rotor surface. Avoid touching the friction surface to keep them clean.
Reattaching The Caliper
Once the pads are in place, carefully position the caliper over them. Align it with the mounting bolts and slide it into place. Tighten the bolts to the manufacturer’s specified torque. Double-check that the caliper moves freely and the pads do not shift. Your Honda Accord is almost ready to stop safely again.
Reassembling And Finishing Up
After replacing the brakes and rotors on your Honda Accord, the next step is to put everything back together. This stage is important for safety and to ensure your vehicle works properly. Careful reassembly will help your car brake smoothly and avoid future issues.
Take your time and follow each step closely. Proper reassembly makes a big difference in how your car performs after the repair.
Reinstalling Wheels
Start by placing the wheels back onto the car. Line up the holes on the wheel with the lug studs. Push the wheel firmly onto the hub. Hand-tighten the lug nuts to hold the wheel in place. Use a cross pattern when tightening to keep the wheel secure and even. Avoid fully tightening the nuts until the car is lowered.
Lowering The Vehicle
Use a jack to slowly lower the Honda Accord back to the ground. Make sure the car is stable and on a flat surface. Once the car is fully lowered, tighten the lug nuts with a torque wrench. Follow the manufacturer’s recommended torque settings. This ensures the wheels are safely secured and prevents damage.
Testing The Brakes
Before driving, test the brakes carefully. Press the brake pedal several times to build pressure. The pedal should feel firm, not soft or spongy. Drive slowly in a safe area and apply the brakes gently. Listen for unusual noises and watch for proper stopping. If anything feels wrong, check your work again.
Tips For Maintenance And Safety
Changing brakes and rotors on a Honda Accord requires care and attention. Proper maintenance keeps your car safe and running smoothly. Follow these tips to protect yourself and your vehicle during the process.
Wear Protective Gear
Always wear gloves to protect your hands from sharp parts. Use safety glasses to shield your eyes from dust and debris. Work in a well-ventilated area to avoid inhaling brake dust.
Use The Right Tools
Use tools designed for brake and rotor replacement. A proper jack and jack stands are essential for safety. Avoid makeshift tools that can slip or break.
Check Brake Fluid Levels
Before and after the job, check the brake fluid reservoir. Low fluid can cause brake failure. Top up with the recommended brake fluid type.
Test The Brakes Carefully
After installation, press the brake pedal slowly several times. This helps set the pads against the rotors. Test the brakes at low speed before driving normally.
Keep Work Area Clean
Clean dust and debris from the brake parts and surrounding area. Brake dust is harmful and can cause problems if left on parts. Use a brake cleaner spray for best results.
Frequently Asked Questions
How Often Should I Change Brakes And Rotors On Honda Accord?
Brake pads usually last 30,000 to 70,000 miles. Rotors may need replacement every 50,000 to 70,000 miles. Check them regularly for wear to ensure safety and optimal performance.
What Tools Are Needed To Change Honda Accord Brakes And Rotors?
Common tools include a jack, lug wrench, socket set, C-clamp, and brake cleaner. Having these handy ensures a smooth and efficient brake and rotor replacement process.
Can I Change Honda Accord Brakes And Rotors Myself?
Yes, with basic mechanical knowledge and proper tools, you can replace them. Follow safety precautions and step-by-step instructions carefully to avoid damage or injury.
How Long Does It Take To Replace Brakes And Rotors?
Typically, it takes 1 to 2 hours for both sides. Time varies based on experience and tool availability. Taking your time ensures a quality job.
Conclusion
Changing brakes and rotors on your Honda Accord is simple and saves money. Take your time and follow each step carefully. Always use the right tools for safety and best results. Check your work before driving again. Routine brake care keeps your car safe on the road.
Now, you can handle brake and rotor changes yourself with confidence.

