Are your brakes starting to feel less responsive or making strange noises? Changing your front brakes and rotors might be the quick fix your car needs to stay safe on the road.
You might think it’s a job only a mechanic can handle, but with the right steps, you can do it yourself—and save time and money. In this guide, you’ll learn exactly how to replace your front brakes and rotors, even if you’re new to car repairs.
Keep reading, and you’ll gain the confidence to take control of your vehicle’s maintenance today.

Credit: www.youtube.com
Tools And Materials Needed
Changing front brakes and rotors needs the right tools and parts. Proper preparation saves time and keeps you safe. Gather everything before you start. Check all tools and materials for quality. This helps the job go smoothly and avoids surprises.
Essential Tools
Use a jack and jack stands to lift the car safely. Lug wrench or impact wrench removes the wheel nuts. A socket set with ratchet makes bolts easy to take off. Brake caliper tool or C-clamp presses the caliper piston back. Flathead screwdriver helps pry parts apart gently. Brake cleaner spray removes dust and grime. Torque wrench ensures bolts tighten to the right strength. Gloves protect your hands from dirt and injury.
Brake Parts And Supplies
Buy new brake pads specific to your vehicle model. Choose rotors that match your car’s size and specs. Brake grease stops squeaking and helps parts move smoothly. Brake fluid may need topping off after the job. Use clean rags to wipe parts and keep everything neat. Have a container ready to catch old brake fluid safely. These parts and supplies keep your brakes working well and safely.
Credit: www.buybrakes.com
Safety Precautions
Changing front brakes and rotors requires careful attention to safety. Taking the right precautions protects you and your vehicle. It also helps you avoid accidents and injuries. Follow these safety steps before starting the job.
Preparing The Vehicle
Park the vehicle on a flat, stable surface. Apply the parking brake firmly. Place wheel chocks behind the rear wheels. This stops the car from moving. Loosen the lug nuts slightly before lifting. Use a reliable jack to raise the car. Support it securely with jack stands. Never work under a car supported only by a jack. Remove the front wheels carefully after the car is stable.
Personal Safety Tips
Wear safety goggles to protect your eyes from dust and debris. Use gloves to keep your hands clean and safe. Avoid loose clothing that could get caught in parts. Work in a well-lit area for better visibility. Keep a fire extinguisher nearby just in case. Have a first aid kit ready for minor injuries. Take your time and do not rush the process. Stay focused on the task to prevent mistakes.
Removing The Wheel
Removing the wheel is the first step to change front brakes and rotors. It gives clear access to the brake system. Follow these steps carefully for safety and ease.
Loosening Lug Nuts
Start by loosening the lug nuts on the wheel. Use a lug wrench or tire iron. Turn each nut counterclockwise. Loosen them just enough to break tightness. Do this while the car is still on the ground. It stops the wheel from spinning.
Lifting And Securing The Vehicle
Next, lift the vehicle using a jack. Place the jack under the car’s frame near the wheel. Raise the car until the wheel is off the ground. Use jack stands to secure the vehicle. Never work under a car only supported by a jack. Safety first.
Credit: thetacomaguy.com
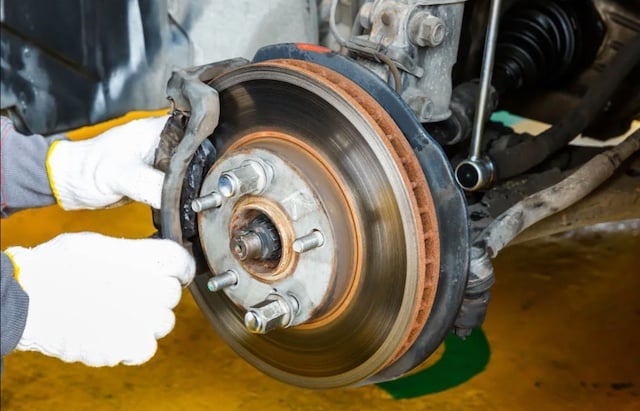
Accessing The Brakes
Start by lifting the car and removing the wheel to reach the brake parts. Next, take off the brake caliper carefully to access the front brakes and rotors. This step is key for replacing worn components safely.
Start by safely lifting and securing the vehicle. Remove the wheel to expose the brake assembly. This gives clear access to the brake caliper and rotor. Clean the area to remove dirt and dust. This helps avoid damage during the brake replacement process.
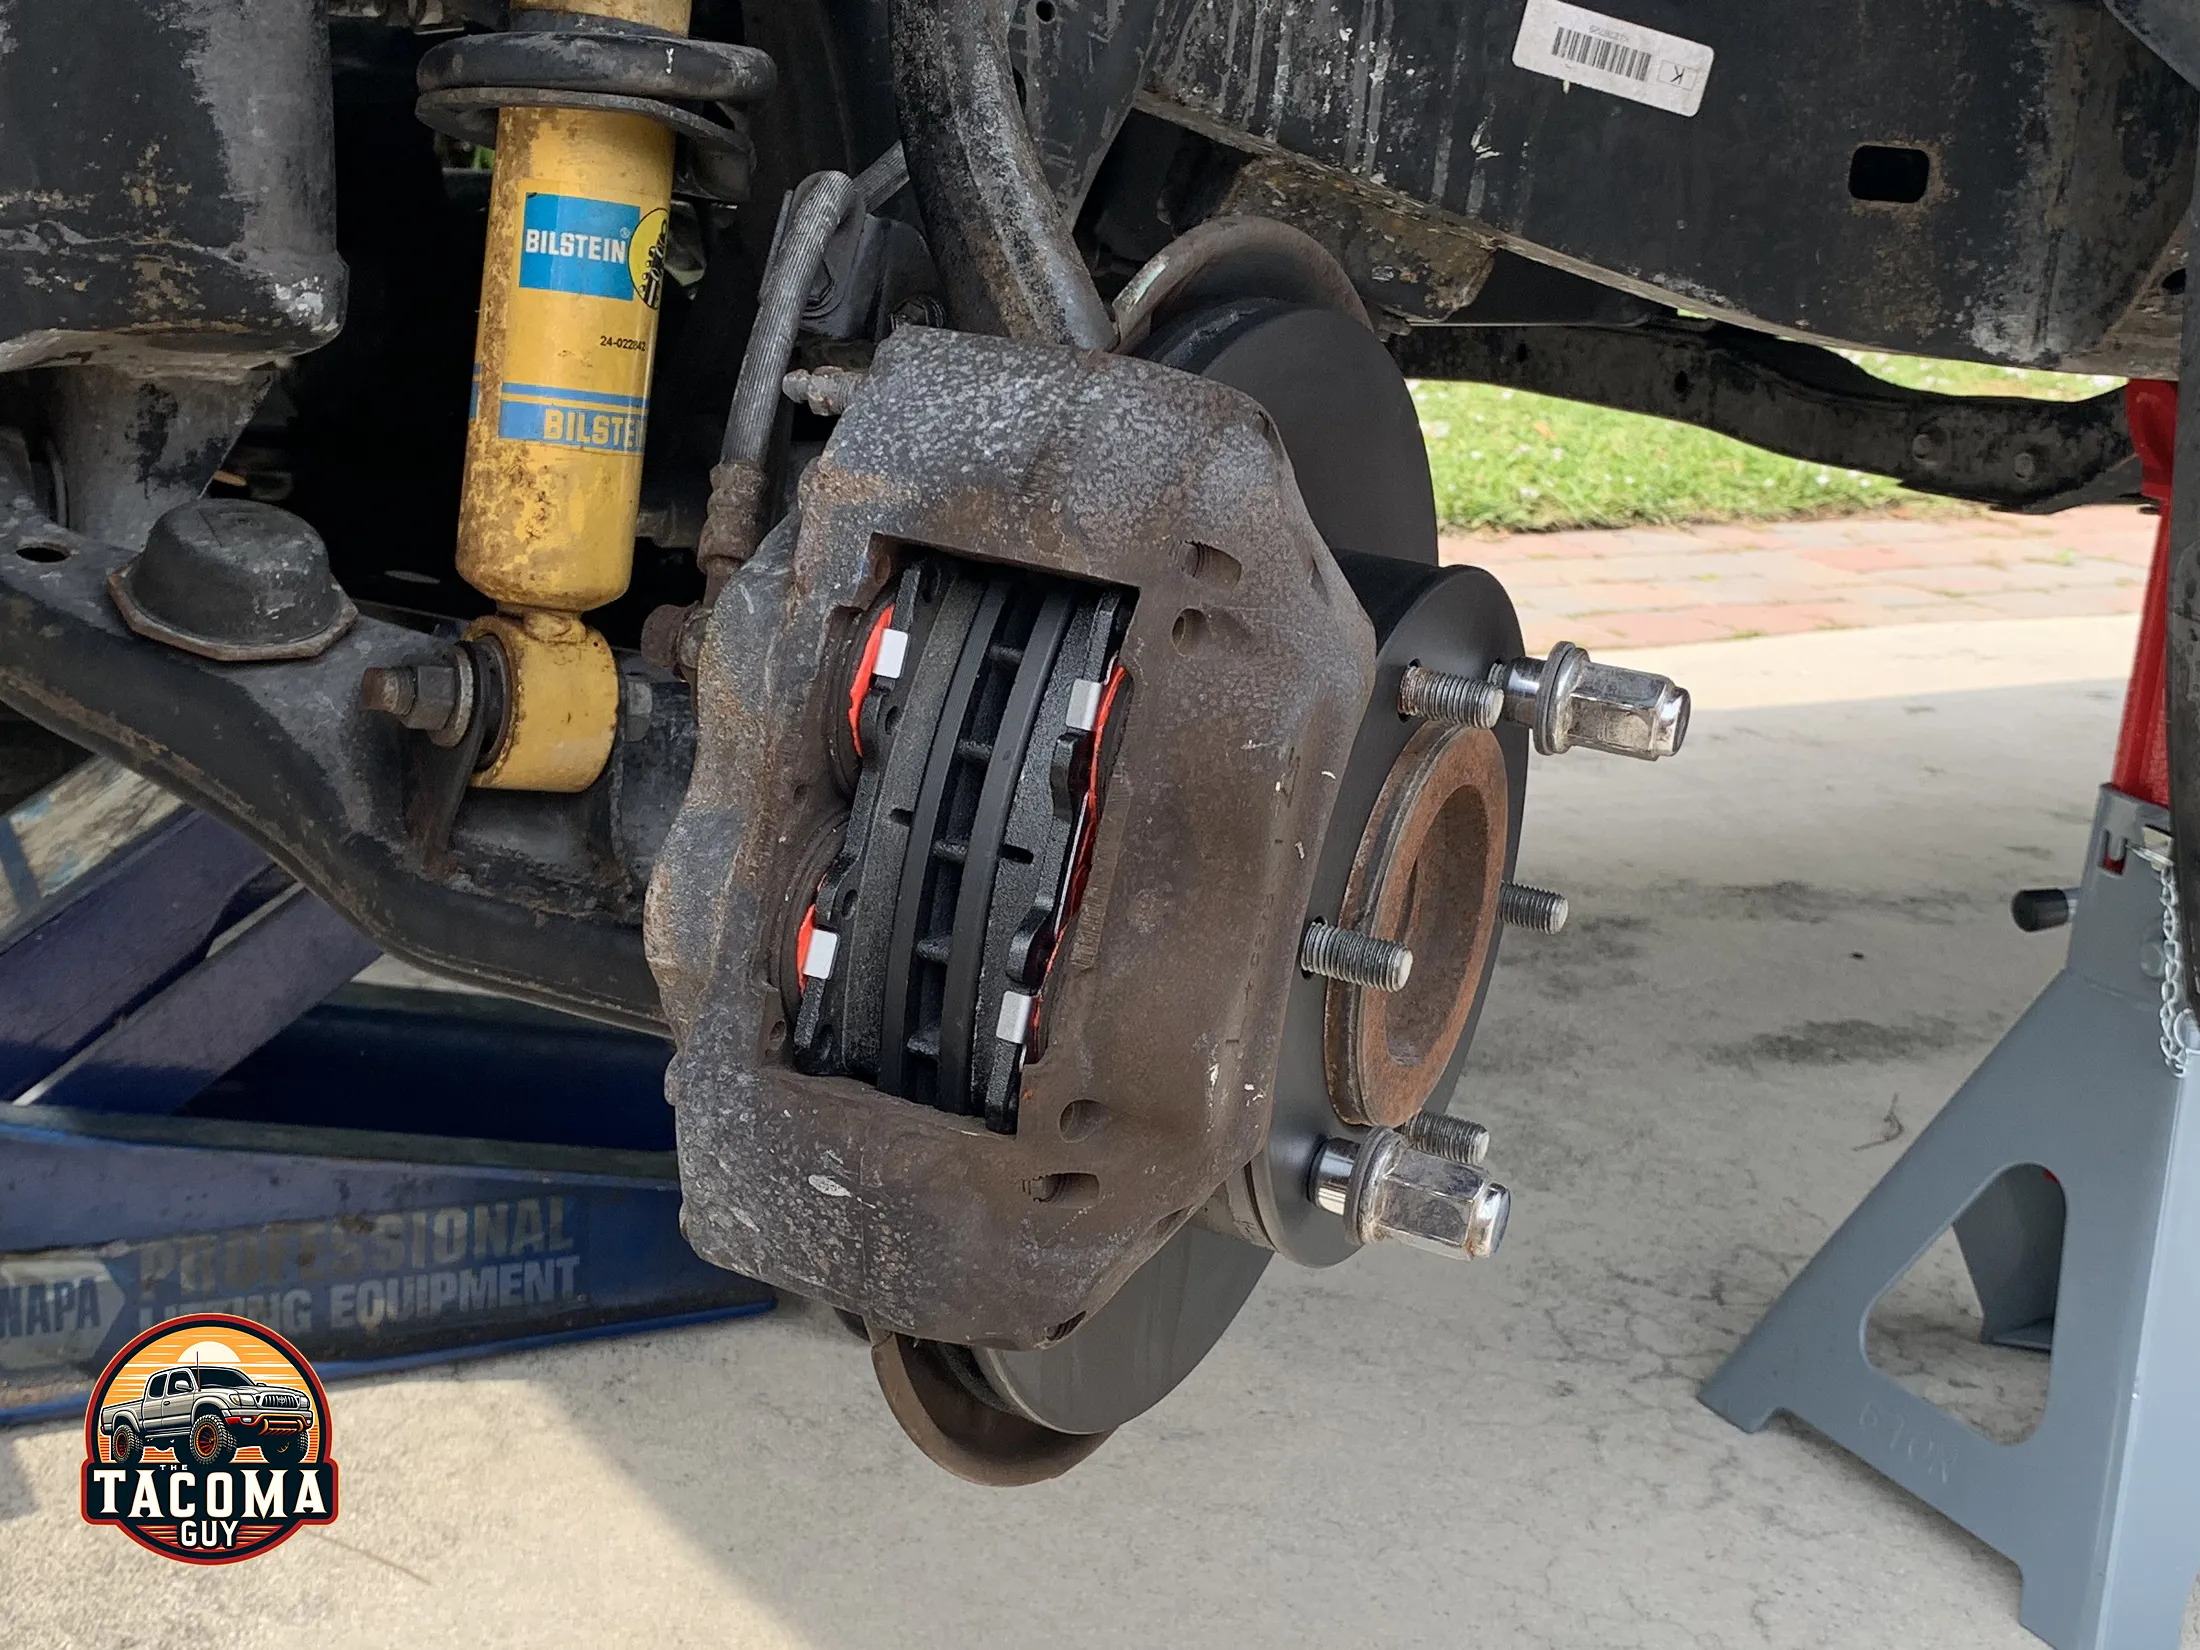
Removing The Caliper
Locate the caliper bolts on the back side of the caliper. Use a wrench or socket to loosen and remove these bolts. Carefully slide the caliper off the rotor. Support the caliper with a hanger or wire. Avoid letting it hang by the brake hose to prevent damage.
Taking Off The Old Brake Pads
Once the caliper is removed, the brake pads become visible. Slide the old pads out of the caliper bracket. Note their position for installing the new pads later. Check the pads for uneven wear or damage. Dispose of the old pads properly.
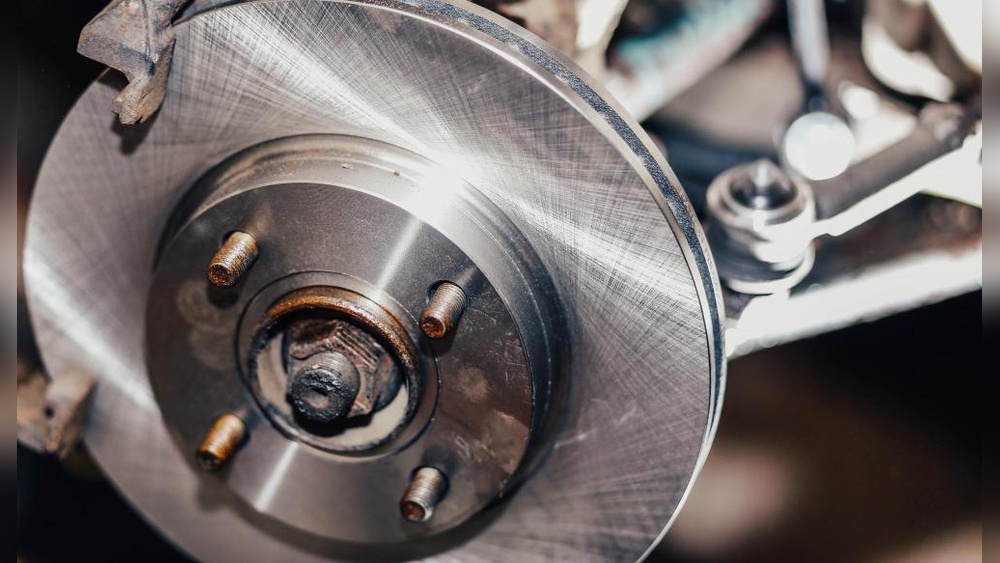
Replacing The Rotors
Replacing the rotors is a key step in changing front brakes. Rotors wear down over time and can cause brake noise or poor stopping power. New rotors help the brakes work smoothly and safely. Follow these steps carefully to remove the old rotor and install the new one.
Removing The Old Rotor
Start by lifting the car and removing the wheel. Use a wrench to take off the brake caliper. Hang the caliper safely to avoid damage. Next, remove the caliper bracket bolts. The rotor might be stuck due to rust. Tap it gently with a rubber mallet to loosen it. Pull the old rotor off the hub. Clean the hub surface before installing the new rotor.
Cleaning And Installing The New Rotor
New rotors often have a protective coating. Wipe this off with brake cleaner and a clean cloth. This ensures good contact with brake pads. Align the new rotor on the hub. Make sure it fits snugly. Reattach the caliper bracket and tighten bolts securely. Place the brake caliper back over the rotor and bolt it in place. Spin the rotor to check for smooth movement. Lower the car and tighten the wheel bolts properly.
Installing New Brake Pads
Installing new brake pads is a key step in changing front brakes and rotors. This process ensures your brakes work safely and smoothly. Proper installation helps avoid noise and uneven wear. Follow the steps carefully to place the pads correctly.
Preparing The Caliper
Start by cleaning the caliper and removing old brake pads. Use a wire brush to clear dirt and rust. Press the caliper piston back using a C-clamp or brake tool. This makes space for the new pads. Check the caliper for damage or leaks. Ensure it moves freely before installing new parts.
Positioning The New Pads
Place the new brake pads into the caliper bracket. Make sure the friction side faces the rotor. Align the pads so they sit flat and secure. Insert any clips or shims that came with the pads. These reduce noise and help fit. Double-check the pads do not move loosely.
Reassembling The Brakes
Reassembling the brakes is an important step after changing the front brakes and rotors. This process ensures your car stops safely and works well. Take your time and follow each step carefully. Proper reassembly helps avoid brake problems and keeps you safe on the road.
Reattaching The Caliper
Place the caliper back over the new brake pads and rotor. Align it carefully with the mounting bracket. Push the caliper so it fits snugly around the rotor. Insert the caliper bolts through the bracket and into the caliper. Tighten the bolts with a wrench until they are secure but not too tight. Check that the caliper moves slightly to allow brake pad contact.
Securing All Components
Double-check all bolts and screws to make sure they are tight. Reconnect any brake lines or sensors you removed earlier. Ensure the brake pads sit properly on both sides of the rotor. Spin the rotor by hand to confirm it moves freely without rubbing. Lower the car carefully if it is on a jack. Test the brake pedal to make sure it feels firm before driving.
Reinstalling The Wheel
Reinstalling the wheel is the final step after changing your front brakes and rotors. This step requires care to ensure safety and proper wheel alignment. A correctly mounted wheel prevents wobbling and uneven tire wear. Follow the steps below to reinstall the wheel safely and securely.
Mounting The Wheel
Lift the wheel and line it up with the wheel hub. Make sure the holes in the wheel match the lug bolts. Push the wheel gently onto the hub. Avoid dropping or forcing the wheel. This helps prevent damage to the brake components.
Tightening Lug Nuts Properly
Start by hand-tightening each lug nut. Tighten them in a crisscross or star pattern. This method ensures even pressure on the wheel. Use a torque wrench to tighten each nut to the manufacturer’s recommended torque. Over-tightening can damage the wheel or studs. Under-tightening risks the wheel coming loose while driving.
Testing The Brakes
Testing the brakes after changing front brakes and rotors is very important. It ensures the brakes work safely and correctly. A careful test helps avoid any problems on the road. This step checks if the brake pads and rotors fit well and respond as they should.
Initial Brake Pumping
Start by pressing the brake pedal slowly. Do this several times to build pressure in the brake system. The pedal should feel firm, not soft or spongy. This action moves the brake pads closer to the rotors. It also helps remove air from the brake lines. Without this step, brakes may not work properly.
Test Drive And Final Checks
Drive the car at a low speed in a safe place. Press the brakes gently to see how they respond. The car should stop smoothly and straight. Listen for any strange noises like grinding or squealing. After the test, check the brake fluid level again. Make sure all bolts and parts are tight. These checks confirm the brake job is done right.
Maintenance Tips
Maintaining your front brakes and rotors helps keep your car safe and reliable. Regular care prevents costly repairs and extends the life of these parts. Small habits make a big difference in brake performance and safety.
Follow these simple maintenance tips to keep your brakes working well and avoid sudden problems on the road.
Extending Brake Life
Drive gently to reduce brake wear. Avoid hard stops and sudden braking. Slow down early and coast to stop when possible. Keep your tires properly inflated for even brake pressure. Clean brake parts to remove dust and dirt. Check brake fluid regularly and change it as recommended. Use quality brake pads and rotors for longer durability.
Signs To Watch For
Listen for squeaking or grinding sounds when braking. Feel for vibrations or pulsing in the brake pedal. Notice if the car pulls to one side during stops. Watch for longer stopping distances than usual. Check for warning lights on your dashboard. Inspect brakes for visible wear or damage. Early detection helps avoid brake failure and expensive repairs.
Frequently Asked Questions
How Often Should I Change Front Brakes And Rotors?
Front brakes and rotors typically need replacement every 30,000 to 70,000 miles. This varies by driving habits and conditions. Regular inspections help catch wear early. Replace them if you hear squealing or feel vibrations during braking.
What Tools Are Required To Change Front Brakes And Rotors?
You need a jack, lug wrench, socket set, C-clamp, and brake cleaner. Safety gloves and eye protection are essential. These tools help remove wheels, calipers, old brakes, and install new parts efficiently and safely.
Can I Change Front Brakes And Rotors Myself?
Yes, with basic mechanical skills and the right tools, you can. Follow step-by-step instructions carefully. Ensure safety by working on a flat surface and using jack stands. If unsure, seek professional help to avoid accidents.
How Do I Know When Front Rotors Need Replacing?
Replace rotors if you feel vibrations when braking or see deep grooves or cracks. Warped rotors cause uneven braking and noise. Inspect visually and during brake pad changes to maintain safety and performance.
Conclusion
Changing front brakes and rotors is simpler than it seems. Follow each step carefully and take your time. Safety matters most, so double-check your work. Clean parts and use the right tools. Regular brake checks keep your car safe on the road.
Practice makes perfect, so don’t rush. Soon, you will save money and feel confident. Keep learning and maintaining your vehicle well. Your brakes will thank you with smooth, quiet stops.