
If you want your vehicle to run smoothly and avoid costly repairs, changing the fuel filter in your gas tank is a step you can’t skip. You might think it’s a complicated job, but with the right guidance, you can do it yourself and save time and money.
Imagine driving without worrying about engine problems caused by clogged fuel filters. You’ll learn simple, clear steps to change your fuel filter safely and effectively. Keep reading, and take control of your car’s performance today!
Signs Of A Clogged Fuel Filter
A clogged fuel filter stops fuel from flowing properly to the engine. This causes many problems with your car’s performance. Knowing the signs helps you fix the issue early. It keeps your engine running smoothly and saves you from costly repairs.
Engine Performance Issues
The engine may run rough or hesitate while driving. You might feel a loss of power during acceleration. The car could stall or jerk unexpectedly. These happen because the engine does not get enough fuel.
Fuel Efficiency Drops
Your car uses more fuel than usual. You may notice fewer miles per gallon. A clogged filter makes the engine work harder. This wastes fuel and lowers efficiency.
Starting Problems
The engine may take longer to start or fail to start. You hear clicking sounds but no engine turning. Blocked fuel flow makes it hard for the engine to get fuel. This causes starting difficulties.
Credit: www.youtube.com
Tools And Materials Needed
Changing the fuel filter inside the gas tank needs the right tools and materials. Having everything ready helps the process go smoothly and safely.
Below is a list of what you need before starting. Each item plays a key role in making the job easier and avoiding problems.
Essential Tools
- Socket wrench set – to remove bolts and screws
- Screwdrivers (flat and Phillips) – for clamps and covers
- Fuel line disconnect tool – to safely detach fuel lines
- Pliers – to grip and remove clips
- Drain pan – to catch fuel spills
- Flashlight – to see inside the gas tank area
Safety Gear
- Protective gloves – to keep hands clean and safe
- Safety glasses – to protect eyes from fuel splashes
- Long sleeves and pants – to avoid skin contact
- Fire extinguisher nearby – for emergencies
- Well-ventilated workspace – to avoid inhaling fumes
Replacement Fuel Filter
Choose a fuel filter that matches your vehicle’s make and model. Check the owner’s manual or ask at an auto parts store. A proper fit ensures good fuel flow and engine performance.
Preparing Your Vehicle
Preparing your vehicle is the first step in changing the fuel filter inside the gas tank. This stage ensures safety and easy access to the parts. Taking time now prevents problems later.
Follow each step carefully. It helps protect you and your vehicle during the process.
Park Safely And Disconnect Battery
Find a flat, open area to park your vehicle. Turn off the engine completely. Apply the parking brake to stop any movement.
Next, open the hood and locate the battery. Use a wrench to disconnect the negative terminal first. This prevents sparks or electrical shocks.
Relieve Fuel System Pressure
Fuel systems are under pressure. Releasing this pressure avoids fuel spray and injury. Locate the fuel pump fuse or relay in the fuse box.
Remove the fuse or relay, then start the engine. Wait until it stops running to clear pressure. Turn off the ignition after that.
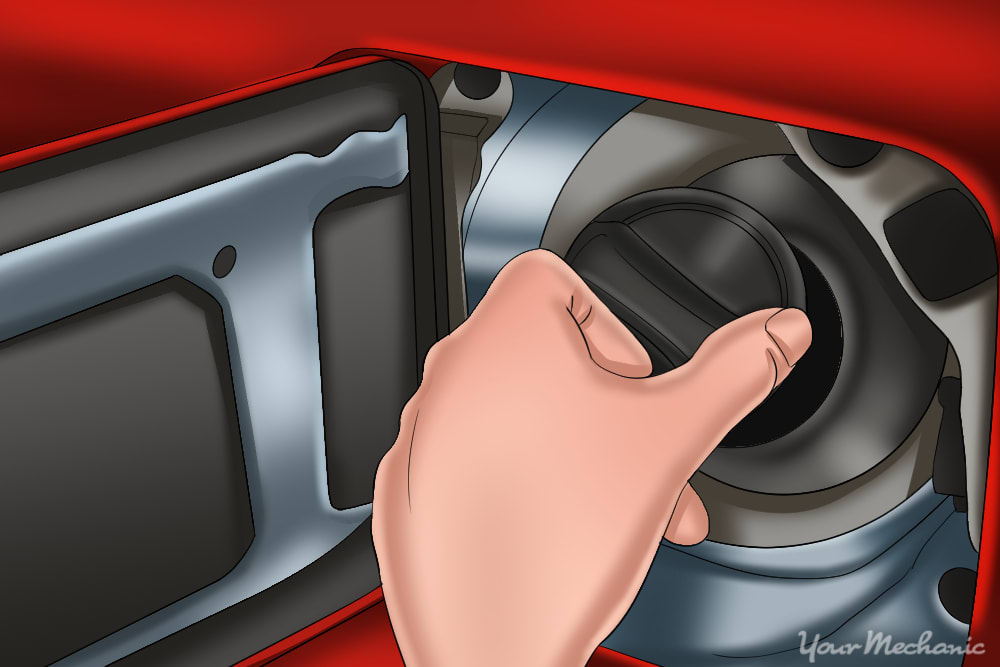
Accessing The Fuel Tank Area
Access depends on your vehicle model. Some have a panel inside the trunk or under rear seats. Others need the tank lowered from underneath.
Remove covers or seats carefully. Keep screws and parts safe for reassembly. Clean the area to prevent dirt from entering the fuel system.
Credit: www.yourmechanic.com
Removing The Old Fuel Filter
Removing the old fuel filter is the first step in replacing it safely. This task requires care and attention to avoid fuel spills or damage. Follow the steps below to remove the old fuel filter correctly.
Locate The Fuel Filter
Find the fuel filter in your vehicle. It is usually near the gas tank or along the fuel line. Check your car manual if unsure. The fuel filter looks like a small cylinder or canister.
Disconnect Fuel Lines
Use pliers or a wrench to loosen the fuel lines connected to the filter. Be ready for some fuel to leak out. Wear gloves and work in a well-ventilated area for safety.
Remove Mounting Hardware
Look for screws or clamps holding the fuel filter in place. Use the correct tool to remove them carefully. Keep the hardware safe for reinstallation later.
Careful Extraction
Gently pull the fuel filter out of its holder. Avoid jerking or forcing it to prevent damage. Dispose of the old filter properly according to local rules.
Installing The New Fuel Filter
Installing the new fuel filter is a key step in maintaining your vehicle’s fuel system. Proper installation ensures clean fuel flow and protects the engine from damage. Follow these steps carefully for a smooth installation process.
Positioning The Filter Correctly
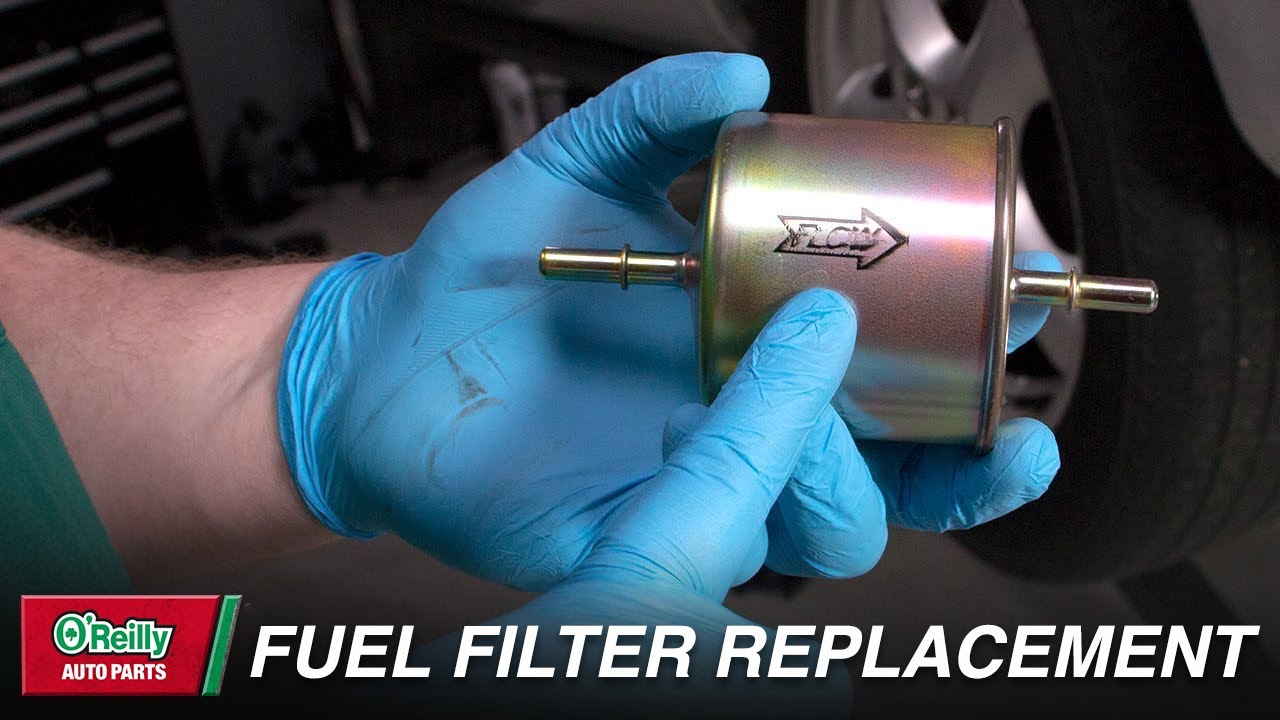
Place the new fuel filter in the same position as the old one. Check for the arrow on the filter body. The arrow shows the direction of fuel flow. Point it toward the engine. This helps fuel flow properly through the filter.
Reconnecting Fuel Lines
Attach the fuel lines to each end of the filter. Push the lines firmly to avoid leaks. Use clamps if necessary to hold the lines tight. Loose connections can cause fuel spills or engine problems.
Securing The Filter
Fix the filter in place with its bracket or clip. Make sure it is stable and does not move. A loose filter can cause vibrations or damage. Tighten any screws or bolts carefully but do not overtighten.
Double Checking Connections
Review all connections before finishing. Check the fuel lines and filter position once more. Look for any signs of loose fittings or damage. Ensuring everything is secure prevents fuel leaks and helps your vehicle run smoothly.

Credit: www.wikihow.com
Testing After Installation
Testing after installing the fuel filter is important. It ensures the filter works correctly and the engine runs smoothly. Careful checks help avoid problems like leaks or engine stalls. Follow these steps to confirm the installation is successful.
Reconnecting The Battery
First, reconnect the car battery. Attach the positive cable to the battery’s positive terminal. Then connect the negative cable to the negative terminal. Make sure the connections are tight and secure. This step powers the vehicle’s electrical system again.
Starting The Engine
Turn the ignition key to start the engine. Listen for smooth running sounds. The engine should start without hesitation or sputtering. If the engine runs rough, wait and try again. This action helps prime the new fuel filter with gasoline.
Checking For Leaks
Look under the vehicle near the fuel tank. Check around the new fuel filter area carefully. Watch for any signs of fuel dripping or wet spots. If you see leaks, tighten the fittings or replace faulty parts. No leaks mean the filter is sealed properly and safe to use.
Maintenance Tips
Proper maintenance helps your vehicle run smoothly and last longer. Keeping the fuel filter clean is key. Dirty filters block fuel flow and hurt engine performance. Follow these tips to maintain your fuel filter and avoid costly repairs.
Regular Fuel Filter Replacement Intervals
Check your vehicle’s manual for the right replacement schedule. Changing the fuel filter regularly prevents dirt build-up. A clean filter keeps fuel flowing freely and protects the engine. Replace the filter every 20,000 to 40,000 miles or as recommended.
Using Clean Fuel
Always fill your tank with clean, high-quality fuel. Contaminated fuel clogs the filter faster. Avoid cheap or questionable gas stations. Clean fuel reduces the risk of damage to the fuel system and engine.
Monitoring Engine Performance
Watch for signs of a clogged fuel filter. Engine sputtering, poor acceleration, or trouble starting can signal filter issues. Address problems quickly to avoid bigger engine damage. Regular checks help keep your engine healthy and reliable.
Frequently Asked Questions
How Often Should I Change The Fuel Filter?
You should change the fuel filter every 20,000 to 40,000 miles. Check your vehicle’s manual for exact intervals. Regular changes prevent engine problems and maintain fuel efficiency.
What Tools Are Needed To Change A Fuel Filter?
Basic tools include a wrench, screwdrivers, and pliers. You may also need a fuel line disconnect tool. Always wear safety gloves and goggles for protection.
Can I Change The Fuel Filter Myself Safely?
Yes, you can safely change the fuel filter if you follow instructions carefully. Work in a well-ventilated area and relieve fuel system pressure first. Avoid open flames or sparks nearby.
How Do I Locate The Fuel Filter In A Gas Tank?
The fuel filter is often inside or near the gas tank or along the fuel line. Consult your vehicle’s manual or a repair guide to find the exact location.
Conclusion
Changing the fuel filter in your gas tank keeps your engine running smooth. It stops dirt from clogging fuel lines and causing problems. Clean filters help save fuel and improve car performance. Follow the steps carefully and take safety measures.
A regular check and change can prevent costly repairs later. Simple maintenance like this keeps your vehicle healthy and reliable. Don’t wait for signs of trouble—act early and keep driving with confidence.


