Your car’s brake rotors play a crucial role in keeping you safe on the road. But do you know how to check them properly?
Ignoring worn or damaged rotors can lead to costly repairs—or worse, accidents. In this guide, you’ll learn simple steps to inspect your brake rotors yourself, saving you money and giving you peace of mind. Keep reading to discover how easy it is to ensure your brakes are in top shape before it’s too late.
Credit: pca.org
Signs Of Worn Brake Rotors
Brake rotors wear out over time and need checking. Knowing the signs helps keep driving safe. Worn rotors affect stopping power and car control. Watch for clear signals from your brakes.
Common Symptoms
Brake rotors wear unevenly and cause problems. Your car might pull to one side while braking. The brake pedal can feel soft or spongy. Longer stopping distance is a warning sign. These symptoms show rotors may need attention.
Noise And Vibration
Squealing or grinding noises often come from worn rotors. Vibrations in the steering wheel or brake pedal feel strange. These happen when rotors are warped or damaged. Noise and shaking mean it’s time for a brake check.
Visual Indicators
Look at the rotors through the wheel spokes. Deep grooves, cracks, or rust spots appear on bad rotors. Thin or uneven surfaces show rotor wear. A quick visual check can catch issues early and keep brakes strong.
Tools Needed For Inspection
Checking your brake rotors requires specific tools. These tools help you inspect the rotors safely and accurately. Having the right equipment makes the process easier and more effective. Below is a list of basic tools and safety gear you will need for a proper inspection.
Basic Tools List
- Jack and jack stands – to lift and secure the vehicle
- Lug wrench – to remove the wheel lug nuts
- Flashlight – to see the rotor surface clearly
- Micrometer or caliper – to measure rotor thickness
- Dial indicator – to check rotor runout (optional)
- Wire brush – to clean rust and debris from the rotor
Safety Equipment
- Gloves – protect your hands from sharp edges and dirt
- Safety glasses – shield your eyes from dust and debris
- Closed-toe shoes – protect your feet under the car
- Work clothes – wear something that can get dirty
Preparing Your Vehicle
Preparing your vehicle is the first step to checking your brake rotors safely. This process makes sure you can work without risk and helps you see the parts clearly. Taking time here saves trouble later.
Parking And Securing
Park your car on a flat, stable surface. Avoid slopes to stop the car from rolling. Put the parking brake on firmly. Place wheel chocks behind the wheels still on the ground. These keep the car from moving while you work.
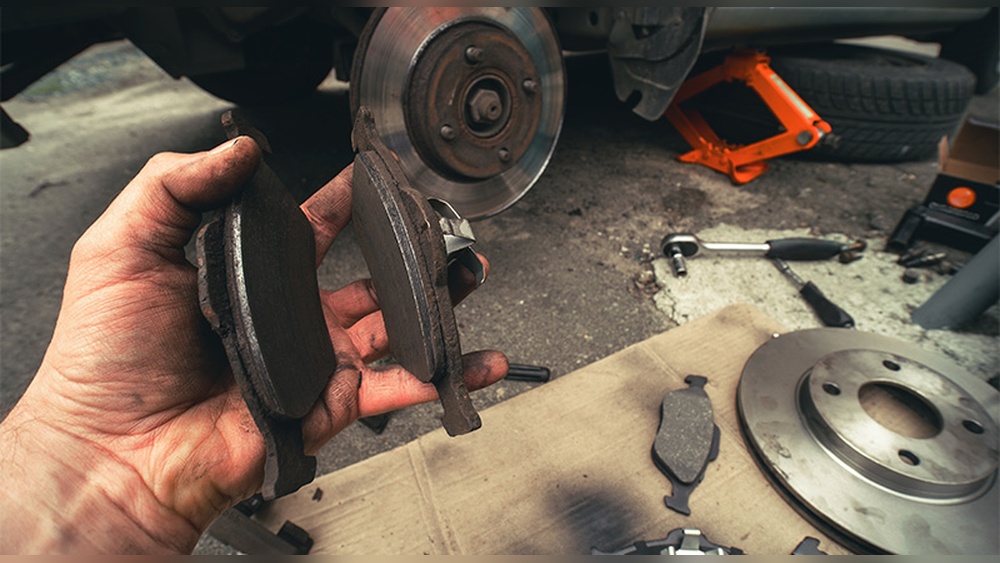
Removing The Wheel
Loosen the lug nuts slightly before lifting the car. Use a jack to raise the car until the wheel is off the ground. Support the car with jack stands for safety. Remove the lug nuts completely and take off the wheel. Now you can see the brake rotor clearly.
Credit: www.buybrakes.com
Inspecting The Brake Rotors
Inspecting the brake rotors is a key part of vehicle safety. Rotors work with brake pads to stop your car. Worn or damaged rotors can cause poor braking. Regular checks help keep your brakes in good shape. You can spot issues early and avoid costly repairs.
Checking For Warping
Warped rotors cause vibrations when braking. To check, feel the brake pedal. If it pulses or shakes, the rotors might be warped. You can also see uneven wear on the rotor surface. Use a dial indicator tool for precise checking. Warped rotors need to be replaced or resurfaced.
Measuring Rotor Thickness
Rotors wear thinner over time. Use a micrometer to measure thickness. Compare the measurement with the minimum thickness specified by the manufacturer. If the rotor is too thin, it can crack or fail. Thin rotors should be replaced immediately for safety.
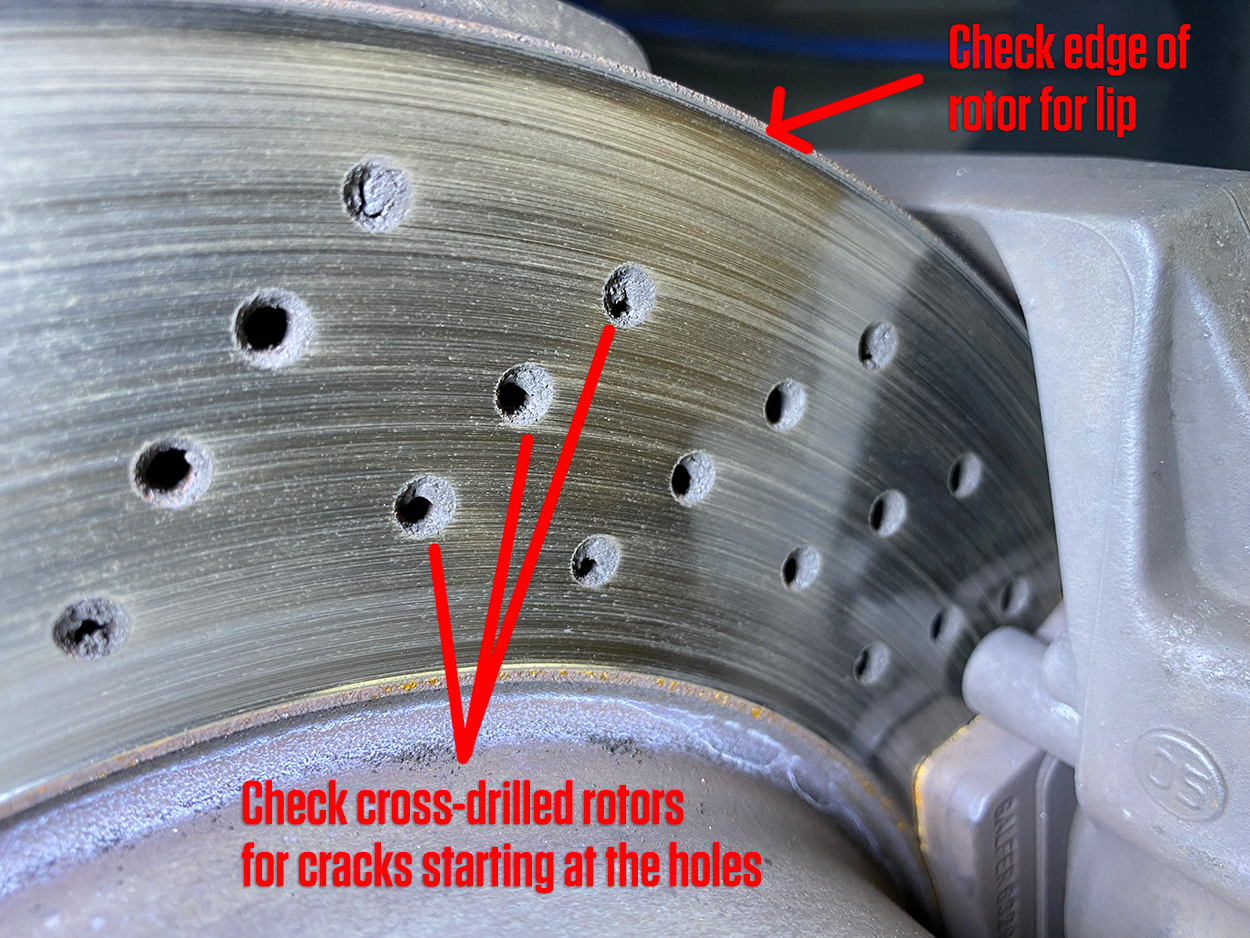
Looking For Cracks And Grooves
Cracks and grooves weaken the rotor’s strength. Inspect the rotor surface closely with good lighting. Small cracks often appear near the edges. Deep grooves result from worn brake pads or dirt. These defects reduce braking performance. Replace rotors showing cracks or deep grooves.
When To Replace Or Resurface Rotors
Knowing when to replace or resurface brake rotors is key for safe driving. Rotors wear down over time due to heat and friction. Driving with damaged rotors can cause poor braking and risk accidents. Regular checks help spot problems early. Understanding when rotors need attention saves money and keeps brakes working well.
Manufacturer Specifications
Every vehicle has rotor thickness limits set by the maker. This info is in the owner’s manual or online. Rotors thinner than the limit are unsafe. Thinner rotors can crack or warp easily. Use a micrometer to measure the rotor thickness. Compare the number to the limit. If below, replace the rotors immediately.
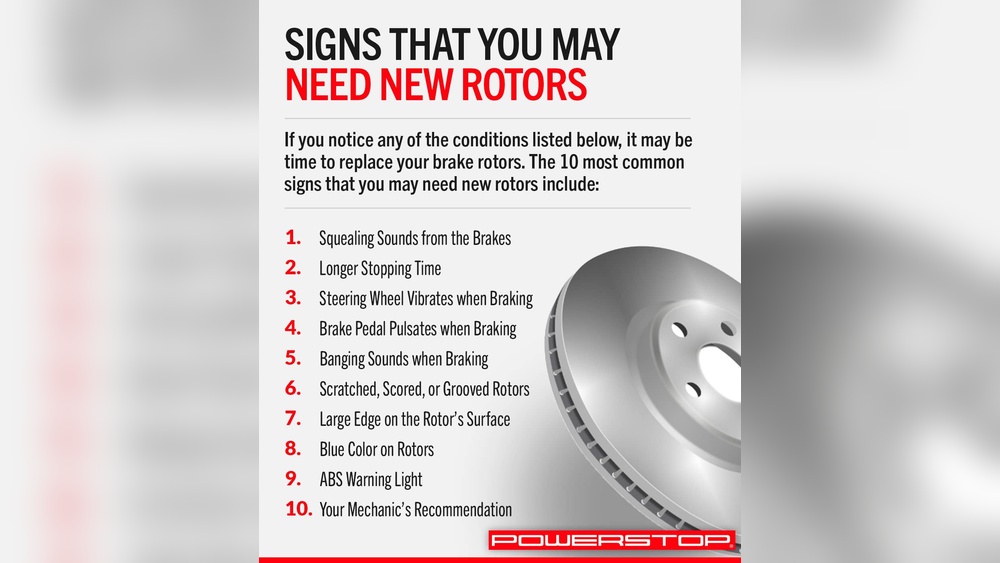
Signs Replacement Is Needed
Look for deep grooves or heavy scoring on the rotor surface. These marks reduce brake grip and cause vibration. If the rotor is cracked or has a blue tint, heat damage happened. Warped rotors make the brake pedal shake. Loud squealing or grinding noises also point to rotor problems. Any of these signs mean it’s time to replace the rotors.
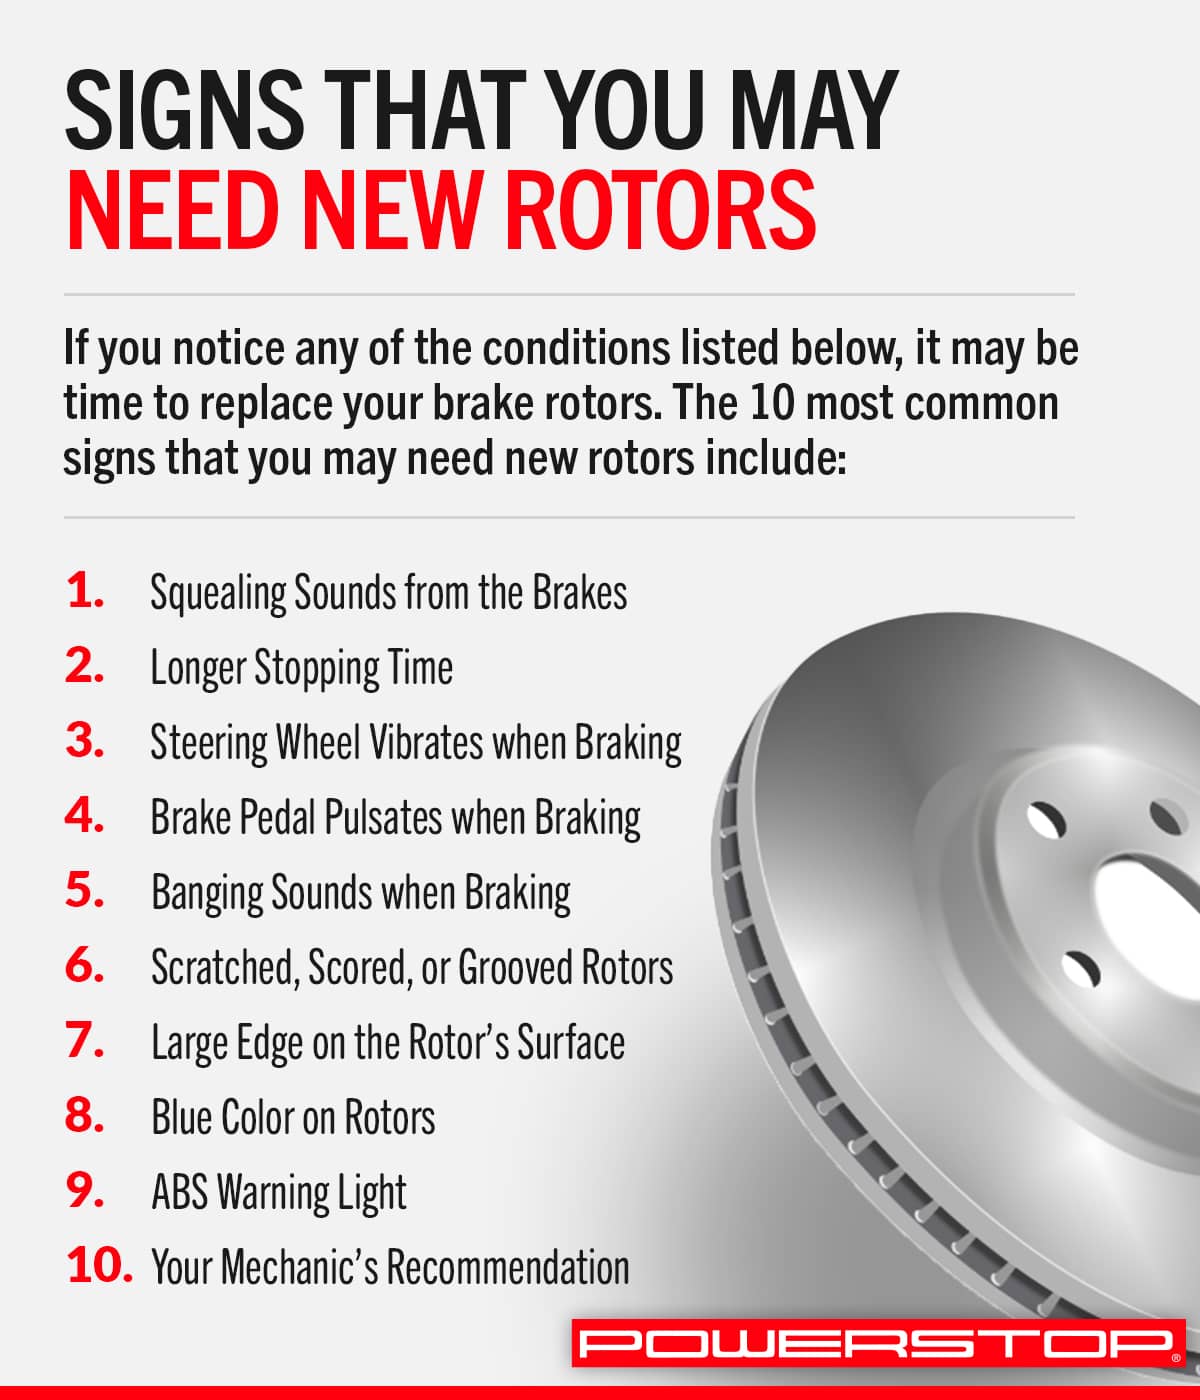
Credit: www.powerstop.com
Maintaining Brake Rotor Health
Maintaining brake rotor health is key for safe driving and longer brake life. Rotors work with brake pads to stop your vehicle smoothly. Poor rotor condition can cause noise, vibrations, and longer stopping distances. Regular care helps avoid costly repairs and keeps your car safe on the road.
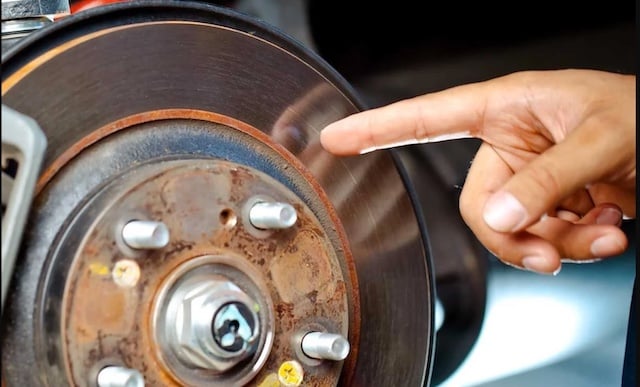
Regular Inspections
Check your brake rotors every few months or after heavy use. Look for cracks, grooves, or rust on the rotor surface. Run your fingers along the edge to feel for sharp spots or uneven wear. If you hear screeching or grinding, inspect the rotors immediately. Early detection helps prevent serious damage.
Driving Habits That Help
Drive gently to protect your brake rotors. Avoid sudden stops and hard braking. Slow down early for traffic lights and stop signs. Use engine braking by downshifting on hills. This reduces heat build-up and rotor wear. Smooth driving extends the life of your brake parts.
Proper Brake Pad Selection
Choose brake pads that match your rotor type and driving style. Soft pads create less rotor wear but wear out faster. Hard pads last longer but may cause rotor damage. Check your vehicle’s manual for recommended pad types. Using the right pads keeps rotors in better shape.
Frequently Asked Questions
How Do I Know If Brake Rotors Need Replacing?
Check for vibrations, squealing, or visible grooves on rotors. Warped or damaged rotors reduce braking efficiency and safety. If you notice these signs, have a mechanic inspect and possibly replace the rotors to ensure optimal vehicle performance.
What Tools Are Needed To Check Brake Rotors?
You need a jack, lug wrench, dial indicator, and flashlight to inspect rotors. A dial indicator measures rotor thickness and runout. These tools help identify wear or warping, ensuring accurate assessment of your brake rotors’ condition.
How Often Should Brake Rotors Be Inspected?
Inspect brake rotors every 12,000 miles or during brake pad changes. Regular checks catch early signs of damage or wear. Consistent inspections maintain safe braking performance and prevent costly repairs or accidents caused by rotor failure.
Can I Check Brake Rotors Without Removing Wheels?
You can visually inspect rotors through wheel spokes for rust or grooves. However, thorough checks require wheel removal to measure thickness and surface condition. Removing wheels ensures a complete and accurate assessment of brake rotor health.
Conclusion
Checking your brake rotors helps keep your car safe. Watch for signs like grooves, cracks, or warping. Regular checks avoid costly repairs and accidents. Use simple tools and take your time. If unsure, ask a mechanic for help. Stay alert to how your brakes feel and sound.
Proper maintenance keeps your brakes working well. Drive safely and keep your vehicle in good shape.