Are you looking to boost your car’s braking performance and give your ride a custom touch? Learning how to cross drill brake rotors could be the game-changer you need.
This simple upgrade not only helps your brakes cool faster but also improves stopping power and reduces brake fade. If you’ve ever wondered how professionals do it or want to try it yourself, this guide will walk you through every step clearly and safely.
Keep reading, and you’ll gain the confidence to tackle this project and take your braking system to the next level.
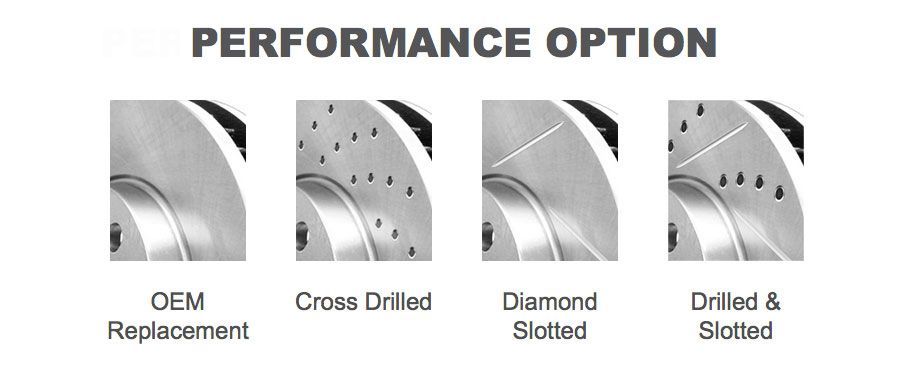
Benefits Of Cross Drilling
Cross drilling brake rotors offers several important benefits for vehicle braking. It improves how the brakes work and helps keep the rotors cool. These advantages support safer and more effective driving. Understanding these benefits helps explain why many choose cross drilled rotors for their vehicles.
Improved Heat Dissipation
Drilled holes allow heat to escape from the rotor surface faster. Heat builds up during braking and can harm brake parts. Cross drilling helps spread out this heat. Cooler rotors last longer and perform better under pressure.
Enhanced Brake Performance
Cross drilled rotors provide better grip for the brake pads. The holes help remove dust and gas between the pad and rotor. This results in a stronger and more reliable brake bite. Drivers notice smoother and more responsive braking.
Reduced Brake Fade
Brake fade happens when brakes lose power after heavy use. Cross drilling lowers the chance of fade by cooling the rotors. Consistent brake performance stays longer, even during tough driving. This keeps control steady and boosts safety.
Choosing The Right Brake Rotors
Choosing the right brake rotors is key before you start cross drilling. The right rotor improves braking and keeps your vehicle safe. Select rotors that match your driving style and vehicle needs. Quality rotors last longer and perform better under stress.
Material Considerations
Brake rotors come in different materials. Cast iron is common and cost-effective. It offers good heat resistance and durability. Steel rotors are stronger but may weigh more. Some rotors have special coatings to prevent rust. Choose material based on your vehicle use and climate.
Rotor Thickness And Size
Check rotor thickness carefully. Thicker rotors handle heat better and last longer. Too thin rotors can warp or crack easily. Size matters too. Rotors must fit your vehicle’s wheel size and brake system. Measure existing rotors or consult your vehicle manual.
Compatibility With Vehicles
Not all rotors fit every vehicle. Each car has specific rotor requirements. Match rotors to your vehicle’s make, model, and year. Using wrong rotors may cause poor braking or damage. Always verify compatibility before purchasing or drilling.
Essential Tools And Equipment
Cross drilling brake rotors requires the right tools for a clean and safe job. Having proper equipment ensures accuracy and protects both you and the parts. Below are the essential tools needed for this task.
Drill Types And Bits
A powerful drill is necessary for drilling through metal rotors. A corded drill offers steady power without battery limits. Select drill bits made for metal, such as cobalt or titanium-coated bits. Use a smaller pilot bit first to guide the larger bit. Sharp bits reduce heat and prevent damage.
Measuring And Marking Tools
Accurate measurements keep your holes even and balanced. Use a caliper or ruler to mark exact drill points. A center punch helps create small indentations at the marks. This stops the drill bit from slipping. Clear markings make drilling easier and safer.
Safety Gear
Safety gear protects you from metal shards and dust. Always wear safety glasses to shield your eyes. Use gloves to guard your hands from sharp edges. A dust mask keeps metal particles from entering your lungs. Proper gear ensures a safer working environment.
Credit: www.r1concepts.com
Preparing The Rotors For Drilling
Preparing the rotors for drilling is a crucial step. It ensures safety and accuracy during the process. Proper preparation helps avoid damage to the rotors and tools. Follow these steps carefully to get the best results.
Cleaning And Inspection
Start by cleaning the rotors thoroughly. Use a brake cleaner or rubbing alcohol to remove dirt and grease. Clean surfaces help the drill bit stay stable and cut smoothly.
After cleaning, inspect the rotors for cracks or deep grooves. Damaged rotors can cause problems and should not be drilled. Only use rotors that are in good condition.
Marking Drill Points
Mark the exact points where you will drill the holes. Use a center punch to make small indentations on the rotor surface. These marks guide the drill bit and prevent slipping.
Measure carefully to keep holes evenly spaced and aligned. Correct marking ensures balanced braking and prevents rotor damage.
Securing The Rotor
Place the rotor on a sturdy workbench or drill press table. Use clamps or a vise to hold it firmly in place. A secure rotor stops movement during drilling.
Double-check the setup before drilling. Stability is key for clean holes and personal safety.
Step-by-step Drilling Process
Cross drilling brake rotors improves cooling and brake performance. The process needs careful attention to detail. Follow clear steps for safe, effective results. Each step helps you avoid damage and ensures proper rotor function.
Setting Drill Speed
Choose a drill speed between 1500 and 2500 RPM. Too fast can cause overheating and damage. Too slow makes drilling uneven and slow. Use a variable speed drill to control speed easily. Keep speed steady throughout drilling for best results.
Drilling Techniques
Start by marking the hole locations on the rotor. Use a center punch to make small dimples at marks. These guide the drill bit and prevent slipping. Begin drilling with a small pilot hole first. Gradually increase drill bit size to final diameter. Apply light pressure and keep the drill straight. Pause often to clear metal shavings and cool the drill bit.
Avoiding Common Mistakes
Do not rush the drilling process. Overheating can warp the rotor and ruin its strength. Avoid using dull drill bits as they create rough holes. Check alignment often to keep holes precise. Wear safety goggles and gloves for protection. Clean the rotor thoroughly after drilling to remove debris.

Credit: www.roadandtrack.com
Post-drilling Finishing Touches
After drilling the brake rotors, the job is not done yet. The post-drilling finishing touches are important to ensure safety and performance. These steps help avoid damage and improve the lifespan of the rotors. Let’s explore the key tasks to complete after cross drilling your brake rotors.
Deburring And Smoothing Holes
Deburring removes sharp edges left by drilling. Use a deburring tool or fine sandpaper. Smooth holes prevent stress cracks and uneven wear. Take your time to gently clean each hole. A smooth finish makes the rotor safer and more reliable.
Balancing The Rotor
Cross drilling can unbalance the rotor. An unbalanced rotor causes vibrations during braking. Use a rotor balancing tool or take it to a shop. Adding small weights can correct the balance. Proper balance ensures smooth braking and less wear on parts.
Final Inspection
Check the rotor for cracks or damage after drilling. Inspect the holes for proper size and smoothness. Verify that the rotor surface is flat and clean. Ensure no metal debris remains on or inside the holes. A careful final inspection helps avoid brake failure and keeps driving safe.
Maintenance Tips For Cross Drilled Rotors
Cross drilled brake rotors need care to stay in good shape. Proper maintenance keeps them safe and working well. Small steps make a big difference in their lifespan and performance.
Regular Cleaning
Clean rotors often to remove dirt and brake dust. Use a soft brush and brake cleaner spray. Avoid harsh chemicals that may damage the metal. Clean rotors help maintain proper brake function and avoid noise.
Monitoring For Cracks
Check rotors for small cracks or damage. Cracks can grow and cause brake failure. Look closely around the drilled holes and edges. Early detection allows timely repair or replacement. Inspect rotors every few months or after hard driving.
Replacement Guidelines
Replace rotors when they show deep grooves or warping. Cross drilled rotors wear differently than solid ones. Follow the vehicle maker’s recommendations for thickness limits. Swap rotors in pairs for balanced braking. Timely replacement ensures safety and smooth stopping.

Credit: www.theautopian.com
Frequently Asked Questions
What Tools Are Needed To Cross Drill Brake Rotors?
You need a drill press, carbide drill bits, center punch, measuring tools, and safety gear. These ensure precision and safety during drilling.
How Do Cross Drilled Rotors Improve Braking Performance?
Cross drilling helps dissipate heat and gases faster, reducing brake fade. It also improves wet weather braking by channeling water away.
Can I Cross Drill Brake Rotors At Home Safely?
Yes, with the right tools, safety gear, and careful measurements, you can drill at home. Precision is key to avoid damaging rotors.
What Precautions Prevent Rotor Cracking When Cross Drilling?
Use sharp drill bits, apply steady pressure, and drill slowly. Cooling the rotor and avoiding excessive heat buildup prevent cracks.
Conclusion
Cross drilling brake rotors can improve your car’s braking. It helps heat escape and keeps brakes cooler. Take your time and follow each step carefully. Use the right tools to avoid damage. Always check your work for safety before driving.
This simple upgrade can make a difference in performance. Practice patience and safety throughout the process. Your brakes will thank you with better stopping power. Keep learning and maintaining your vehicle for best results.