

Are you ready to give your vehicle or project a fresh, stylish look? Installing 3M vinyl wrap is a smart way to transform surfaces quickly and affordably.
But if you’ve never done it before, the process might seem tricky. Don’t worry—you’re about to learn step-by-step how to do it right, avoiding common mistakes that can cost you time and money. By the end of this guide, you’ll have the confidence to tackle your wrap like a pro and enjoy a flawless finish that turns heads everywhere you go.
Let’s get started!

Credit: www.youtube.com
Preparing Your Vehicle
Preparing your vehicle is the first step for a smooth 3M vinyl wrap installation. A clean and clear surface helps the vinyl stick better. It also prevents bubbles and wrinkles. Taking time to prepare your car saves effort later.
Cleaning And Drying
Start by washing your car thoroughly. Use soap and water to remove dirt and grease. Pay special attention to areas you plan to wrap. Rinse well to avoid soap residue. Dry the surface completely with a clean cloth. Any moisture can affect the vinyl’s grip.
Removing Obstacles
Take off parts that block the wrap. Remove side mirrors, badges, and trim pieces carefully. This allows better access to wrap edges. It also helps achieve a neat finish. Keep screws and parts safe for reassembly.
Gathering Tools And Materials
Prepare all needed tools before starting. You will need a squeegee, heat gun, utility knife, and cleaning cloths. Use 3M vinyl wrap film designed for vehicles. Having everything ready avoids interruptions. It makes the installation process smoother and faster.
Measuring And Cutting The Vinyl
Measuring and cutting the vinyl wrap is a key step in the installation process. Precise measurements ensure the vinyl fits well on the surface. Careful cutting prevents waste and mistakes. This step saves time and effort later.
Taking Accurate Measurements
Start by cleaning the surface you want to wrap. Dirt can affect measurements. Use a tape measure to get the length and width. Measure twice to avoid errors. Write down the numbers clearly. Add a little extra length for edges and curves. This extra helps during installation. Check the shape and any curves. Note any unusual angles or contours. These details matter for a good fit.
Cutting The Vinyl To Size
Lay the vinyl flat on a clean surface. Use a sharp utility knife or scissors. Cut slowly along your marked lines. Keep your hand steady for straight edges. Avoid cutting too close to the measurement. Leave a small margin for trimming later. This margin helps adjust the fit. Handle the vinyl carefully to prevent wrinkles. Roll or fold the cut piece gently for storage. Ready to apply without damage.
Applying The Vinyl Wrap
Applying the vinyl wrap is a careful process. It needs patience and a steady hand. This step shapes how the wrap looks on your surface. A good application means a smooth, clean finish without bubbles or wrinkles.
Positioning The Vinyl
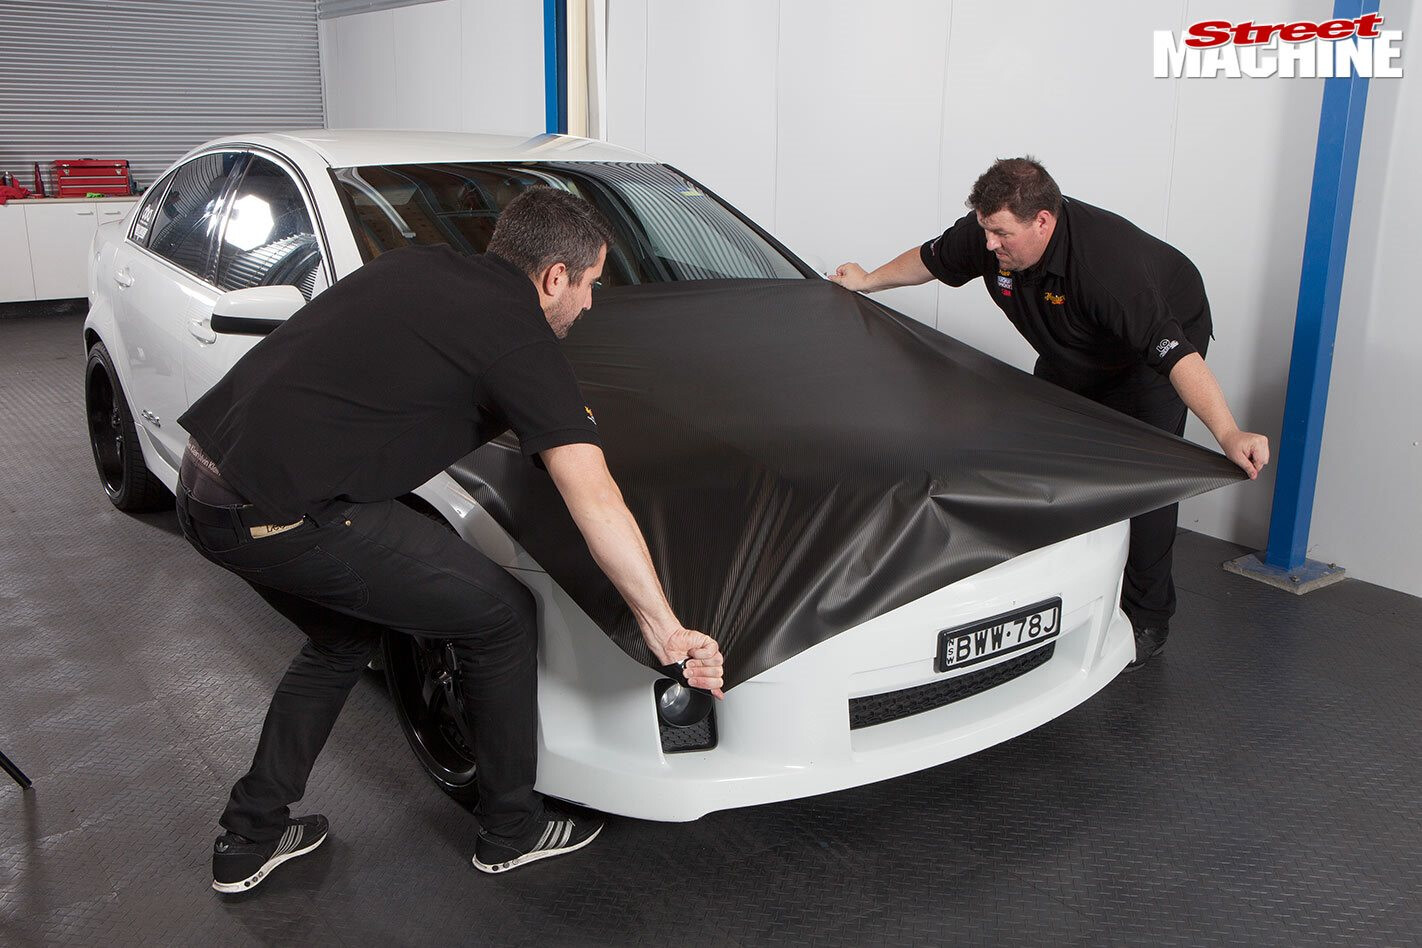
Start by placing the vinyl on the surface. Make sure it covers the area fully. Align edges carefully. Use light pressure to hold it in place. Check for any folds or creases before pressing down.
Peeling The Backing
Slowly peel the backing from the vinyl. Pull it back little by little. Avoid touching the sticky side too much. Keep the vinyl flat as you expose the adhesive. This helps prevent dirt and dust from sticking.
Smoothing Out Air Bubbles
Use a squeegee or soft cloth to smooth the vinyl. Start from the center and push outward. This moves air bubbles to the edges. Small bubbles can be popped with a pin. Work gently to avoid tearing the wrap.
Trimming And Finishing Touches
Trimming and finishing touches are vital for a clean vinyl wrap look. This stage ensures the wrap fits perfectly and stays in place longer. Attention to detail here prevents peeling and bubbles. Proper finishing also enhances the vehicle’s appearance, making the wrap look smooth and professional.
Cutting Excess Vinyl
Use a sharp blade to cut away extra vinyl. Cut slowly and carefully to avoid damaging the surface. Leave a small margin near the edges for adjustments. Trim excess vinyl in manageable sections for better control. Dispose of scraps to keep the workspace tidy.
Heating And Stretching For Curves
Heat the vinyl gently with a heat gun to make it flexible. Warm vinyl stretches easier over curves and contours. Stretch the vinyl smoothly without overdoing it to avoid tears. Use a squeegee to press the vinyl evenly while stretching. Let the vinyl cool to set its shape firmly.
Sealing The Edges
Seal edges to stop water and dirt from getting underneath. Use a heat gun to activate the adhesive along the edges. Press edges firmly with a squeegee or cloth for a tight seal. Check all edges to ensure no gaps or loose spots remain. Proper sealing extends the wrap’s life and look.
Maintaining Your Vinyl Wrap
Maintaining your 3M vinyl wrap keeps it looking fresh and new. Proper care extends the life of the wrap. Regular attention prevents damage and fading. Follow simple steps to protect your investment.
Cleaning Tips
Use a soft cloth or sponge for cleaning. Wash with mild soap and water only. Avoid harsh chemicals or abrasive cleaners. Rinse thoroughly to remove all soap. Dry with a microfiber towel to prevent spots.
Avoiding Damage
Park in shaded areas to reduce sun exposure. Avoid rubbing against sharp objects or rough surfaces. Do not use high-pressure washers too close. Keep away from gasoline or oil spills. Be gentle while opening and closing doors.
Repairing Minor Flaws
Inspect your wrap regularly for small scratches or bubbles. Use a heat gun on low settings to smooth bubbles. Gently lift edges to fix minor peeling. For small scratches, use a vinyl repair kit. Act quickly to stop damage from growing.
Credit: www.streetmachine.com.au

Credit: www.youtube.com
Frequently Asked Questions
What Tools Are Needed To Install 3m Vinyl Wrap?
You need a squeegee, heat gun, utility knife, microfiber cloth, and gloves. These tools help apply the wrap smoothly and avoid bubbles or damage.
How Do I Prepare My Vehicle For Vinyl Wrapping?
Clean the surface thoroughly with soap and water. Remove dirt, wax, and grease for better adhesion. Dry completely before starting the installation.
How Long Does It Take To Install 3m Vinyl Wrap?
Installation time depends on the vehicle size and experience. Typically, it takes 4 to 8 hours for a full car wrap.
Can I Install 3m Vinyl Wrap Myself?
Yes, with patience and proper tools, you can DIY. Follow step-by-step instructions to avoid mistakes and achieve a professional look.
Conclusion
Installing 3M vinyl wrap can be easy with the right steps. Take your time and work carefully. Clean the surface well before you start. Use a squeegee to smooth out air bubbles. Trim edges neatly for a clean look. Practice makes perfect, so don’t rush.
You can change your vehicle’s look without paint. Enjoy the fresh, new appearance once done. Follow these tips, and your wrap will last long. Simple steps lead to great results.


