
Are you looking to give your car a fresh, stylish look without spending a fortune? Installing Pilot Spyder wheel covers is a simple and cost-effective way to do just that.
But if you’ve never done it before, the process might seem tricky. Don’t worry—this guide will walk you through every step, making it easy for you to upgrade your wheels quickly and confidently. Keep reading, and you’ll have your car looking sharp in no time!

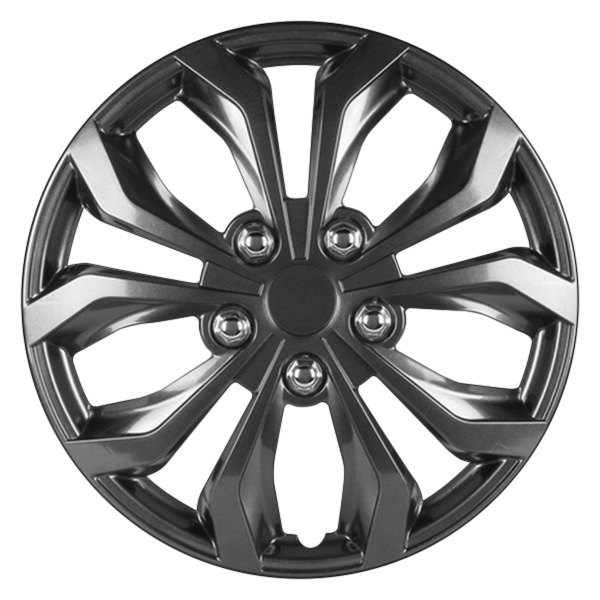
Credit: www.carid.com
Tools And Materials Needed
Before installing Pilot Spyder wheel covers, gather all necessary tools and materials. Having the right items helps the process go smoothly. It saves time and prevents mistakes.
Prepare a clean workspace near your vehicle. Make sure you have enough light to see details clearly. Double-check you have everything before starting the installation.
Wheel Covers
Choose the correct size of Pilot Spyder wheel covers for your wheels. The covers should fit snugly without gaps. Check the product packaging or manual for size details.
Flathead Screwdriver
A flathead screwdriver helps to pry off old wheel covers carefully. It also assists in adjusting clips on the new covers. Use one with a comfortable handle for better grip.
Rubber Mallet
Use a rubber mallet to tap the new wheel covers into place. It applies gentle force without damaging the covers. Avoid using a metal hammer to prevent cracks or dents.
Cleaning Cloth And Cleaner
Clean the wheel surface before installing the covers. Use a soft cloth and a mild cleaner to remove dirt and grease. Clean wheels ensure better fit and longer hold.
Gloves
Wear gloves to protect your hands from dirt and sharp edges. Gloves also improve grip on slippery surfaces. Choose gloves that fit well and allow easy movement.
Preparing Your Vehicle
Preparing your vehicle is the first step to install Pilot Spyder wheel covers. Proper preparation ensures a smooth and secure fit. It also protects your wheels and improves the final look.
Take your time with these steps. They help avoid damage and make the installation easier. Clean, dry, and stable wheels are the best starting point.
Cleaning The Wheels Thoroughly
Remove dirt and brake dust from the wheels. Use soap and water or a gentle wheel cleaner. Scrub with a soft brush to reach all areas. Dry the wheels completely with a clean cloth. Dirty wheels can prevent the covers from fitting well.
Checking Wheel Condition
Inspect each wheel for damage or rust. Look for cracks, dents, or loose lug nuts. Fix any issues before installing the covers. Damaged wheels can cause poor fit and safety problems.
Removing Existing Hubcaps Or Covers
Take off old hubcaps or wheel covers carefully. Use a flat tool if needed, but avoid scratching the wheels. Keep the old covers in case you want to reuse them later. Clear space around the wheels for easy installation.
Ensuring The Vehicle Is Parked Securely
Park your car on a flat, stable surface. Engage the parking brake for safety. Turn off the engine and remove the keys. This prevents movement while working on the wheels.
Removing Old Wheel Covers
Removing old wheel covers is the first step before installing new Pilot Spyder wheel covers. This step helps ensure the new covers fit properly and look great. It also prevents damage to your wheels.
Old wheel covers can be stuck due to dirt or tight clips. Taking your time during removal makes the process easier and safer. Use the right tools and follow simple methods to avoid scratching your wheels.
Gather Necessary Tools
Start by collecting tools like a flathead screwdriver or a plastic pry tool. Gloves protect your hands during removal. Having a cloth nearby helps clean dirt from the wheels after removing covers.
Loosen The Wheel Cover
Insert the flathead screwdriver or pry tool gently between the wheel and cover edge. Push carefully to avoid bending the cover or wheel. Work your way around the wheel cover, loosening clips evenly.
Remove The Wheel Cover
Once clips are loose, pull the cover away from the wheel. Use steady pressure to avoid sudden pops. If stuck, check for hidden clips or screws and remove them before trying again.
Clean The Wheel Surface
After removing the cover, wipe the wheel surface with a clean cloth. Remove dirt and debris to help new covers fit properly. A clean surface prevents scratches and improves wheel cover grip.
Inspecting And Cleaning Wheels
Inspecting and cleaning your wheels is an important first step before installing Pilot Spyder wheel covers. This step helps the covers fit well and last longer. Dirt and damage can stop the covers from attaching properly.
Take your time to check each wheel carefully. Cleaning removes dust and grease, making the surface smooth. A clean wheel ensures the cover stays in place and looks good.
Check For Damage
Look closely at the wheels for cracks, dents, or rust. Small damage can cause problems when fitting the wheel covers. Fix any issues before moving on.
Remove Dirt And Debris
Use a brush or cloth to clear away mud, leaves, and dust. Clean all around the wheel, including the edges and lug nut areas. Dirt can stop the cover from snapping in place.
Wash With Soap And Water
Mix mild soap with water and wash the wheels well. Use a sponge or soft cloth to scrub gently. Rinse with clean water to remove soap residue.
Dry Thoroughly
Wipe the wheels dry using a clean towel. Make sure no water remains on the surface or inside the wheel holes. Dry wheels help the covers stick better and avoid slipping.
Aligning The Pilot Spyder Wheel Covers
Aligning the Pilot Spyder wheel covers is a key step in their installation. Proper alignment ensures the covers fit securely and look great. It prevents wobbling and damage while driving. Taking time to align them correctly saves effort later.
Start by checking the wheel cover and the wheel itself. Note the clips or tabs on the cover. These must match the spaces or holes on the wheel. Aligning these parts makes the cover sit firmly on the wheel.
Identify The Clip Positions On The Wheel Cover
Look closely at the back of the wheel cover. Find the plastic clips or tabs. Count them and note their shape. These clips hold the cover tightly to the wheel.
Knowing the clip positions helps match them to the wheel. This step avoids forcing the cover on the wheel incorrectly.
Match Clips With Wheel Rim Slots
Turn the wheel cover so clips face the wheel rim. Find the slots or gaps on the rim. Line up each clip with a slot on the rim.
Aligning clips and slots allows easy fitting. It keeps the cover stable and prevents falls.
Test Fit Before Pressing Firmly
Place the cover gently on the wheel rim. Check if clips align with slots. Slightly move the cover to find the best fit.
Do not press hard at first. Testing the fit helps avoid damage to clips or wheel.
Credit: www.carid.com
Installing The Wheel Covers
Start by cleaning the wheel surface to ensure the cover fits well. Align the Pilot Spyder wheel cover with the wheel, then press firmly until it snaps into place. Check all edges to confirm a secure fit.
Preparing The Wheel Surface
Clean the wheel surface thoroughly before starting. Dirt and dust stop the cover from fitting well. Use a cloth and some water to wipe the wheel. Make sure the wheel is dry before the next step. This helps the cover stick better and stay longer.
Aligning The Pilot Spyder Wheel Cover
Hold the wheel cover near the wheel. Match the cover’s clips with the wheel’s rim carefully. Check that the logo or design is upright. Proper alignment makes the cover look neat and fit tight. Take your time to position it right.
Securing The Wheel Cover
Press the wheel cover firmly onto the wheel. Push around the edges to snap the clips into place. Listen for a clicking sound to know it fits well. Avoid using too much force to stop damage. A tight fit prevents the cover from falling off while driving.
Securing And Testing Fit
Securing and testing the fit of Pilot Spyder wheel covers is a key step. It ensures the covers stay in place and look great. Taking time here prevents problems while driving.
Check each cover carefully after placing it on the wheel. Make sure it snaps in tightly. Loose covers can fall off or cause noise.
Aligning The Cover Properly
Start by matching the wheel cover’s clips with the wheel rim. Hold the cover firmly against the wheel. Press around the edges to lock each clip in place. Do this slowly to avoid bending the cover.
Pressing The Cover Firmly
Apply steady pressure all around the cover. Use your palm, not fingers, for even force. Listen for clicking sounds. These confirm the cover is secured tightly. Avoid pushing too hard to prevent damage.
Testing The Fit By Driving Slowly
Drive your car slowly around the block. Listen for rattling or loose sounds from the wheels. Stop and check the covers again. If any move, press them back firmly. Repeat until the fit is perfect.
Maintenance Tips For Wheel Covers
Maintaining your Pilot Spyder wheel covers keeps them looking fresh and lasting longer. Clean covers prevent dirt buildup that can cause damage. Regular care saves money on replacements and keeps your wheels attractive.
Simple steps help protect the covers from harsh weather and road grime. Follow these tips to keep the covers secure and looking new.
Cleaning Your Wheel Covers Regularly
Use mild soap and water to clean the covers. Avoid harsh chemicals that can damage the finish. A soft cloth or sponge works best for scrubbing gently. Rinse with clean water and dry with a soft towel. Clean covers prevent dirt from scratching the surface.
Checking For Damage And Loose Fittings
Inspect the wheel covers often for cracks or chips. Look for any loose clips or parts that might fall off. Tighten any loose fittings carefully without forcing them. Early fixes stop small problems from becoming big issues.
Protecting Wheel Covers From Harsh Weather
Try to park in shaded or covered areas to avoid sun damage. Rain and snow can wear down the covers over time. Use a protective spray made for plastic or metal surfaces. This adds a barrier against water and dust.
Removing And Reinstalling Carefully
Remove covers gently to avoid breaking clips or edges. Use the right tools or follow the manufacturer’s instructions. Align the covers properly when reinstalling. Secure them firmly to prevent rattling or falling off.

Credit: www.amazon.sg
Frequently Asked Questions
How Do I Install Pilot Spyder Wheel Covers?
To install, align the cover with the wheel rim. Press firmly until it snaps into place. Ensure all clips are secure for safety.
Can I Install Pilot Spyder Covers Without Tools?
Yes, most Pilot Spyder wheel covers snap on without tools. However, a flat screwdriver can help remove old covers safely.
How To Remove Pilot Spyder Wheel Covers Safely?
Use a flat screwdriver to gently pry the cover off. Work slowly around the edges to avoid damaging the cover or wheel.
Will Pilot Spyder Wheel Covers Fit All Wheel Sizes?
No, Pilot Spyder covers come in specific sizes. Check your wheel size before purchasing to ensure a perfect fit.
Conclusion
Installing Pilot Spyder wheel covers is simple and quick. Follow the steps carefully for a secure fit. Check each cover fits snugly on the wheel. Avoid rushing to prevent any damage. Regularly clean and inspect the covers to keep them looking new.
Enjoy the fresh, stylish look of your wheels. This small upgrade can boost your car’s appearance easily. Stay safe and confident on the road with properly installed covers. Take pride in your work and drive with style.


