Are you struggling to remove those stubborn Aero wheel covers on your car? You’re not alone.
Many people find it tricky to get them off without damaging the covers or their wheels. But don’t worry—removing Aero wheel covers is easier than you think, once you know the right steps. In this guide, you’ll learn simple, clear methods to take off your wheel covers quickly and safely.
Keep reading, and you’ll save time, avoid frustration, and protect your wheels like a pro.
Credit: service.tesla.com
Tools Needed
Removing aero wheel covers requires a few basic tools. These tools make the job easier and safer. Having the right tools ready saves time and effort.
Flathead Screwdriver
A flathead screwdriver helps pry off the wheel cover carefully. Choose one with a wide, flat tip. This prevents damage to the cover or wheel.
Rubber Mallet
A rubber mallet gently taps the cover loose. It avoids scratching the wheel or cover. Use soft, controlled hits for best results.
Gloves
Wearing gloves protects your hands from sharp edges. It also gives a better grip on the cover. Choose gloves that fit snugly.
Wheel Wrench
A wheel wrench removes the lug nuts if needed. Some covers hide the nuts underneath. Check if you must remove nuts first.
Clean Cloth
Use a clean cloth to wipe dirt before removal. This keeps tools and parts clean. It also helps you see the edges better.
Safety Precautions
Removing aero wheel covers requires care and attention. Safety must be the first priority. Taking the right precautions can prevent accidents and damage to your vehicle.
Always prepare your workspace. Make sure it is clean and well-lit. This helps you see what you are doing clearly.
Wear Protective Gloves
Gloves protect your hands from sharp edges. They also improve your grip on the wheel cover. Choose gloves that fit well and allow good movement.
Park On A Flat Surface
Park the car on a flat, stable area. This stops the car from moving. Engage the parking brake for extra safety.
Use Proper Tools
Use the right tools to remove the wheel covers. Avoid using excessive force or wrong tools. This prevents damage to the covers and wheels.
Handle Covers Carefully
Wheel covers can be brittle. Handle them gently to avoid cracks or breaks. Place them on a soft surface during removal.
Keep Kids And Pets Away
Keep children and pets away from the work area. This reduces the chance of distractions or accidents.
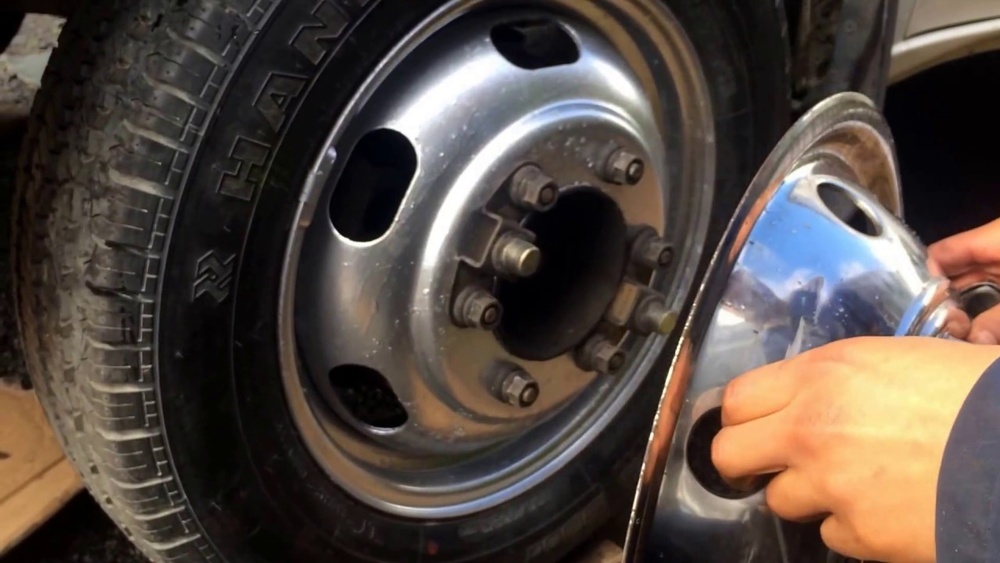
Locate The Wheel Cover
Before removing an Aero wheel cover, find it on your car. The wheel cover fits tightly over the wheel’s rim. It hides the lug nuts and protects the wheel from dirt and damage.
Each car wheel has one wheel cover. Check all four wheels to see their covers. Some cars might have a different style or size for the covers.
Check The Wheel’s Outer Surface
Look closely at the outer surface of the wheel. The wheel cover usually snaps onto this part. You can see edges or small gaps where the cover meets the tire.
These gaps help to remove the cover later. Notice if the cover is plastic or metal. Most Aero covers are plastic and lightweight.
Identify The Valve Stem Cutout
Find the small hole or cutout on the cover. This space allows access to the valve stem. The valve stem is where you add air to the tire.
The cutout helps position the cover correctly. It also gives a point to start lifting the cover gently.
Look For Retaining Clips Or Tabs
Inspect the inside edge of the wheel cover. You might see clips or tabs that hold it in place. These clips grip the wheel rim firmly.
Knowing where these clips sit helps in removing the cover without damage. Use a tool carefully near these clips to pry the cover off.

Credit: www.reddit.com
Loosen The Lug Nuts
Loosening the lug nuts is the first step to remove Aero wheel covers safely. These nuts hold the wheel and cover tightly in place. You need to loosen them before lifting the car or taking off the cover.
Use a lug wrench or tire iron for this task. It fits over the nuts and helps turn them without slipping. Turn each nut counterclockwise to loosen it.
Position The Vehicle On A Flat Surface
Park your car on a flat, stable surface. This stops the car from rolling while you work. Engage the parking brake for extra safety.
Use The Correct Lug Wrench Size
Check the size of the lug nuts before you start. Use a wrench that fits snugly. A loose wrench can strip the nuts or slip off.
Loosen Lug Nuts Before Lifting The Car
Loosen the nuts slightly while all wheels are still on the ground. This prevents the wheel from spinning. Turn the wrench slowly to break the tight grip.
Apply Steady Pressure
Push or pull the wrench with steady pressure. Avoid sudden jerks that might damage the nuts. Use your body weight if needed for more force.
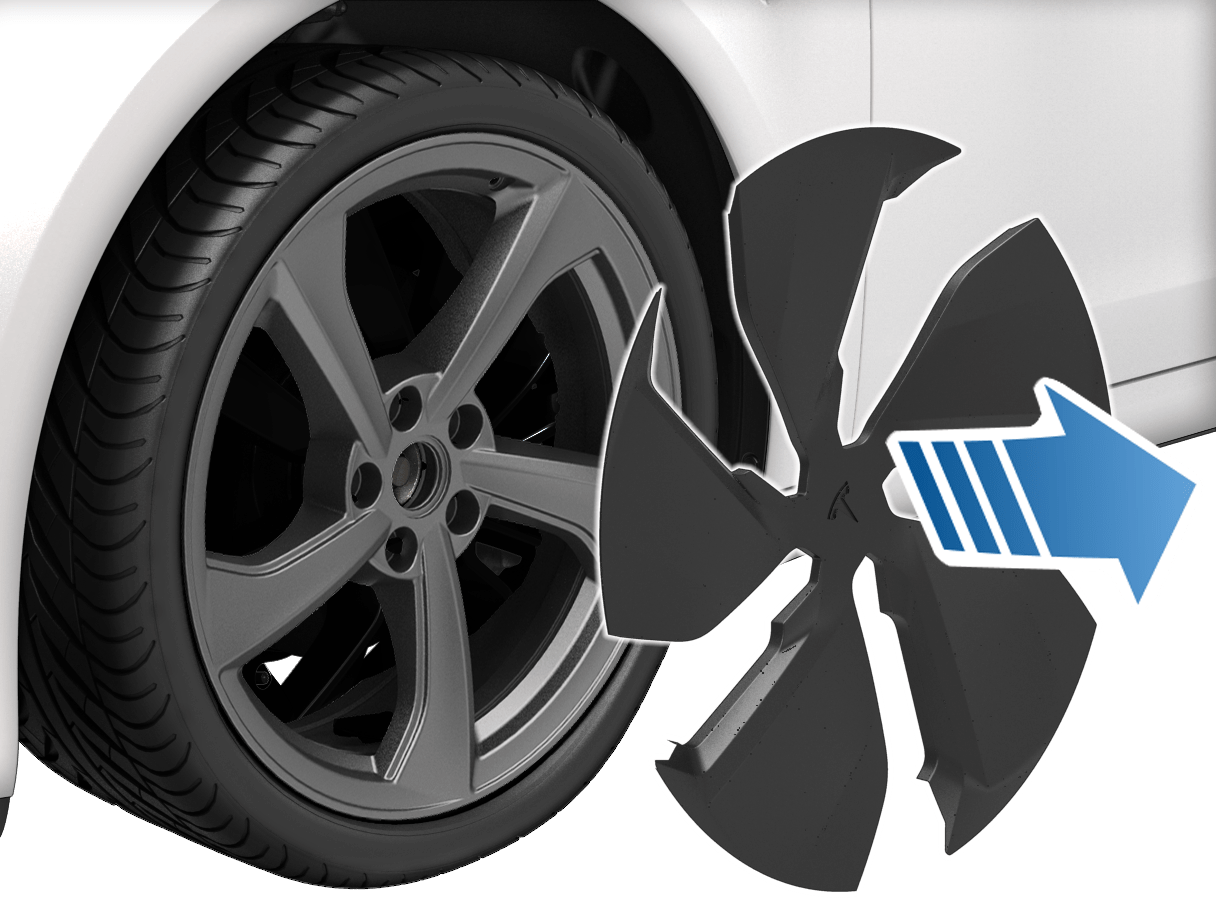
Pry Off The Wheel Cover
Removing aero wheel covers requires careful prying to avoid damage. This step helps release the cover from the wheel’s rim. Use tools that provide leverage and control. Protect your wheel and cover from scratches. Follow the right method to make the process easier and safer.
Use A Flathead Screwdriver
Choose a flathead screwdriver with a wide, flat tip. Insert the tip gently between the wheel cover and rim. Apply slow, steady pressure to pry the cover away. Work around the edge, moving the screwdriver to different spots. Avoid forcing the screwdriver too hard. This tool helps lift the cover carefully without bending it.
Use A Pry Bar Or Similar Tool
Select a small pry bar or a similar tool with a flat edge. Place it between the cover and wheel rim at a safe point. Push the handle down to lift the cover slightly. Move the tool around the cover’s edge as you lift. This method gives more leverage and control than a screwdriver. Be gentle to prevent damage to the wheel or cover.
Remove The Wheel Cover
Removing the wheel cover is the first step to access your car’s wheels for maintenance or replacement. It requires care to avoid damage to the cover or wheel. Follow these simple steps to remove the aero wheel cover safely.
Check For Clips Or Retainers
Look closely around the edge of the wheel cover. Some covers have clips or retainers holding them in place. These clips keep the cover secure during driving. Identify where the clips are before trying to pull the cover off. Knowing their position helps prevent breaking them.
Gently Pull Off The Cover
Use your hands or a plastic pry tool to pull the cover away from the wheel. Avoid metal tools that can scratch the surface. Apply gentle, even pressure to loosen the cover. If it feels stuck, check for hidden clips or screws. Pull slowly to prevent bending or cracking the cover.
Inspect The Wheel And Cover
Before removing Aero wheel covers, carefully inspect both the wheel and the cover. This step helps avoid damage and ensures safe removal. Checking the condition of each part saves time and effort later.
Look closely at the wheel cover for any cracks or broken clips. These parts hold the cover tightly to the wheel. Damaged clips might make the cover harder to remove or cause it to fall off while driving.
Next, inspect the wheel itself. Dirt, rust, or debris can make the cover stick. Clean the wheel surface gently to help the cover come off easily. This also prevents scratches on the wheel.
Check For Damage On The Wheel Cover
Examine the cover for cracks and broken clips. Damaged clips reduce how well the cover fits. Handle the cover carefully to avoid breaking it during removal.
Clean The Wheel Surface
Remove dirt and rust from the wheel surface. Use a soft brush or cloth. Clean wheels help the cover come off without sticking or scratching.
Assess The Fit Of The Cover
Test how tightly the cover fits on the wheel. A tight fit needs gentle prying. Loose covers come off more easily but check for missing clips.
Reinstalling Tips
Reinstalling your Aero wheel covers is a simple task that requires care. Proper reinstallation ensures your wheel covers stay secure and look good. Follow these tips to put them back safely and correctly.
Clean The Wheel And Cover
Remove dirt and dust from the wheel surface. Use a soft cloth and mild cleaner. Clean the inside of the wheel cover too. This helps the cover fit tightly and prevents damage.
Align The Cover Properly
Check the clips or tabs on the wheel cover. Match them with the slots on the wheel rim. Correct alignment makes the cover snap on easily. Avoid forcing it to prevent cracks.
Press Firmly But Gently
Push the wheel cover evenly around the edges. Use your hands, not tools, to avoid scratches. Listen for clicks as clips lock in place. Ensure all clips are secured before moving.
Check For Loose Fit
After installation, shake the wheel cover lightly. It should not move or wobble. A loose cover can fall off while driving. Repeat the steps if the fit feels weak.

Credit: www.youtube.com
Frequently Asked Questions
How Do You Safely Remove Aero Wheel Covers?
To remove Aero wheel covers, use a flathead screwdriver or a pry tool. Gently pry around the edges to loosen the cover. Avoid using excessive force to prevent damage to the wheel or cover. Work slowly and evenly around the wheel cover for safe removal.
What Tools Are Needed To Remove Aero Wheel Covers?
The primary tool needed is a flathead screwdriver or a plastic pry tool. These tools help gently lift and detach the wheel cover without scratching the wheel. Avoid sharp or metal tools that can cause damage. Having gloves can also improve grip and protect your hands.
Can Aero Wheel Covers Be Removed Without Damaging Them?
Yes, Aero wheel covers can be removed without damage. Use a plastic pry tool or flathead screwdriver carefully. Pry evenly around the edges and avoid forcing the cover off quickly. Taking your time ensures the cover remains intact and reusable after removal.
Why Remove Aero Wheel Covers From My Vehicle?
Removing Aero wheel covers allows access to the lug nuts for tire maintenance. It also helps in cleaning or replacing damaged covers. Sometimes, removal is necessary for upgrading to different wheel styles. Proper removal ensures no damage to the wheel or cover.
Conclusion
Removing Aero wheel covers is simple with the right steps. Use a flat tool carefully to avoid damage. Take your time and work gently around the edges. Clean the wheels after removal for best results. These tips help keep your wheels safe and looking good.
Practice this process to get faster and more confident. Now, you can remove Aero wheel covers without stress or hassle.