
Are you looking to protect your vehicle and give it a sleek, finished look? Installing wheel well covers is a simple upgrade that can do just that.
Whether you want to guard against dirt and debris or improve your car’s appearance, wheel well covers are a smart choice. In this guide, you’ll discover easy steps to install them yourself—no special tools or experience needed. Keep reading to learn how you can enhance your ride quickly and confidently.
Tools And Materials Needed
Installing wheel well covers requires some basic tools and materials. Having the right items makes the job easier and faster. It also ensures the covers fit well and last long.
This section lists all the tools and materials needed. Prepare them before starting your installation.
Tools Required
- Screwdriver set – to tighten or loosen screws
- Drill with drill bits – for making holes if needed
- Socket wrench – to secure bolts tightly
- Measuring tape – to measure the wheel well and cover
- Marker or pencil – to mark drilling spots
- Rubber mallet – to gently tap covers into place
- Safety gloves – to protect your hands during work
Materials Needed
- Wheel well covers – the main parts to install
- Mounting screws or bolts – to attach covers firmly
- Plastic clips or fasteners – for additional support
- Cleaning supplies – to clean the wheel well before installation
- Rust inhibitor spray – to prevent rust around holes
- Weather seal tape – to seal edges against water
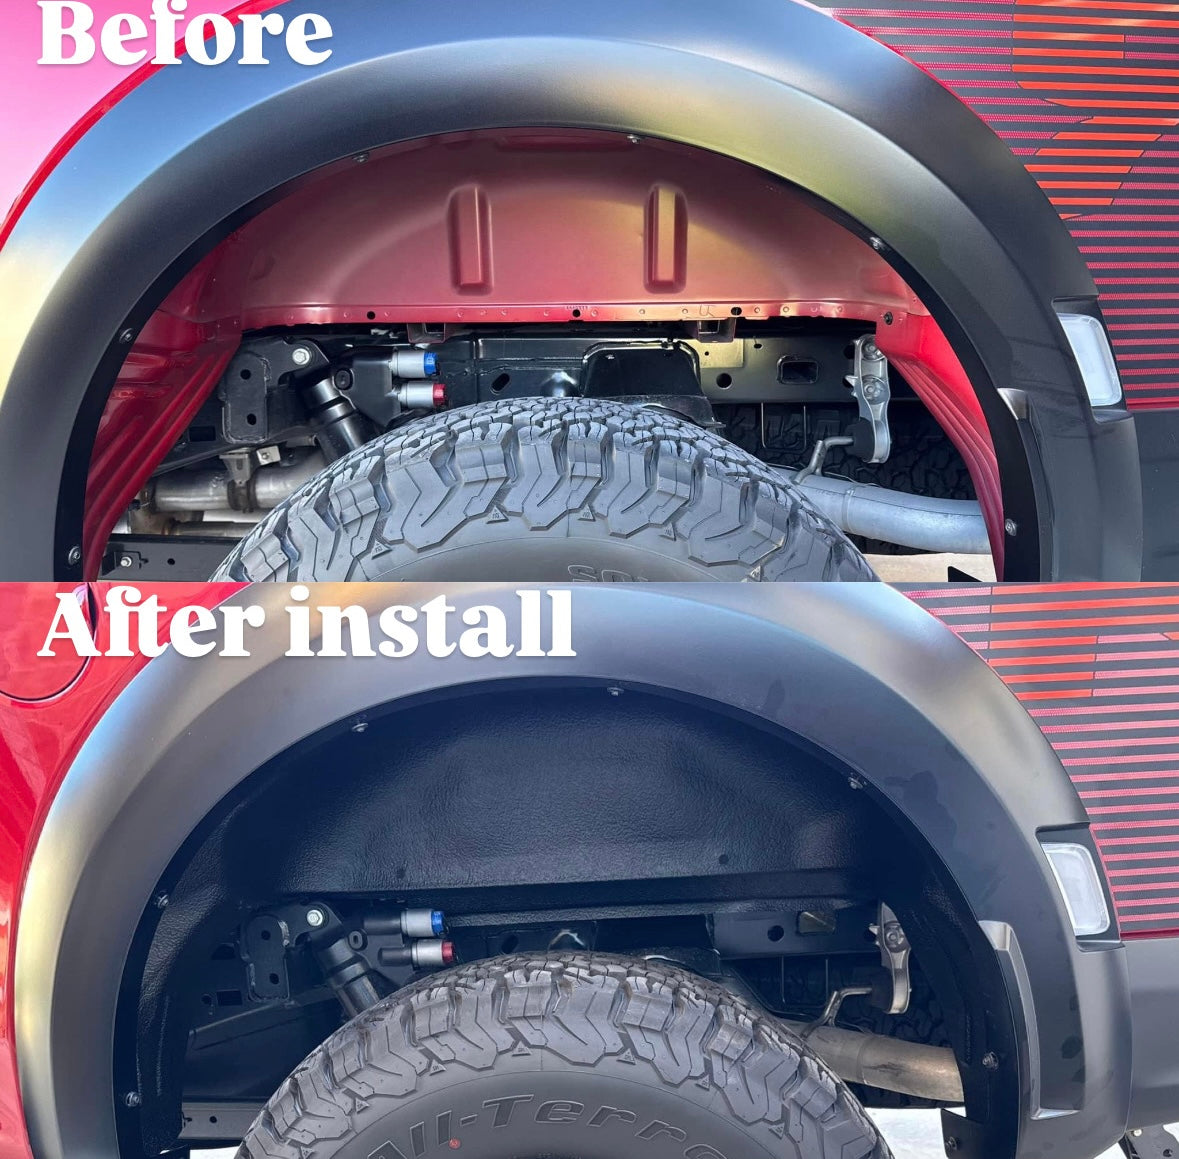
Credit: tsp-parts.com
Preparing The Wheel Well
Preparing the wheel well is the first step to a smooth installation of wheel well covers. A clean and clear surface helps the covers stick properly and last longer. Take time to prepare the area carefully for the best results.
Cleaning The Surface
Start by washing the wheel well with soap and water. Remove dirt, mud, and grease. Use a brush to scrub tough spots. Rinse well and let it dry completely. A dry surface helps the cover stick better.
Next, wipe the area with rubbing alcohol. This removes leftover oils and dust. Use a clean cloth for this step. Make sure the surface is clean and dry before moving on.
Removing Old Covers
Check if there are old wheel well covers or stickers. Peel them off carefully. Use a plastic scraper to avoid scratching the paint. Remove any glue residue with an adhesive remover. Clean the area again after removing old covers.
Removing old covers fully is important. It prevents bumps and peeling under the new cover. Take your time to get the surface smooth and clear.
Selecting The Right Wheel Well Covers
Selecting the right wheel well covers is key to protecting your vehicle and improving its look. The right covers fit well and last long. Choosing covers involves two main steps: measuring your wheel well and picking the right material and style. Both steps help you find covers that suit your needs and vehicle type.
Measuring Your Wheel Well
Measure your wheel well carefully before buying covers. Use a tape measure to find the width, height, and depth. Measure from the top edge down to the bottom and across the widest part. Write down each number to avoid mistakes. Accurate measurements make sure the covers fit snugly. Avoid covers that are too big or too small. Proper fit keeps dirt and water out and stops damage.
Choosing Material And Style
Pick a material that matches your driving and weather conditions. Plastic covers resist rust and are easy to clean. Rubber covers offer good flexibility and absorb shocks well. Metal covers provide strong protection but may rust over time. Think about the style too. Some covers are smooth for a sleek look. Others have a rugged design for off-road use. Match the style to your vehicle and personal taste. Choose covers that feel right for your daily drive and weather conditions.
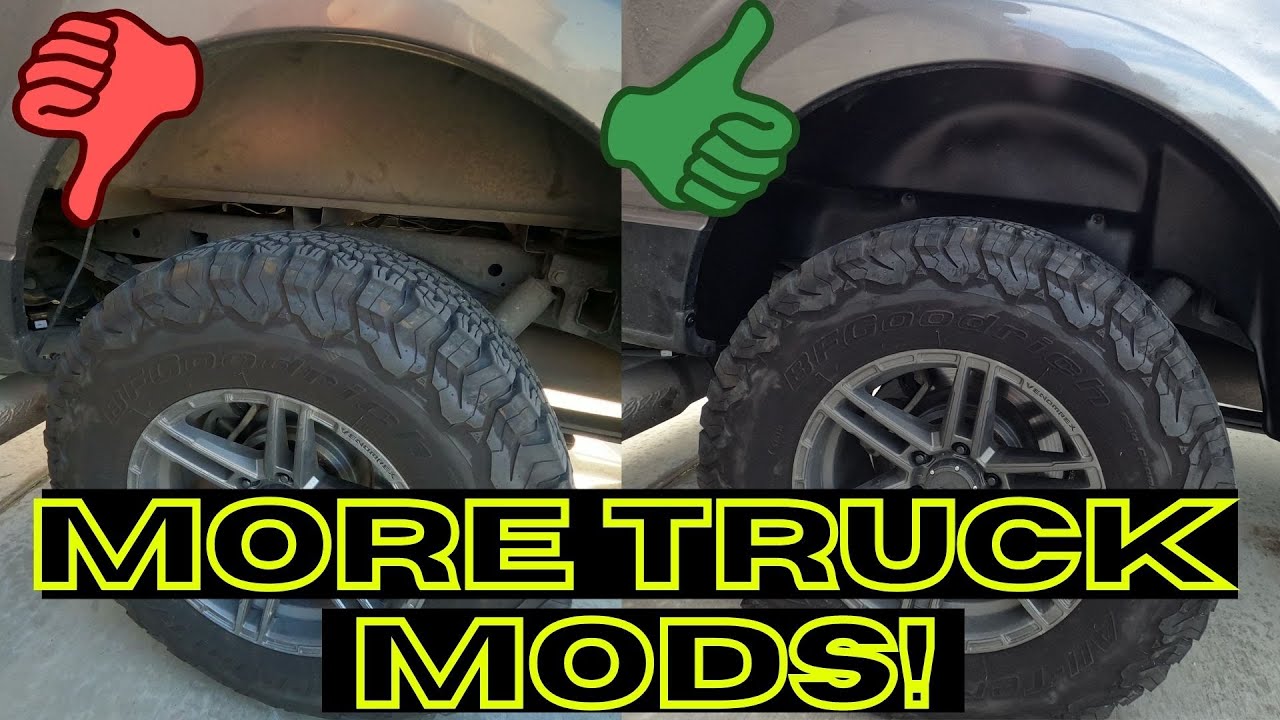
Credit: www.youtube.com
Step-by-step Installation Guide
Installing wheel well covers is a simple task with the right steps. This guide breaks down the process into clear, easy actions. Follow each step carefully for a perfect fit and secure hold.
Aligning The Cover
Start by cleaning the wheel well area. Dirt can prevent the cover from fitting well. Hold the cover near the wheel well. Match the edges with the wheel arch shape. Check that the cover sits evenly on all sides. Adjust it until it aligns perfectly with the wheel well. Proper alignment ensures the cover protects the wheel well fully.
Attaching Fasteners
Locate the holes on the wheel well cover. Match these holes with the holes on the vehicle. Use the correct fasteners included in the kit. Insert each fastener carefully into the matching hole. Fasteners hold the cover firmly in place. Do not force fasteners; they should fit smoothly. Tighten each fastener just enough to hold the cover securely.
Securing The Cover
Double-check the cover’s position on the wheel well. Tighten all fasteners evenly to avoid gaps. Press along the edges to ensure full contact with the surface. Test the cover by gently pushing it; it should not move. A secure cover prevents dirt, mud, and debris from damaging the wheel well. Your wheel well cover is now installed and ready to protect.
Checking The Fit And Finish
Checking the fit and finish of wheel well covers is a key step. It ensures the covers look good and work well. Proper fit prevents damage and keeps dirt out. Take your time to inspect the covers carefully. Small adjustments can make a big difference in performance and appearance.
Adjusting For Gaps
Look closely for any gaps between the cover and wheel well. Even small gaps let dirt and water in. Use a soft cloth to clean the area first. Then, gently push or pull the cover to close gaps. Some covers have clips or screws for adjustment. Tighten or loosen these to improve the fit. Avoid forcing the cover too hard to prevent damage.
Ensuring Stability
Check that the cover stays firmly in place. Push on different parts to test its hold. Wiggle the cover slightly to see if it moves. Secure all fasteners tightly but carefully. Add extra clips if the cover feels loose. Stability keeps the cover from rattling or falling off. A stable cover protects your vehicle better on all roads.

Credit: upfitsupply.com
Maintenance Tips
Proper care helps wheel well covers last longer and work well. Regular maintenance keeps them clean and strong. Simple steps protect your investment and keep your vehicle looking great.
Cleaning Wheel Well Covers
Use a soft brush or cloth to remove dirt and mud. Wash covers with mild soap and water. Avoid harsh chemicals that can damage the material. Rinse thoroughly and dry with a clean cloth. Clean covers prevent rust and build-up.
Inspecting For Damage
Check covers often for cracks or loose parts. Look under the covers for hidden damage. Tighten any screws or clips that are loose. Replace damaged covers to avoid further problems. Early checks save time and money later.
Frequently Asked Questions
What Tools Are Needed To Install Wheel Well Covers?
You need a drill, screwdriver, measuring tape, and mounting hardware. Always check your cover’s instructions for specific tools. Safety gloves and eye protection are recommended during installation.
How Long Does It Take To Install Wheel Well Covers?
Installation typically takes 30 to 60 minutes. Time varies by vehicle type and cover design. Proper preparation and following instructions ensure a smooth process.
Can I Install Wheel Well Covers Myself?
Yes, most covers are designed for DIY installation. Basic tools and careful measurement are essential. If unsure, seek professional help to avoid damage.
Will Wheel Well Covers Protect Against Rust?
Yes, they shield wheel wells from dirt, moisture, and debris. This reduces rust and corrosion risks. Proper installation maximizes protection and prolongs vehicle life.
Conclusion
Installing wheel well covers protects your vehicle from dirt and damage. Follow each step carefully for a secure fit. Take your time and double-check all fastenings. Proper installation helps your car look neat and last longer. Keep tools ready and work in a clean space.
Soon, you will see the benefits of added protection. Simple actions make a big difference in car care. Now you can enjoy a safer, cleaner drive every day.


