
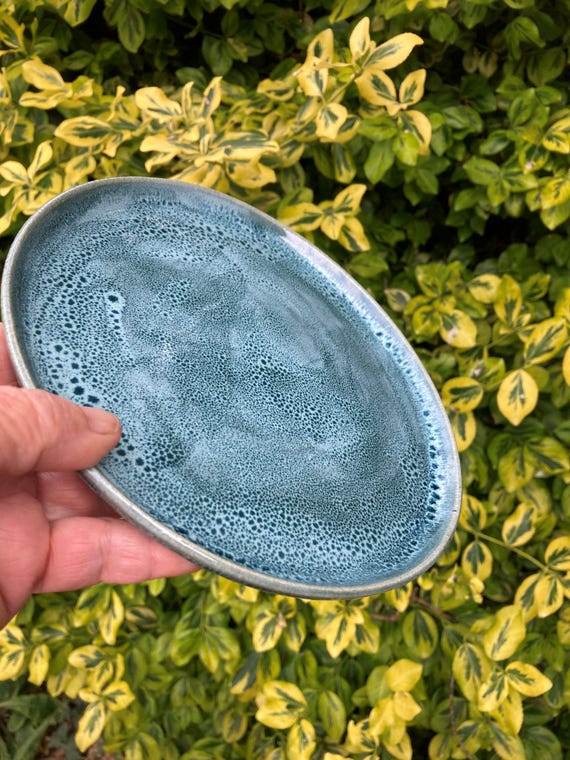
Have you ever wanted to create a beautiful, unique covered dish that stands out on your table? Making a wheel thrown oval covered dish is easier than you might think, even if you’re new to pottery.
Imagine holding a piece you shaped yourself—smooth, elegant, and perfect for serving your favorite meals. In this guide, you’ll discover simple, step-by-step techniques to craft your own oval dish on the pottery wheel. By the end, you’ll have the skills to impress your friends and add a personal touch to your kitchen collection.
Ready to get your hands dirty and create something truly special? Let’s dive in!
Materials And Tools Needed
Creating a wheel thrown oval covered dish needs specific materials and tools. These help shape and finish your pottery piece well. Using the right items makes the process smoother and the results better.
Gathering all essentials before starting saves time and avoids interruptions. Each tool has a clear role in forming and detailing the dish.
Clay Suitable For Wheel Throwing
Choose clay that is soft and easy to shape. Stoneware clay is a common choice for covered dishes. It holds its form well and fires strong.
Pottery Wheel
A pottery wheel spins the clay evenly. This helps create the oval shape smoothly. Electric or kick wheels both work fine.
Shaping Tools
Use ribs, wooden knives, and trimming tools to shape the dish. These tools refine the oval and create smooth edges.
Wire Cutter
A wire cutter helps remove the finished dish from the wheel. It cuts cleanly without damaging the shape.
Slip And Scoring Tools
Slip is liquid clay used to join parts. Scoring tools scratch the clay surface for strong attachment. Both are needed for the lid and base connection.
Sponges And Towels
Sponges keep the clay moist and clean. Towels help wipe hands and tools during work.
Glazes And Brushes
Glazes add color and protect the dish after firing. Brushes apply glaze evenly over the surface.

Credit: www.youtube.com
Preparing The Clay
Preparing the clay is the first step in making a wheel-thrown oval covered dish. This step sets the foundation for your entire project. Proper preparation ensures the clay will be easy to work with and strong after firing. It helps remove air bubbles and improves the clay’s texture. Take your time to prepare the clay carefully for the best results.
Choosing The Right Clay
Select clay that suits wheel throwing and can hold shape well. Stoneware clay is a good choice for covered dishes. It is durable and fires to a strong finish. Avoid very soft clays that may collapse during shaping. Look for clay with a smooth texture and medium plasticity. This type of clay is easier to shape and trim on the wheel.
Wedging The Clay
Wedging mixes the clay and removes trapped air bubbles. It also makes the clay uniform and soft. Use a spiral or ram’s head wedging method for best results. Cut the clay into smaller chunks before wedging. Press and fold the clay repeatedly on a clean surface. Proper wedging prevents cracks and weak spots in your dish. Stop when the clay feels smooth and consistent in texture.
Centering The Clay On The Wheel
Start by placing a lump of clay firmly in the center of the wheel. Use your hands to press and shape the clay until it spins smoothly without wobbling. This step ensures the oval dish will form evenly and hold its shape.
Preparing Your Clay For Centering
Start with a clean, smooth ball of clay. Make sure it is free of air bubbles. Place the clay firmly on the wheel head. A good base helps keep the clay steady.
Positioning Your Hands Correctly
Use both hands to center the clay. One hand supports the side, the other controls the top. Keep your hands wet to reduce friction. Steady pressure guides the clay into the center.
Starting The Wheel And Applying Pressure
Turn the wheel on at a medium speed. Use your hands to push the clay inward and downward. Apply even pressure to avoid wobbling. Keep your body steady and relaxed.
Checking The Clay’s Balance
Watch the clay as it spins. It should stay still without shaking. If it wobbles, stop and try again. Good centering makes shaping the oval easier.
Credit: www.etsy.com
Shaping The Oval Base
Shaping the base is a key step in making a wheel thrown oval covered dish. The base starts as a round form on the wheel. This base needs careful shaping to achieve a smooth oval shape. The process requires patience and gentle hands. It sets the foundation for the entire dish.
Let’s break down the shaping into two main parts: creating a round form and then altering it into an oval.
Creating A Round Form
Begin by centering the clay well on the wheel. Keep your hands steady and use water to keep the clay soft. Pull the clay upwards gently to form a cylinder. Then, widen the base slightly by pressing outward with your fingers. Aim for a smooth, even surface. The round form must be balanced and solid. This shape will be the starting point for the oval base.
Altering To Oval Shape
After making the round base, slow the wheel speed. Use your fingers to press the clay gently on two opposite sides. This action stretches the circle into an oval shape. Work slowly to keep the clay even. Check the shape from all angles. Keep the edges smooth and soft. The oval base should be flat and stable to support the cover later.
Raising The Walls
Raising the walls of a wheel-thrown oval covered dish is a key step. It shapes the body and sets the foundation for the lid. This part needs focus and control to keep the shape strong and even. The clay should rise smoothly without thinning too much.
Patience helps. Slow, steady movements guide the clay upwards. Your hands work with the wheel’s speed, pulling the walls gently. This ensures the dish will hold its form during drying and firing.
Pulling Even Walls
Start with wet, soft clay on the wheel. Keep your hands steady and close together. Use your fingers to pull the walls up in small, even strokes. This prevents weak spots and cracks.
Check the thickness often. Aim for consistent walls about 1/4 inch thick. Uneven walls can cause the dish to warp or break later.
Maintaining Oval Shape
Oval shapes need careful attention as you pull the walls. Support the longer sides more to keep the form true. Use your fingers to shape gently and avoid rounding the corners.
Slow the wheel if needed. Use small adjustments to keep the shape balanced. Step back and look at the dish from above often.
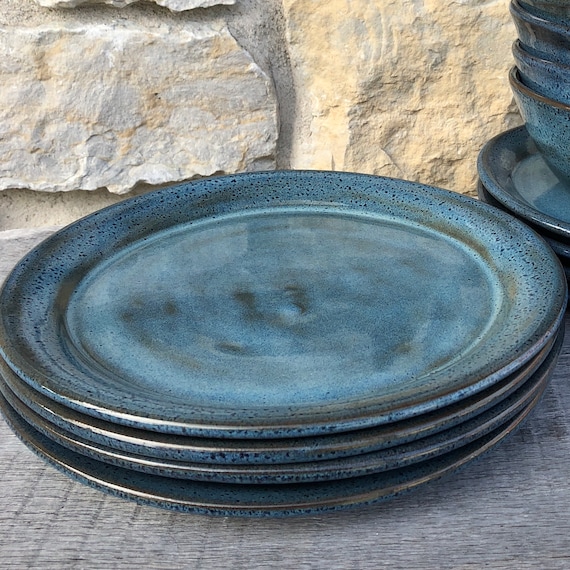
Credit: www.etsy.com
Forming The Lid
Forming the lid is a key step in making a wheel thrown oval covered dish. The lid needs to fit snugly and look balanced. This part requires focus and care. You will shape the lid on the wheel and then adjust it to match the dish’s opening.
Throwing The Lid On The Wheel
Start with a small ball of clay. Center it well on the wheel. Open the center gently with your thumbs. Pull the walls up slowly to form a shallow bowl. Keep the clay even and smooth. The lid should be slightly larger than the dish’s opening. This allows room for fitting later.
Shaping To Fit
Once the lid is thrown, check its size against the dish. Trim the edges carefully to fit the dish’s shape. Use a rib tool to smooth and shape the rim. The lid must sit flat without wobbling. Adjust the thickness if needed for a secure fit. Test the lid often during this process.
Trimming And Smoothing
Trimming and smoothing are key steps in shaping a wheel-thrown oval covered dish. These steps help refine the form and give the dish a clean, polished look. Trimming removes excess clay and sharpens the shape. Smoothing perfects the surface, making it ready for drying and firing.
Taking time during trimming and smoothing improves the dish’s balance and feel. It also helps the lid fit better. Careful work here shows in the final piece’s quality and beauty.
Preparing The Piece For Trimming
Wait until the clay is leather-hard before trimming. This means the clay is firm but still moist. Place the dish upside down on the wheel. Secure it lightly with your hands to keep it steady. Check the edges and bottom for any uneven spots.
Trimming Excess Clay
Use a sharp trimming tool to remove extra clay. Work slowly around the base and sides. Keep the tool angled slightly to avoid cutting too deep. Trim until the dish feels light and well-shaped. Remove clay from the lid’s edges for a perfect fit.
Smoothing The Surface
After trimming, smooth the surface with a damp sponge or soft rib. Use gentle, circular motions on the dish’s body and lid. This removes tool marks and rough spots. Pay special attention to the rim and lid edges. Smoothing helps the glaze stick evenly later.
Adding Surface Details
Adding surface details to your wheel-thrown oval covered dish brings character and charm. These details make your piece unique and eye-catching. Simple techniques can create interesting textures and colors. They also help highlight the shape of the dish.
Texturing Techniques
Texturing gives your dish a tactile feel and visual interest. Use tools like combs, brushes, or sponges to press patterns into the clay. You can create lines, dots, or wave designs. Try carving shallow marks with a needle tool. Each texture changes how light hits the surface.
Another method is pressing natural objects like leaves or fabric into the clay. This adds organic patterns that are hard to replicate. Keep textures balanced so they don’t overpower the dish’s shape. Light textures work well on the lid and body.
Applying Slip Or Glaze
Slip is liquid clay that you can paint or pour on the surface. It allows color and texture changes before firing. Use a brush to add slip designs or cover the dish evenly. Slip can be tinted with stains for different effects.
Glaze adds a glassy finish and color after firing. Apply glaze with a brush, dip, or spray. Thin coats avoid drips and uneven surfaces. Experiment with matte or glossy glazes for different looks. Layering glazes creates depth and richness.
Both slip and glaze protect the dish and enhance its beauty. Test your surface treatments on small pieces first. This helps avoid surprises and ensures a smooth finish.
Drying And Firing Process
The drying and firing process is key to making a strong, beautiful wheel-thrown oval covered dish. This stage prepares your pottery for use and display. It removes moisture and hardens the clay. Understanding this process helps avoid cracks and damage. It also ensures the glaze looks smooth and vibrant.
Proper Drying Tips
Dry your dish slowly and evenly. Keep it in a cool, dry place. Avoid direct sunlight or heat. Cover the dish loosely with plastic to control drying speed. Check the dish daily for any soft spots or cracks. Wait until it feels leather-hard before handling. Proper drying prevents warping and breaking during firing.
Bisque And Glaze Firing
Bisque firing is the first kiln firing. It removes all remaining water and hardens the clay. Fire the dish at a low temperature, around 1730°F (945°C). After bisque firing, the pottery is ready for glazing. Apply glaze evenly and carefully. The glaze firing follows at a higher temperature, usually 2230°F (1220°C). This melts the glaze and bonds it to the clay. Cool the kiln slowly to avoid cracking. The firing process makes your dish durable and food-safe.
Tips For Success
Making a wheel thrown oval covered dish takes patience and care. Small steps can make a big difference in your final piece. Follow these simple tips to improve your pottery skills and create a beautiful dish.
Prepare Your Clay Properly
Use clay that is soft and free of air bubbles. Wedge the clay well to remove trapped air. This prevents cracks and weak spots in your dish.
Center The Clay Firmly
Center the clay on the wheel carefully. A well-centered clay is easier to shape. It helps keep the oval shape even and balanced.
Shape Slowly And Evenly
Take your time shaping the oval. Use gentle, steady pressure with your hands. Avoid sudden moves that can distort the shape.
Use The Right Tools
Use ribs and wooden tools to smooth the surface. Tools help refine the shape and create clean edges. Keep your tools wet to avoid sticking.
Check Thickness Consistently
Keep the walls and base even in thickness. Thin areas may crack while drying. Thick areas take longer to dry and may warp.
Allow Proper Drying Time
Dry the dish slowly at room temperature. Cover it lightly with plastic to prevent cracks. Slow drying keeps the shape strong.
Fit The Lid Carefully
Make sure the lid fits snugly but not tight. The lid should rest evenly on the dish rim. Adjust the lid shape before the clay hardens.
Frequently Asked Questions
How Do You Start Making A Wheel Thrown Oval Covered Dish?
Begin by centering the clay on the wheel. Shape it into an oval by gently pulling and compressing. Use steady hands for even walls. Form the base before raising the sides evenly to maintain the oval shape.
What Tools Are Essential For Wheel Throwing An Oval Dish?
Key tools include a potter’s wheel, rib tools, trimming tools, and a sponge. A wooden rib helps shape the oval. Trimming tools refine the edges. A sponge smooths the surface and controls moisture during throwing.
How Do You Create The Lid For An Oval Covered Dish?
Throw a separate oval lid matching the dish’s size. Ensure it fits snugly by trimming the edges. Add a knob or handle on top while the clay is still soft. Allow both parts to dry evenly before firing.
What Clay Type Works Best For Wheel Thrown Oval Dishes?
Use stoneware or porcelain clay for durability and smooth finish. These clays hold shape well during wheel throwing. They also withstand high firing temperatures, making the dish functional and long-lasting.
Conclusion
Making a wheel-thrown oval covered dish takes practice and patience. Each step shapes your skill and creativity. The process allows you to create a unique, useful piece. Keep trying, and your dishes will improve with time. Enjoy the art of pottery and the joy it brings.
This simple project can become a favorite craft to share.


