
Are your car’s body side moldings looking dull or scratched? You don’t have to replace them to make your vehicle look fresh again.
Painting your body side moldings yourself can save you money and give your car a clean, polished finish. In this guide, you’ll discover simple, step-by-step tips that anyone can follow—even if you’ve never painted a car part before. Keep reading, and you’ll learn how to transform your moldings from worn-out to like new, boosting your car’s style and value in no time.

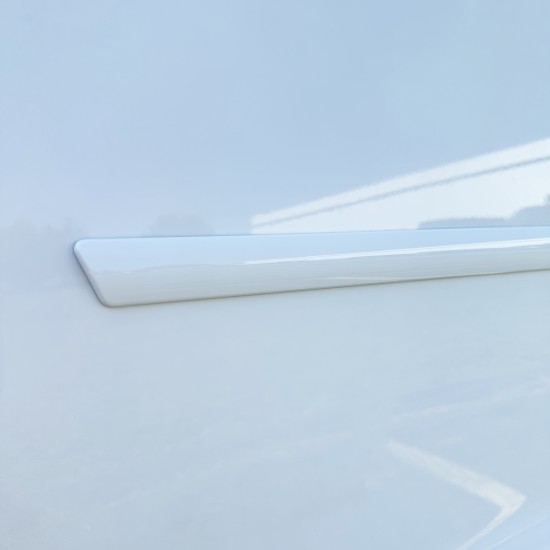
Credit: www.shopsar.com
Tools And Materials Needed
Painting body side moldings requires the right tools and materials. These items help you achieve a smooth, lasting finish. Preparing well makes the job easier and better. Gather everything before you start to avoid interruptions.
Essential Painting Supplies
- Automotive paint matched to your car’s color
- Primer for plastic or metal surfaces
- Clear coat for a shiny, protective finish
- Fine grit sandpaper (400 to 600 grit)
- Spray gun or paint spray cans
- Masking tape and paper to protect surrounding areas
- Clean cloths or tack cloths to remove dust
Surface Preparation Items
- Soap and water to clean the moldings
- Plastic cleaner or rubbing alcohol for grease removal
- Plastic adhesion promoter to help paint stick
- Filler putty for fixing any scratches or dents
- Sandpaper (200 to 400 grit) for smoothing filler
- Gloves to keep hands clean and avoid fingerprints

Credit: autoparts.rickhendricktoyotasandysprings.com
Preparing The Moldings
Preparing the body side moldings correctly is the first step for a smooth paint job. It helps the paint stick well and last longer. Take your time with this part. A clean and smooth surface makes all the difference.
Cleaning And Removing Dirt
Start by washing the moldings with soap and water. Use a soft cloth or sponge to remove dirt and grease. Dirt blocks paint from sticking properly. Rinse well and let the moldings dry completely.
Sanding For Smoothness
Lightly sand the moldings with fine-grit sandpaper. This removes old paint and rough spots. Sanding helps the new paint grip the surface better. Wipe away dust with a clean, dry cloth after sanding.
Masking Surrounding Areas
Use painter’s tape to cover areas next to the moldings. Protect the car’s paint and windows from accidental paint spray. Press the tape firmly to avoid paint bleeding underneath. Masking keeps the job neat and professional.
Choosing The Right Paint
Choosing the right paint for your body side moldings is important. The paint must stick well and last long. It should also match your car’s color perfectly. Picking the wrong paint can cause peeling or fading. This guide will help you find the best paint for your moldings.
Types Of Paint Suitable For Moldings
Use paint made for plastic or rubber surfaces. These paints are flexible and do not crack easily. Acrylic enamel and urethane paints work well on moldings. They provide a smooth finish and good durability. Avoid regular car paint, as it may not stick well to plastic.
Matching Paint To Car Color
Find the exact paint code for your car. This code helps match the paint perfectly. You can find it inside the driver’s door or in the owner’s manual. Use this code when buying paint or mixing colors. A perfect match keeps your car looking new and clean.
Credit: www.dawn-ent.com
Applying Primer
Applying primer is a key step when painting body side moldings. It prepares the surface for paint. Primer helps the paint stick better. It also prevents rust and damage. Proper priming ensures a smooth, long-lasting finish.
Skipping primer can cause peeling or uneven paint. Take your time to do this step right. Use the right primer and apply it carefully. This section explains how to select and apply primer for best results.
Selecting Primer Type
Choose a primer made for automotive use. It must work with plastic or metal moldings. Some primers are designed for plastic surfaces. Others suit metal or mixed materials. Check the label before buying.
Use an adhesion promoter primer if your moldings are plastic. This type helps paint stick well. For metal moldings, use an anti-rust primer. It protects against corrosion and wear.
Pick a primer that matches your paint type. Water-based or solvent-based paints need different primers. This match improves paint durability and appearance.
Proper Primer Application Techniques
Start by cleaning the moldings. Remove dirt, grease, and old paint. Use soap and water or a degreaser. Let the moldings dry completely.
Sand the surface lightly with fine-grit sandpaper. This creates a smooth base for primer. Wipe off dust with a clean cloth.
Shake the primer can well before use. Spray or brush thin coats evenly. Avoid thick layers to prevent drips and runs.
Hold the spray can about 6-8 inches from the surface. Use smooth, steady strokes. Allow each coat to dry before applying the next.
Apply 2-3 coats of primer for full coverage. Let the primer cure fully before sanding or painting. Follow the drying times on the label.
Painting The Moldings
Painting the body side moldings is a key step to refresh your car’s look. This process needs care and patience for a smooth finish. Choosing the right painting method and applying paint evenly make a big difference. Proper drying time between coats also helps the paint last longer. Follow these tips to get the best results.
Spray Vs Brush Painting
Spray painting covers moldings quickly and evenly. It helps avoid brush marks and gives a smooth finish. Use light, steady sprays for the best effect. Brush painting works well for small touch-ups or tight spots. Choose a soft brush and apply thin layers. Both methods can work well if done carefully.
Applying Even Coats
Apply thin coats to avoid drips and runs. Hold the spray can or brush steady and move in one direction. Wait to see if the first coat is smooth before adding another. Even coats give a professional look and reduce the chance of peeling. Patience pays off in this step.
Drying Times Between Coats
Let each coat dry fully before applying the next. Drying times depend on paint type and weather. Usually, wait 15 to 30 minutes for spray paint. Brush paint may need longer to dry. Rushing can cause smudges or uneven color. Proper drying ensures a strong, lasting finish.
Finishing Touches
The finishing touches are crucial to complete your body side moldings painting project. They protect the paint and give your moldings a smooth, shiny look. Taking your time here will make the paint last longer and look better. Follow these simple steps to finish your work like a pro.
Applying Clear Coat
Clear coat adds a strong protective layer over the paint. It prevents scratches and fading caused by sunlight and weather. Use a spray can or spray gun for even coverage. Hold the spray about 6-8 inches away from the surface.
Apply two to three thin coats of clear coat. Let each coat dry for 10-15 minutes before the next. Avoid heavy spraying to stop runs or drips. The clear coat will make the paint look glossy and smooth.
Polishing For Shine
Polishing brings out a deep shine in the clear coat. Use a fine polishing compound and a soft cloth or foam pad. Work in small sections with gentle, circular motions.
Do not press too hard. Wipe off excess polish with a clean microfiber cloth. Polishing removes minor imperfections and smooths the surface. Your moldings will look bright and fresh after this step.
Maintenance Tips
Maintaining painted body side moldings keeps your car looking fresh and new. Proper care stops paint from chipping or fading. Simple steps help protect your investment and extend the life of your paint job.
Cleaning Painted Moldings
Use a soft cloth and mild soap to clean moldings. Avoid harsh chemicals that can damage paint. Rinse thoroughly with water to remove soap. Dry with a soft towel to prevent water spots. Clean regularly to stop dirt buildup.
Preventing Paint Damage
Park in shaded areas to avoid sun damage. Use car covers during long stops outside. Avoid scraping moldings against curbs or objects. Apply a clear protective wax for extra defense. Check moldings often for chips or scratches and fix them fast.
Frequently Asked Questions
How Do I Prepare Moldings For Painting?
Clean the moldings thoroughly to remove dirt and grease. Sand lightly to smooth surfaces. Use a primer to help paint adhere better.
What Type Of Paint Is Best For Body Moldings?
Use automotive-grade paint for durability and a smooth finish. Acrylic enamel or urethane paints work well on moldings.
How Many Coats Of Paint Should I Apply?
Apply 2 to 3 thin coats for even coverage. Allow each coat to dry fully before applying the next.
Can I Paint Moldings Without Removing Them?
Yes, but removing moldings ensures better access and prevents paint from spreading to the car body. Use painter’s tape if not removed.
Conclusion
Painting body side moldings can refresh your car’s look quickly. Take your time to prepare and paint carefully. Clean the moldings well before starting. Use smooth, even strokes for the best finish. Let each coat dry fully to avoid mistakes.
Small details make a big difference in appearance. Practice patience and enjoy the process. Your car will look cleaner and more polished. Try this simple task to improve your vehicle’s style.


