
If you want to keep your car safe and running smoothly, knowing how to put on brake pads and rotors is a skill you can’t ignore. You might think it’s complicated or best left to a mechanic, but with the right steps, you can do it yourself and save time and money.
Imagine the confidence you’ll feel when your brakes work perfectly, knowing you did the job right. In this guide, you’ll learn simple, clear instructions that make the process easy to follow—even if you’re new to car maintenance. Ready to take control of your car’s braking system?
Let’s get started.
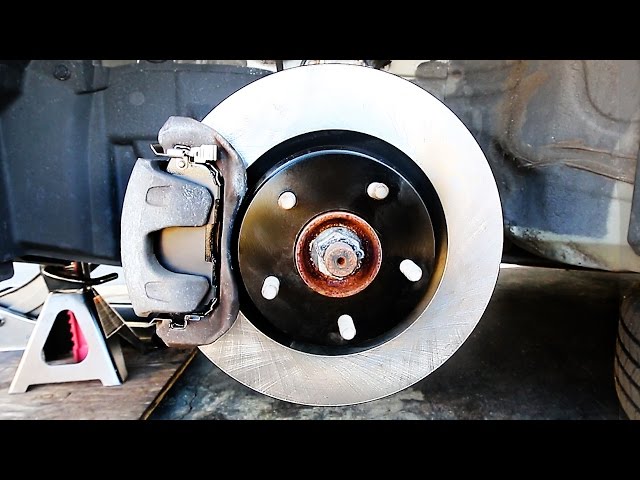
Credit: www.youtube.com
Tools And Materials Needed
Replacing brake pads and rotors requires specific tools and materials. Having the right items makes the job easier and safer. Prepare everything before starting to avoid interruptions.
Basic Hand Tools
You need a socket set with ratchets and wrenches. A C-clamp or brake caliper tool helps compress the caliper piston. Screwdrivers assist in removing clips or retaining screws.
Brake Parts
New brake pads and rotors must fit your vehicle model. Use parts recommended by the vehicle manufacturer. Check for quality to ensure safety and durability.
Safety Equipment
Wear gloves to protect your hands from dirt and sharp edges. Safety glasses keep dust and debris out of your eyes. A dust mask guards against brake dust inhalation.
Additional Supplies
Brake cleaner removes grease and dirt from parts. Anti-seize lubricant prevents rust and makes future removal easier. A jack and jack stands safely lift and hold the vehicle.
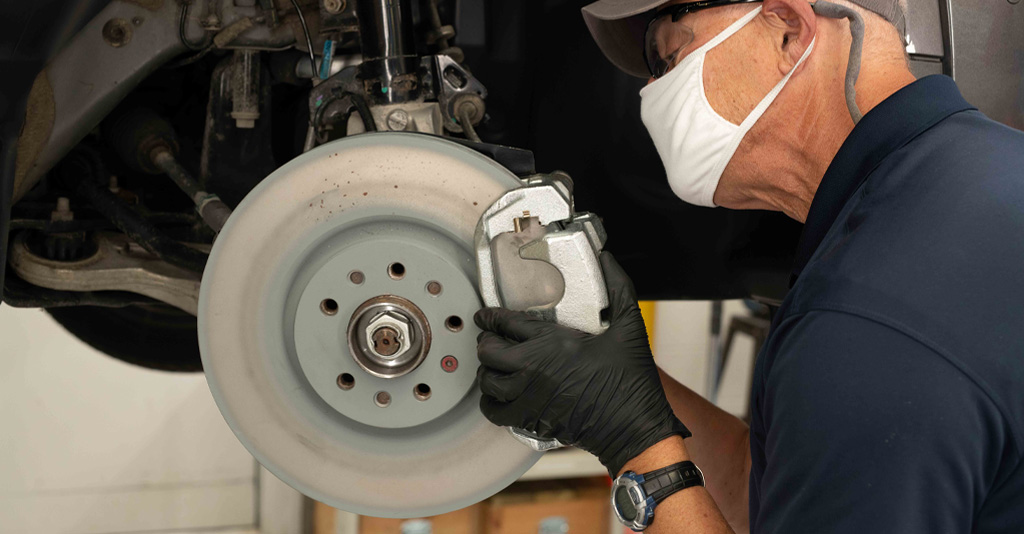
Credit: www.advicsaftermarket.com
Preparing Your Vehicle
Preparing your vehicle is the first step in changing brake pads and rotors. It ensures safety and makes the job easier. Taking time to set up your car correctly helps avoid accidents and damage. Follow these steps carefully before starting the brake work.
Securing The Car
Park your car on a flat surface to keep it steady. Turn off the engine and apply the parking brake. Place wheel chocks behind the wheels that will stay on the ground. This stops the car from rolling while you work. Use a jack to lift the car at the right points. Always use jack stands to support the car securely. Never rely on the jack alone for safety.
Removing The Wheels
Loosen the lug nuts slightly before lifting the car. Once the car is raised and stable, remove the lug nuts completely. Take off the wheel carefully and set it aside. Keep the lug nuts in a safe place for reinstallation. Removing the wheel exposes the brake system for easy access. Clean the area around the brakes to see parts clearly.
Removing Old Brake Pads And Rotors
Removing old brake pads and rotors is the first step in replacing your brakes. This process clears the worn parts and makes space for new, efficient components. Proper removal helps avoid damage to other brake parts and ensures safety.
Prepare your tools and work area before starting. Make sure the car is secure and the wheel is off. Follow each step carefully to remove the old pads and rotors.
Detaching The Caliper
Locate the caliper, the part that holds the brake pads. Use a wrench to remove the bolts securing the caliper. Carefully lift the caliper off the rotor. Support the caliper with a hook or wire to avoid strain on the brake hose.
Taking Out The Old Pads
Slide the old brake pads out from the caliper bracket. Note their position for correct placement of new pads. Check the pads for wear and damage to understand their condition.
Removing The Rotor
Remove any screws or clips holding the rotor in place. Pull the rotor straight off the wheel hub. If the rotor is stuck, tap it gently with a rubber mallet to loosen it. Clean the hub surface before placing the new rotor.
Installing New Rotors
Installing new rotors is a key step in replacing brake pads and rotors. Rotors must be clean and properly placed. This ensures good brake performance and safety. Take your time and follow each step carefully for best results.
Cleaning The Hub
Start by cleaning the hub surface where the rotor sits. Use a wire brush or sandpaper. Remove rust, dirt, and old grease. A clean hub helps the rotor fit flat and tight. This prevents wobbling or noise when driving. Wipe the area with a clean cloth after scrubbing.
Positioning The Rotor
Place the new rotor onto the cleaned hub. Align the holes on the rotor with the wheel studs. Make sure the rotor sits flush against the hub surface. Use a few lug nuts to hold the rotor in place. Tighten them by hand to keep the rotor steady. Avoid tightening fully until all parts are in place.
Fitting New Brake Pads
Fitting new brake pads is a key step in brake maintenance. It helps keep your car safe and stops it smoothly. The process requires care and the right tools. This section explains how to fit new brake pads easily and correctly.
Compressing The Caliper Piston
Start by pushing the caliper piston back into its place. Use a piston tool or a C-clamp for this. Compressing the piston makes room for the new, thicker brake pads. Take your time and apply steady pressure. Do not force it too fast or hard. This step prevents brake damage and ensures proper pad fit.
Placing The New Pads
Place the new brake pads in the caliper bracket. Make sure the pads fit snugly and align with the rotor. The friction surface should face the rotor. Check if the pads move freely but stay secure. Press the caliper over the pads carefully. Tighten the bolts to hold everything firmly in place.
Reassembling The Brake System
Reassembling the brake system is a key step after changing brake pads and rotors. It ensures the brakes work safely and properly. Careful assembly helps avoid problems on the road. Follow each step slowly and check your work.
Reattaching The Caliper
Place the caliper back over the new brake pads and rotor. Align it with the mounting bracket. Insert the caliper bolts by hand to avoid cross-threading. Tighten the bolts with a wrench, following the correct torque. This keeps the caliper secure and stable during braking.
Securing The Wheels
Put the wheel back on the hub. Screw on the lug nuts by hand first. Use a wrench to tighten them in a star pattern. This evenly presses the wheel against the hub. Lower the car and finish tightening the lug nuts with a torque wrench. Proper wheel security is vital for safe driving.
Testing And Final Checks
Testing and final checks are crucial steps after installing brake pads and rotors. These steps ensure the brakes work safely and effectively. Skipping this stage can lead to poor brake performance or even accidents.
Careful testing helps spot any issues early. It confirms that all parts fit well and function as expected. Follow these simple checks before driving on the road.
Checking Brake Fluid
Open the hood and locate the brake fluid reservoir. Check the fluid level against the marks on the side. The fluid should be between the minimum and maximum lines.
Look for any dirt or discoloration in the brake fluid. Dirty fluid may need replacement to keep brakes working well. Top up the fluid if it is low, using the correct type for your car.
Ensure the cap is tightened securely after checking. This prevents contamination and keeps the brake system sealed.
Performing Brake Test
Start the car and press the brake pedal several times. The pedal should feel firm, not soft or spongy. A soft pedal may mean air is in the brake lines.
Drive slowly in a safe area and apply the brakes gently. Listen for any unusual noises or vibrations. The car should stop smoothly without pulling to one side.
Repeat the braking test a few times to confirm consistent performance. If the brakes feel weak or make noise, inspect the installation again.
Safety Tips And Maintenance
Safety is the top priority when changing brake pads and rotors. Proper maintenance keeps your brakes working well and prevents accidents. Follow simple safety tips to protect yourself and your vehicle.
Wear Protective Gear
Always wear gloves to protect your hands from sharp parts and chemicals. Use safety glasses to guard your eyes against dust and debris. A mask helps prevent inhaling brake dust, which can be harmful.
Work On A Flat Surface
Park your car on a level area to avoid it rolling. Use wheel chocks on opposite wheels for extra safety. Never work under a car supported only by a jack. Use jack stands for stable support.
Check Brake Fluid Levels
Before starting, check the brake fluid in the reservoir. Low fluid can signal leaks or worn brake parts. Keep the fluid clean and topped up to ensure proper brake function.
Inspect Brake Components Regularly
Look for cracks, rust, or uneven wear on rotors and pads. Replace damaged parts immediately to maintain braking power. Regular checks extend the life of your brake system.
Clean Brake Parts Carefully
Use brake cleaner spray to remove dust and grease. Avoid using compressed air; it can spread harmful dust. Clean parts help brakes work smoothly and last longer.
Tighten Bolts To Manufacturer Specs
Use a torque wrench to tighten bolts to the right level. Over-tightening can damage parts; too loose bolts are unsafe. Follow the vehicle manual for exact torque values.

Credit: vatire.com
Frequently Asked Questions
How Do I Remove Old Brake Pads Safely?
First, lift the vehicle and remove the wheel. Then, unbolt the caliper carefully and slide out the old brake pads. Avoid damaging the brake lines and use proper tools for safety.
What Tools Are Needed To Install Brake Rotors?
You need a jack, lug wrench, socket set, C-clamp, and screwdriver. These tools help remove the wheel, caliper, and old rotor, and fit the new rotor securely.
How To Align Brake Pads With Rotors Correctly?
Ensure the rotor is clean and properly seated. Compress the caliper piston with a C-clamp. Position the brake pads in the caliper bracket, then reattach the caliper firmly.
How Long Does It Take To Replace Brake Pads And Rotors?
Typically, it takes about 1 to 2 hours for one axle. Time varies based on experience and tools but plan for at least an hour.
Conclusion
Replacing brake pads and rotors can be simple with the right steps. Take your time and follow each part carefully. Check all tools and safety gear before starting work. Clean the parts well to help them last longer. Test your brakes gently after installation.
Safe brakes mean safe driving every day. Keep practicing and you will get better. This task saves money and builds confidence. Now, you are ready to handle brake maintenance yourself.

