
If you want to give your car or room a fresh, stylish look without spending a fortune, vinyl wrapping your door jambs is a smart choice. But wrapping door jambs can seem tricky at first.
Don’t worry—you’re about to learn simple, clear steps that make the process easy and even enjoyable. By the end of this article, you’ll have the confidence to transform your door jambs with a smooth, professional finish that turns heads. Ready to take your project to the next level?
Let’s dive in!
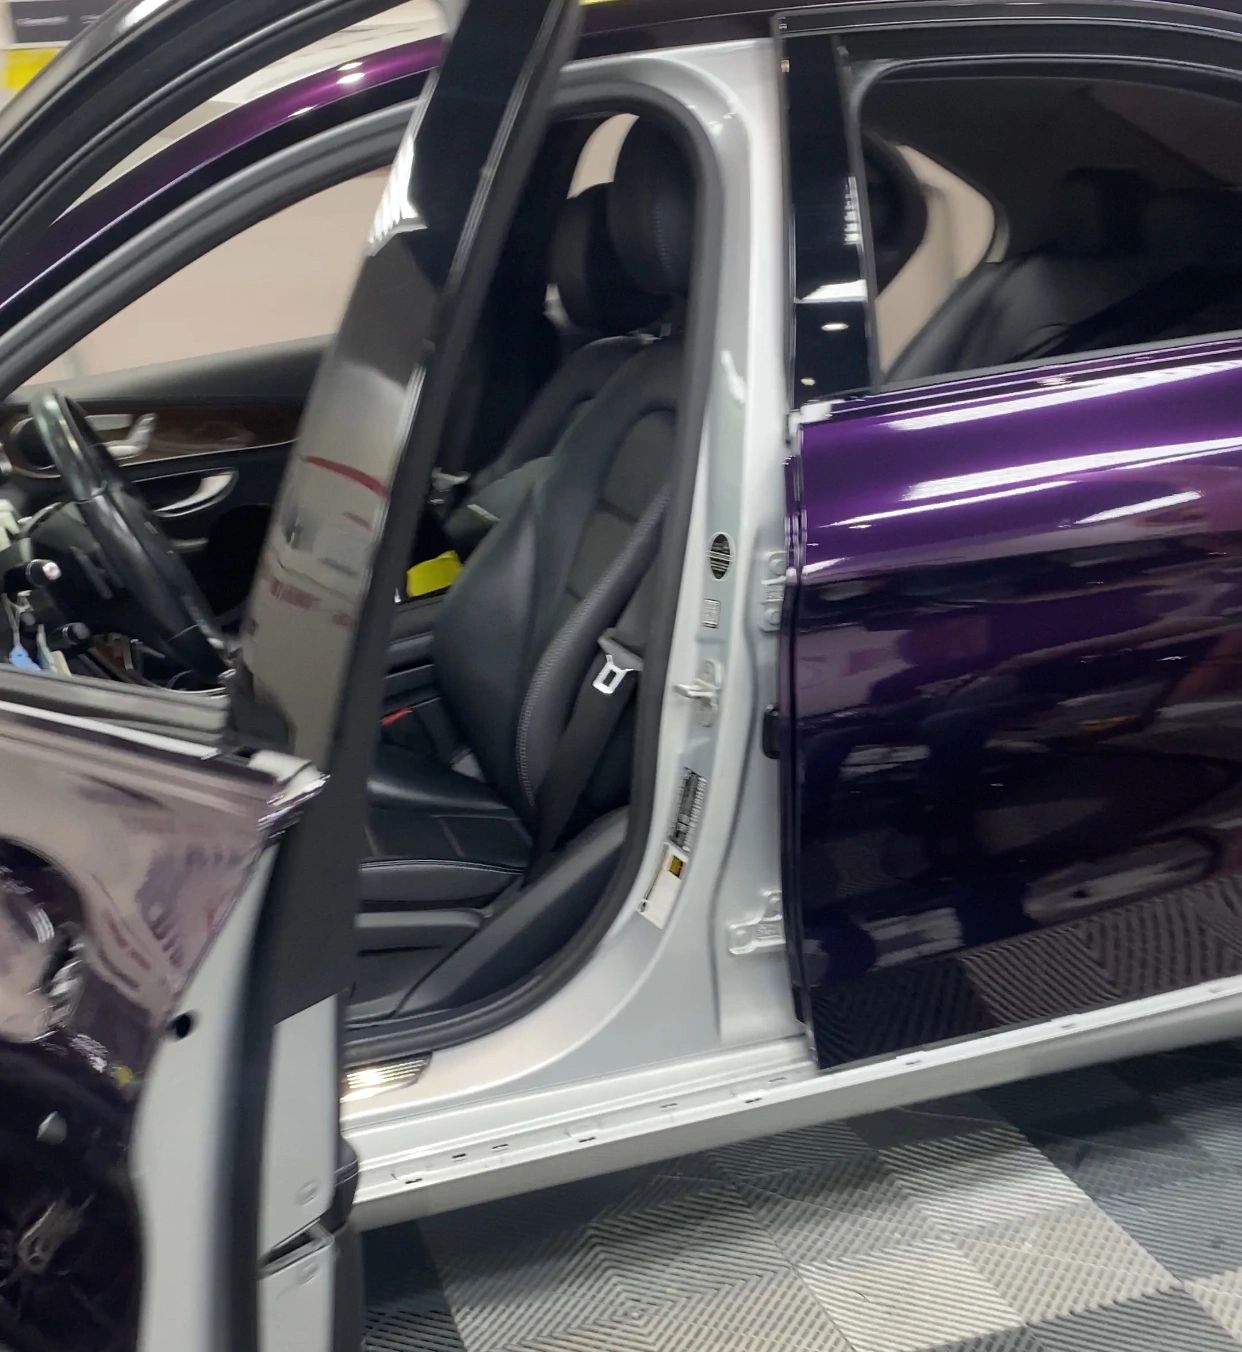
Credit: sanfordautospa.com
Preparing The Door Jamb
Preparing the door jamb is the first step in a successful vinyl wrap project. It ensures the wrap sticks well and looks smooth. Taking time to prepare will prevent bubbles and peeling later. A clean, smooth surface helps the vinyl last longer and appear neat.
Cleaning The Surface
Start by wiping the door jamb with a damp cloth. Remove dust, dirt, and grease. Use a mild soap if needed, then wipe again with clean water. Let the surface dry completely before moving on. A clean surface helps the vinyl stick better and last longer.
Removing Old Adhesive
Check the door jamb for leftover glue or tape. Use an adhesive remover or rubbing alcohol on a cloth to rub off sticky spots. Be gentle to avoid damage. Removing old adhesive prevents bumps under the vinyl and keeps the finish smooth.
Sanding For Smoothness
Lightly sand the door jamb using fine-grit sandpaper. This step smooths rough areas and removes small imperfections. Sand until the surface feels even to the touch. Wipe away dust with a clean cloth. A smooth surface helps the vinyl wrap lay flat and look professional.
Choosing The Right Vinyl Wrap
Choosing the right vinyl wrap is key to a smooth and lasting door jamb project. The right vinyl makes the wrap easier to apply and keeps it looking good for years. Picking a vinyl that fits your needs helps avoid peeling or fading. It also ensures a neat, professional finish on your door jambs.
Types Of Vinyl Wraps
There are several types of vinyl wraps. Cast vinyl is strong and flexible. It molds well around curves and corners. Calendered vinyl is thicker and less flexible. It works best on flat surfaces. For door jambs, cast vinyl often gives better results. It sticks well and resists cracking.
Color And Finish Options
Vinyl wraps come in many colors. Bright, dark, or neutral tones fit different styles. Finishes vary too. Glossy wraps shine and look new. Matte finishes offer a smooth, soft look. Satin finishes fall between glossy and matte. Choose a color and finish that match your door and room.
Measuring For Accurate Fit
Measure your door jamb carefully before buying vinyl. Use a tape measure for height and width. Add a little extra to cover edges and mistakes. Accurate measurements help avoid waste and gaps. Cut vinyl pieces to size before applying. This step saves time and stress during wrapping.
Tools And Materials Needed
Before starting to vinyl wrap door jambs, gather the right tools and materials. Having everything ready makes the job faster and cleaner. Proper tools help apply the vinyl smoothly and avoid damage. This list covers what you need for a good wrap job.
Essential Tools
- Vinyl wrap film – Choose a good quality, adhesive vinyl.
- Squeegee – Use a soft one to smooth out air bubbles.
- Heat gun – Helps stretch and fit the vinyl tightly.
- Utility knife – For trimming excess vinyl precisely.
- Measuring tape – Measure the door jamb dimensions accurately.
- Cleaning cloth – Remove dust and dirt before wrapping.
- Spray bottle with water and soap – Allows repositioning of vinyl during application.
Additional Supplies
- Masking tape – Holds vinyl in place while positioning.
- Gloves – Protect hands and prevent fingerprints on vinyl.
- Plastic scraper – Helps remove stubborn air bubbles gently.
- Isopropyl alcohol – Cleans surfaces thoroughly before wrapping.
- Soft brush – Clears dust from crevices and corners.
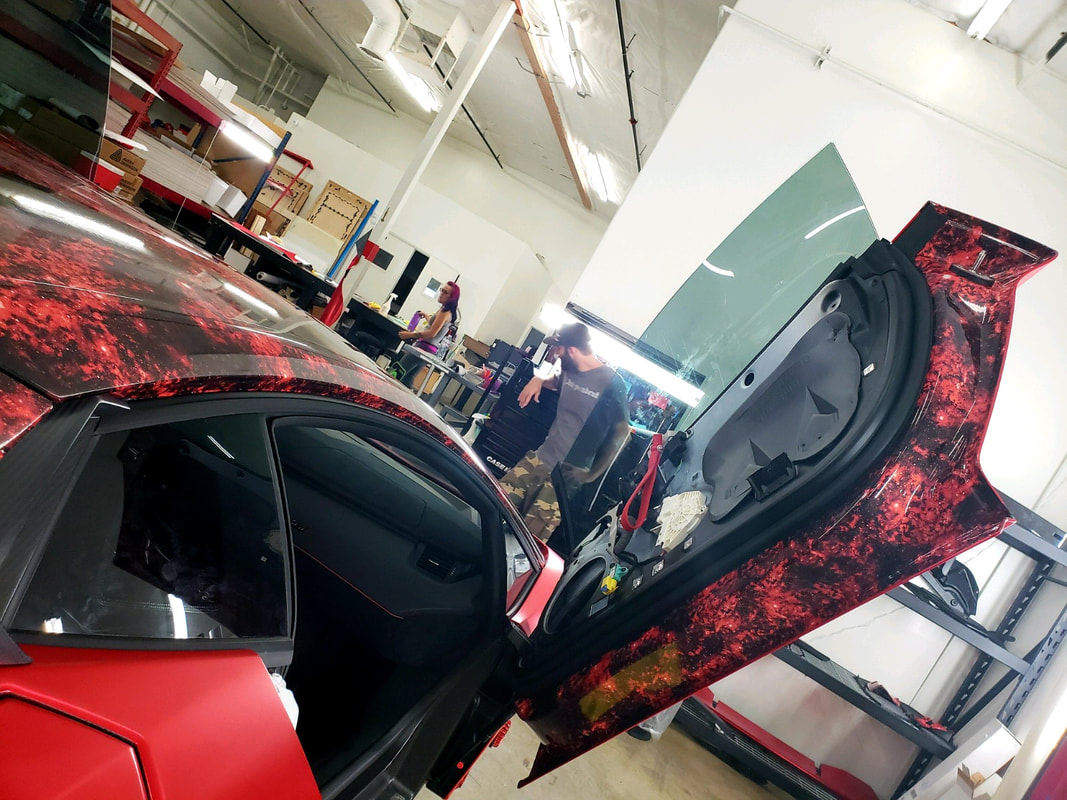
Credit: www.wrapseshaz.com
Cutting And Aligning The Vinyl
Cutting and aligning vinyl on door jambs is a key step in the wrapping process. This step ensures a smooth, clean finish. Careful measurement and precise cutting prevent mistakes. Proper alignment avoids bubbles and wrinkles. The right technique makes the vinyl look professional and neat.
Measuring And Marking
Measure the door jamb length and width carefully. Use a tape measure for accuracy. Mark the vinyl with a pencil or pen lightly. Marking guides your cutting and keeps lines straight. Double-check measurements to avoid errors. Accurate marks make cutting easier and precise.
Precision Cutting Techniques
Use a sharp utility knife or vinyl cutter. Cut slowly along the marked lines. Straight cuts prevent uneven edges and gaps. A cutting mat helps protect surfaces and guides the blade. Replace dull blades for clean cuts. Small, controlled cuts reduce the risk of tearing the vinyl.
Aligning On The Door Jamb
Start by peeling a small part of the vinyl backing. Position the vinyl at the top of the jamb first. Press gently to stick it in place. Smooth the vinyl downward using a squeegee or cloth. Work slowly to avoid air bubbles. Adjust the vinyl edges to fit snugly around corners and edges.
Applying The Vinyl Wrap
Applying vinyl wrap to door jambs needs care and patience. This step ensures the wrap sticks well and looks smooth. Proper application prevents bubbles and wrinkles. Follow each part carefully for the best finish.
Starting From The Edges
Begin by placing the vinyl at the edge of the door jamb. Align it straight for a neat look. Press the vinyl lightly to hold it in place. This helps avoid shifting as you work.
Using A Squeegee For Smoothness
Use a squeegee to press the vinyl down firmly. Move from the center outwards to push out air bubbles. Apply steady pressure but do not stretch the vinyl. This step creates a clean, flat surface.
Dealing With Corners And Curves
Stretch the vinyl gently around corners and curves. Use your fingers to guide the wrap carefully. Cut small slits if the vinyl bunches up. This makes the wrap fit snugly without tears.

Credit: www.youtube.com
Finishing Touches
Finishing touches make your vinyl wrap look neat and last longer. These small steps help the vinyl fit perfectly in the door jamb. They stop edges from peeling and keep the wrap smooth. Pay close attention to these details to get a clean, professional finish.
Trimming Excess Vinyl
Start by cutting away extra vinyl around the edges. Use a sharp knife or blade for clean cuts. Cut slowly to avoid damaging the paint under the wrap. Trim close to the edges but leave a tiny bit for better adhesion.
Heat Application For Adhesion
Use a heat gun or hair dryer to warm the vinyl. Heat makes the vinyl soft and sticky. Gently press the wrap into corners and curves with a squeegee or cloth. This helps the vinyl stick tightly in hard-to-reach spots.
Inspecting For Bubbles And Wrinkles
Look closely for air bubbles or wrinkles. Smooth them out by pushing toward the edges. Use a pin to pop any stubborn bubbles. Apply more heat if needed and press down again for a smooth finish.
Maintenance Tips
Proper care keeps your vinyl wrapped door jambs looking fresh and new. Follow simple steps to maintain their look and durability. Regular upkeep prevents damage and extends the life of the wrap.
Cleaning Wrapped Door Jambs
Use a soft cloth and mild soap to clean the vinyl surface. Avoid harsh chemicals that can weaken the wrap. Wipe gently to remove dirt and dust. Dry the surface with a clean towel to avoid water spots.
Avoiding Damage
Keep sharp objects away from the wrapped area. Avoid rubbing the door jamb hard to prevent scratches. Do not expose the vinyl to extreme heat or direct sunlight for long periods. Be careful when opening and closing doors to protect the edges.
Repairing Minor Flaws
Small scratches can be fixed using a vinyl repair kit. Lightly heat the area to soften the vinyl before smoothing it out. Use a plastic squeegee to press the patch firmly. For peeling edges, apply a small amount of vinyl adhesive to secure them.
Frequently Asked Questions
What Tools Are Needed To Vinyl Wrap Door Jambs?
You need vinyl wrap film, a squeegee, a heat gun, a utility knife, and cleaning supplies. These tools help ensure smooth application and lasting adhesion.
How Do You Prepare Door Jambs For Vinyl Wrapping?
Clean the door jamb thoroughly to remove dirt and grease. Sand lightly if needed for better adhesion. Dry completely before applying vinyl wrap.
Can Vinyl Wrap Door Jambs Prevent Scratches?
Yes, vinyl wraps provide a protective layer that can reduce scratches and scuffs. They help maintain your door jamb’s appearance over time.
How Long Does Vinyl Wrapping Door Jambs Take?
Wrapping door jambs typically takes 1-2 hours depending on experience. Proper prep and careful application ensure the best results and durability.
Conclusion
Vinyl wrapping door jambs can refresh any space quickly. It protects surfaces and adds a clean look. Take your time to measure and cut carefully. Smooth out bubbles for a neat finish. Small mistakes can be fixed with patience. This simple project saves money on repairs and paint.
Enjoy the new style and easy maintenance. Try it yourself to see the difference it makes.


