Are your kitchen cupboards looking tired but you don’t want to spend a fortune on a full renovation? Vinyl wrapping is a smart, affordable way to give your cupboards a fresh, modern look.
But what if your cupboards have grooves? You might think that makes the job tricky or impossible. The good news is, it doesn’t have to be. In this guide, you’ll discover simple, step-by-step tips to vinyl wrap kitchen cupboards with grooves like a pro.
By the end, you’ll have the confidence to transform your kitchen and make your cupboards stand out—all without breaking the bank. Keep reading to unlock the secrets to a flawless finish!
Credit: modernds.co.uk
Preparing Cupboards For Wrapping
Preparing kitchen cupboards for vinyl wrapping is a key step. Proper preparation ensures the vinyl sticks well and looks smooth. It helps avoid bubbles and wrinkles on cupboards with grooves. This section guides you through cleaning, sanding, removing hardware, and gathering materials.
Cleaning And Sanding Surfaces
Start by cleaning the cupboard surfaces thoroughly. Use a mild detergent and warm water to remove grease and dirt. Rinse with clean water and dry with a soft cloth. Sand the surface lightly with fine-grit sandpaper. This creates a rough texture for better vinyl adhesion. Wipe away dust with a damp cloth and let it dry completely.
Removing Hardware And Fixtures
Remove all handles, knobs, and hinges from the cupboard doors. This step makes wrapping easier and prevents damage to hardware. Use a screwdriver to take off screws carefully. Keep the hardware in a safe place for reinstallation later. Removing fixtures also allows vinyl to cover the grooves evenly.
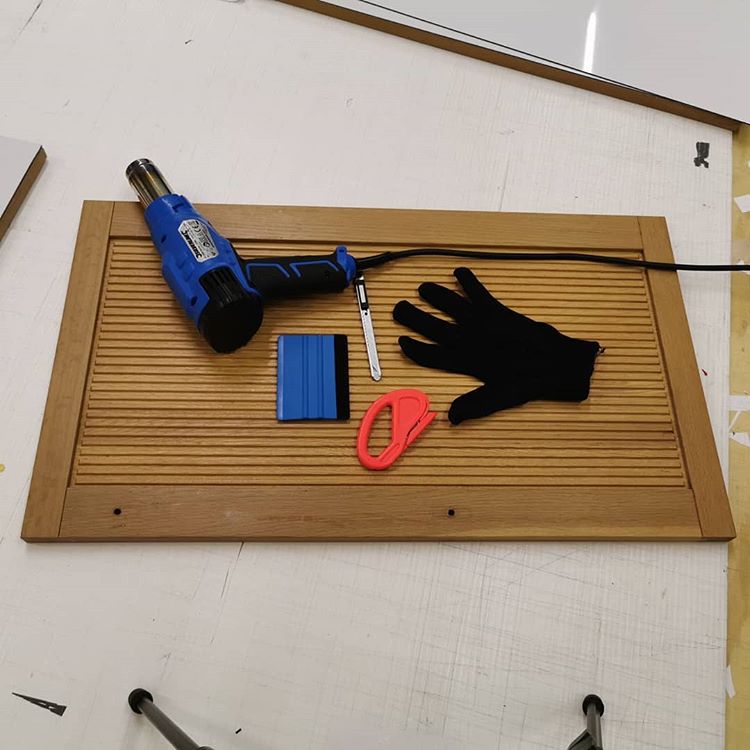
Gathering Necessary Materials
Collect all materials before starting the wrapping process. You will need vinyl wrap sheets, a utility knife, a squeegee, and a heat gun. Also, have masking tape and a measuring tape ready. Organizing materials saves time and helps you work efficiently. Check the vinyl for any defects before applying.
Credit: www.youtube.com
Cutting Vinyl Wrap To Size
Cutting vinyl wrap to size is a key step for a smooth and neat finish. Accurate cuts help the wrap fit perfectly on kitchen cupboards. This process needs care, especially with grooves in the cupboard doors.
Measuring Cupboards Accurately
Start by measuring the height and width of each cupboard door. Use a tape measure for exact numbers. Write down each measurement to avoid mistakes. Measure twice to be sure. Don’t forget to measure the depth if wrapping around edges.
Marking Vinyl For Grooves
Grooves need special attention when marking vinyl. Lay the vinyl flat on a clean surface. Use a pencil to mark where the grooves will go. Mark lightly to avoid permanent lines. These marks guide cutting and folding around grooves.
Pre-cutting For Easier Application
Cut vinyl slightly larger than your cupboard measurements. Leave extra space for adjustments during wrapping. Pre-cutting helps avoid stress and errors. Use a sharp blade for clean edges. This step makes applying vinyl easier and more precise.
Applying Vinyl To Grooved Surfaces
Applying vinyl wrap to kitchen cupboards with grooves requires careful attention. Grooved surfaces create challenges because the vinyl must fit into every curve and indentation. Proper technique ensures the vinyl looks smooth and professional. The key is to soften the vinyl and gently press it into the grooves without tearing or wrinkling. Follow these steps for the best results.
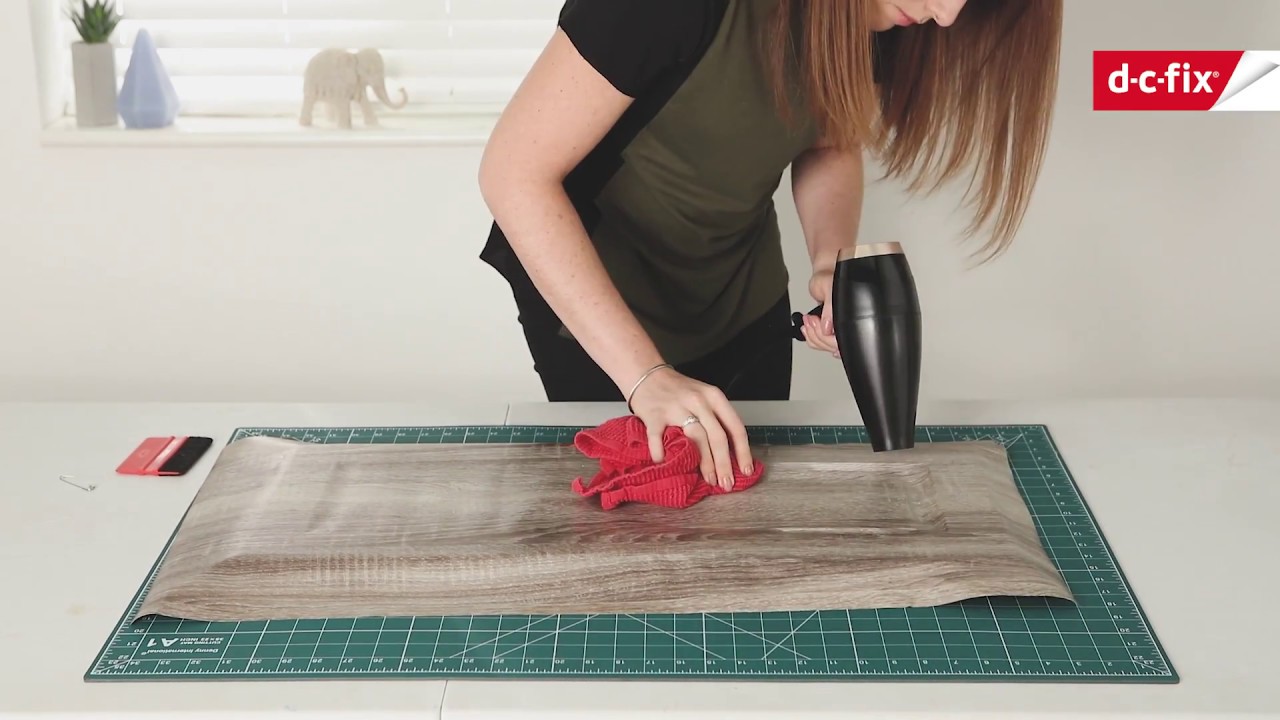
Heating Vinyl For Flexibility
Heat makes vinyl soft and flexible. Use a heat gun or hairdryer on low heat. Warm the vinyl evenly but avoid overheating. Soft vinyl stretches easily into grooves without damage. Keep the heat moving to prevent burning or shrinking. Warmer vinyl adapts better to curves and edges.
Stretching Vinyl Into Grooves
Start by placing the vinyl over the cupboard door. Gently pull and stretch the vinyl into each groove. Work slowly and carefully to avoid tearing. Stretch enough to fill the groove but not too much to cause holes. Take your time with deep or narrow grooves for smooth coverage.
Using Tools To Smooth Wrinkles
Use a plastic squeegee or a soft cloth to smooth the vinyl. Press the vinyl firmly into the grooves to remove air bubbles. Work from the center out to the edges. Small wrinkles can be heated again and smoothed out. Avoid sharp tools that could cut or damage the vinyl.
Trimming And Finishing Edges
Trimming and finishing edges is a key step in vinyl wrapping kitchen cupboards with grooves. It ensures a neat, smooth look and helps the wrap last longer. Proper trimming avoids bulky corners and visible seams.
Finishing edges carefully protects the vinyl from peeling. This step also prepares the cupboards for daily use without damage.
Cutting Excess Vinyl Cleanly
Use a sharp utility knife for clean cuts. Trim close to the cupboard edge but avoid cutting into the surface. Work slowly for precise results. Keep the knife blade steady and straight. Cut small sections at a time to prevent mistakes.
Sealing Edges For Durability
Apply edge sealer or clear adhesive around the trimmed edges. This prevents moisture and dust from getting under the vinyl. Use a small brush or applicator for even coverage. Press the edges firmly with a roller to secure the seal. Let it dry fully before use.
Reattaching Hardware
Remove hardware before wrapping for smooth application. Once the vinyl is trimmed and sealed, reattach knobs and handles carefully. Tighten screws without damaging the vinyl. Check that all hardware fits well and functions properly. This keeps the cupboard looking clean and professional.
Tips For Lasting Results
Achieving a smooth, long-lasting vinyl wrap on kitchen cupboards with grooves takes care and attention. Small mistakes can cause peeling, bubbles, or uneven surfaces. Follow practical tips to keep your cupboards looking fresh and neat for years. Proper handling and maintenance play key roles in lasting results.
Avoiding Air Bubbles
Start by cleaning the surface thoroughly. Dirt and dust cause bubbles under the vinyl. Use a soft cloth and mild cleaner. Peel the vinyl slowly and apply it section by section. Use a plastic squeegee to press the vinyl firmly. Work from the center outwards to push air out. Heating the vinyl lightly helps it stretch over grooves. Avoid rushing; slow application reduces trapped air.
Maintaining Wrapped Cupboards
Clean wrapped cupboards gently with a damp cloth. Avoid harsh chemicals or abrasive scrubbers that can damage vinyl. Dry surfaces immediately to prevent water damage. Avoid sharp objects near the wrapped areas. Regularly check edges for lifting or peeling. Fix small problems early to stop them from growing. Keep the kitchen environment moderate to avoid heat or moisture damage.
Fixing Minor Imperfections
Use a pin to gently prick small bubbles. Press the air out carefully with a squeegee. For minor scratches, apply heat with a hairdryer and smooth the vinyl. If edges lift, use vinyl adhesive to reattach them. Avoid using too much glue to prevent mess. Small repairs help maintain a clean, professional look. Act fast to keep the wrap intact.

Credit: www.reddit.com
Frequently Asked Questions
How Do I Prepare Grooved Cupboards For Vinyl Wrapping?
Clean the cupboards thoroughly and remove all grease or dust. Lightly sand the surface around the grooves for better adhesion. Fill deep grooves with suitable filler to create a smooth base before applying vinyl wrap.
Can Vinyl Wrap Cover Deep Grooves On Kitchen Cupboards?
Yes, but deep grooves may require filling or extra care. Use a flexible vinyl and apply heat with a heat gun to mold the wrap into grooves smoothly.
What Tools Are Needed For Wrapping Grooved Cupboards?
You need a heat gun, squeegee, utility knife, and a vinyl wrap film. Additional items include a cleaning cloth and groove filler if necessary.
How Do I Avoid Bubbles When Wrapping Grooved Kitchen Cupboards?
Apply vinyl slowly and use a squeegee to push out air bubbles. Heat the vinyl to make it pliable, especially around grooves, ensuring a smooth finish.
Conclusion
Vinyl wrapping kitchen cupboards with grooves can brighten any space. Careful cutting and smoothing keep the wrap neat and strong. Take your time to avoid bubbles or wrinkles. Use a heat gun to help the vinyl fit tight in grooves.
Clean surfaces first for the best stick. This project saves money and refreshes your kitchen look fast. Try it yourself and enjoy a fresh, stylish kitchen. Small steps bring big changes.