Stripped brake rotor screws can turn a simple brake job into a frustrating challenge. If you’re staring at a stuck screw that won’t budge, you’re not alone—and you don’t have to give up.
In this guide, you’ll discover easy, effective ways to remove those stubborn screws without damaging your brake rotors. Keep reading, and you’ll soon have the confidence and know-how to tackle this common problem like a pro.
Causes Of Stripped Brake Rotor Screws
Stripped brake rotor screws happen when the screw head gets damaged. This makes the screw hard to turn or remove. Knowing why screws strip helps avoid this problem during brake work.
Many factors can cause stripped screws. Using the wrong tools or too much force often leads to damage. Rust and dirt also weaken screws, making them strip easily.
Common Reasons For Stripping
Using a screwdriver or bit that does not fit the screw head can strip it quickly. Screws that are old or rusty break down and lose strength.
Over-tightening screws during installation puts too much pressure on the head. Trying to remove screws with the wrong angle or poor grip also causes stripping.
Effects On Brake Maintenance
Stripped screws slow down brake repairs and increase frustration. They make it harder to remove the rotor, delaying the job.
Damaged screws might need special tools or drilling, raising costs and effort. This can lead to more wear on other brake parts if not fixed properly.

Credit: www.youtube.com
Tools Needed For Removal
Removing a stripped brake rotor screw requires the right tools. Using proper tools makes the job easier and safer. You can avoid damage and save time by preparing these tools before starting.
Basic Hand Tools
Start with common hand tools. A screwdriver set with different sizes and heads helps fit the screw properly. A hammer can tap the screwdriver gently to loosen the screw. Pliers provide extra grip for stubborn screws. A socket wrench set helps remove bolts around the rotor. These tools form the foundation for most brake rotor screw removals.
Specialized Removal Tools
Some screws need special tools for removal. A screw extractor set is designed to grip stripped screws tightly. Impact drivers deliver strong turning force without slipping. A rotary tool with a cutting disc can cut a new slot in the screw head. Heat guns soften stuck screws by expanding metal. These tools are useful for tough or damaged screws that basic tools cannot handle.
Preparation Before Removal
Preparation is key before removing a stripped brake rotor screw. Proper steps ensure safety and success. Take time to prepare your tools and the work area. Clean and lubricate parts to make removal easier. Follow safety steps to protect yourself from harm.
Safety Precautions
Wear safety glasses to protect your eyes from debris. Use gloves to avoid cuts and bruises. Work in a well-lit area to see clearly. Keep a fire extinguisher nearby, just in case. Make sure the vehicle is stable and won’t move. Use jack stands to support the car securely. Avoid wearing loose clothing that can catch on tools. Always work slowly and carefully to prevent accidents.
Cleaning And Lubrication Tips
Clean the area around the screw before starting. Use a wire brush to remove rust and dirt. Spray penetrating oil on the screw and wait 10 minutes. This helps loosen rust and corrosion. Wipe away excess oil to prevent slipping. Apply lubricant to the screw threads for smooth turning. Repeat oil application if the screw is very stuck. Clean and lubricate improve your chance of easy removal.
Credit: discoweb.org
Techniques For Removing Stripped Screws
Removing a stripped brake rotor screw can be tough. The screw’s head is damaged, making it hard to turn. Using the right techniques can save time and prevent more damage. Below are simple methods to try. Each one helps get a better grip or loosens the screw.
Using Rubber Bands For Grip
Place a wide rubber band over the stripped screw head. Press the screwdriver firmly into the rubber band. The rubber fills gaps and improves grip. Turn the screwdriver slowly to avoid slipping. This method works best for slightly stripped screws.
Applying Penetrating Oil
Spray penetrating oil around the screw’s base. Let it soak for 10 to 15 minutes. The oil loosens rust and dirt, making the screw easier to turn. Use a screwdriver or pliers to remove the screw after applying oil. Repeat if needed for better results.
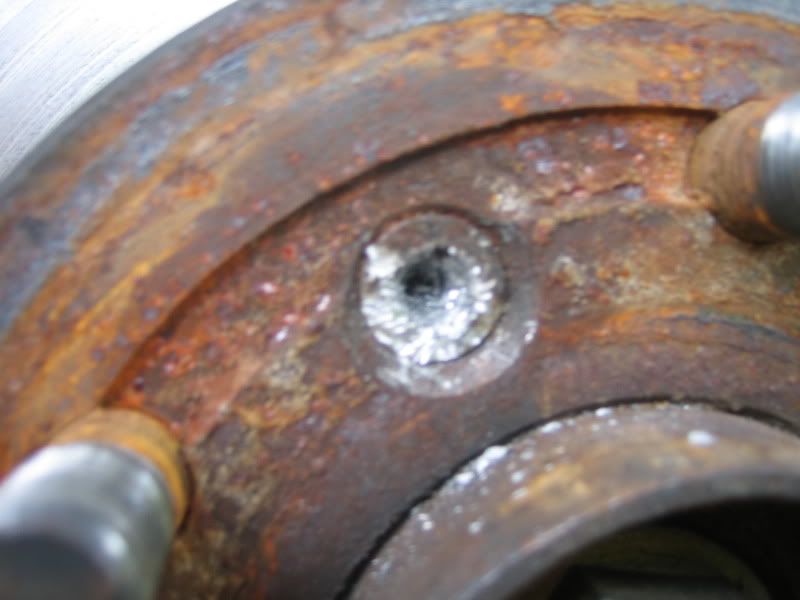
Using Screw Extractors
Screw extractors are tools made for stripped screws. First, drill a small hole in the center of the screw head. Insert the extractor and turn it counterclockwise. The extractor bites into the screw and helps twist it out. This method works well for badly stripped screws.
Drilling Out The Screw
Drill out the screw if other methods fail. Use a drill bit slightly smaller than the screw shaft. Drill straight into the center of the screw. This removes the head and frees the rotor. After drilling, use pliers to pull out the remaining screw part. Be careful not to damage the rotor or surrounding parts.
Preventing Future Screw Stripping
Preventing stripped brake rotor screws saves time and money. These screws can be tough to remove once damaged. Taking simple steps stops this problem before it starts. Focus on correct tools and good maintenance to keep screws in good shape.
Proper Tool Usage
Use the right screwdriver or bit size. A wrong tool can slip and strip the screw head. Apply steady, even pressure when turning screws. Avoid using worn or damaged tools. Clean tools before use to ensure a good grip. Tighten or loosen screws slowly to avoid damage.
Regular Maintenance Practices
Check screws regularly for rust or dirt buildup. Clean the brake rotor area to prevent corrosion. Apply anti-seize lubricant on screws before installation. This helps screws turn smoothly and resist rust. Replace old or damaged screws promptly. Regular checks make future removal easier and safer.
When To Seek Professional Help
Removing a stripped brake rotor screw can be tricky and sometimes risky. Knowing when to seek professional help is important. It saves time and prevents damage to your vehicle. Professionals have the right tools and skills to handle tough situations. They can fix the problem safely and quickly.
Signs You Need Expert Assistance
Stripped screws that won’t budge after multiple attempts. Screws that break inside the rotor. Using wrong tools that cause more damage. Hearing unusual noises while trying to remove screws. Feeling unsure about the process or tools. Experiencing rust or corrosion making removal hard. These signs suggest calling a mechanic is best.
Choosing The Right Mechanic
Pick a mechanic with good reviews and experience. Check if they specialize in brake repairs. Confirm they use proper tools and follow safety steps. Ask about their pricing and service guarantees. Choose a shop close to your location. Clear communication helps avoid misunderstandings. A skilled mechanic saves time and money.
Credit: www.reddit.com
Frequently Asked Questions
How Do You Remove A Stripped Brake Rotor Screw?
To remove a stripped brake rotor screw, use a rubber band for grip or a screw extractor. Apply penetrating oil and turn carefully with a screwdriver or impact driver. Avoid damaging the rotor or surrounding parts.
What Tools Are Best For Stripped Rotor Screws?
The best tools include a screw extractor kit, rubber band, impact driver, and penetrating oil. These help loosen and grip stripped screws without damage. Proper tools make removal easier and safer.
Can Heat Help Loosen A Stripped Brake Rotor Screw?
Yes, applying heat with a heat gun or torch can expand the metal. This loosens the screw’s grip, making removal easier. Use heat cautiously to avoid damaging brake components or nearby parts.
Why Do Brake Rotor Screws Get Stripped?
Brake rotor screws strip due to rust, over-tightening, or using incorrect tools. Frequent removal and exposure to elements also weaken screw heads. Proper care and tools prevent stripping during maintenance.
Conclusion
Removing a stripped brake rotor screw can seem tough at first. With the right tools and steps, you can do it safely. Take your time and work carefully to avoid damage. Always wear safety gear and keep your workspace clean.
Practicing patience makes the job easier and faster. Now, you have the knowledge to handle this repair with confidence. Keep learning and improving your skills one step at a time.