Are your brakes making noise or feeling less responsive? It might be time to change your brake pads and rotors.
You might think this is a job only mechanics can handle, but with the right steps, you can do it yourself and save money. Imagine the confidence you’ll feel knowing your car stops safely and smoothly, all thanks to your own hands.
Keep reading, and you’ll discover a simple, clear guide to replacing your brake pads and rotors without stress or confusion. Ready to take control of your car’s safety? Let’s get started!
Tools And Materials Needed
Changing brake pads and rotors requires the right tools and materials. Having everything ready makes the job easier and safer. It saves time and helps avoid mistakes. This section explains what tools and parts you need before starting.
Essential Tools
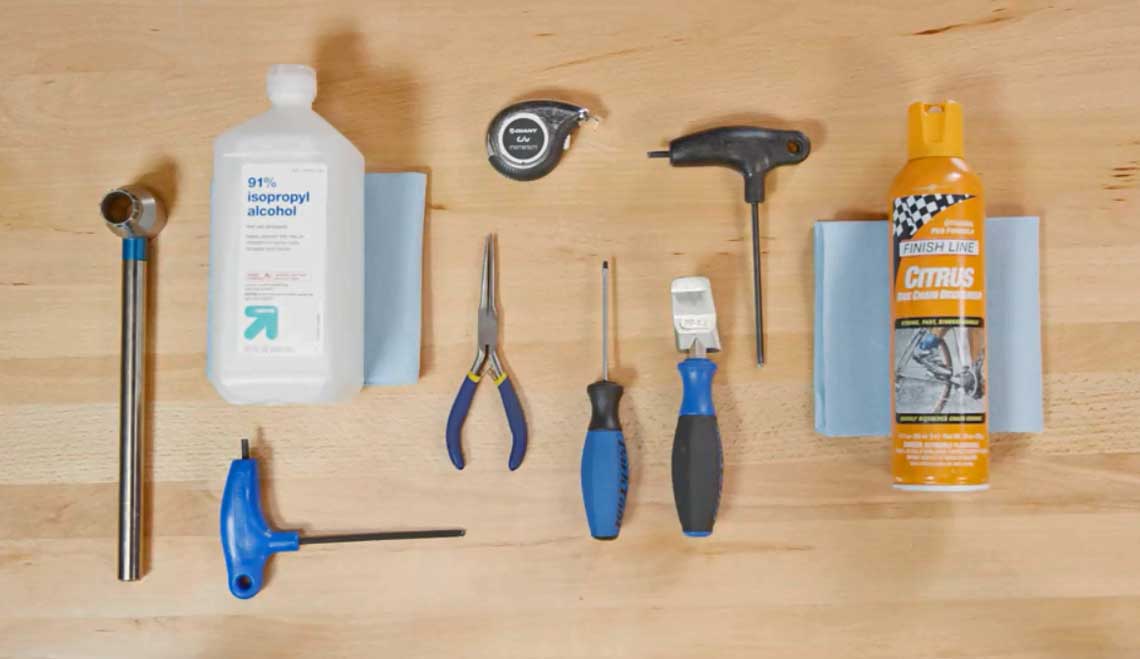
You need a jack and jack stands to lift and hold the car safely. A lug wrench helps remove the wheel nuts. Use a socket set to remove bolts on the brake caliper and rotor. A C-clamp or brake caliper tool pushes the piston back. A wire brush cleans rust and dirt from the parts. Brake cleaner sprays help remove dust and grime. Gloves and safety glasses protect your hands and eyes. A torque wrench tightens bolts to the right strength.
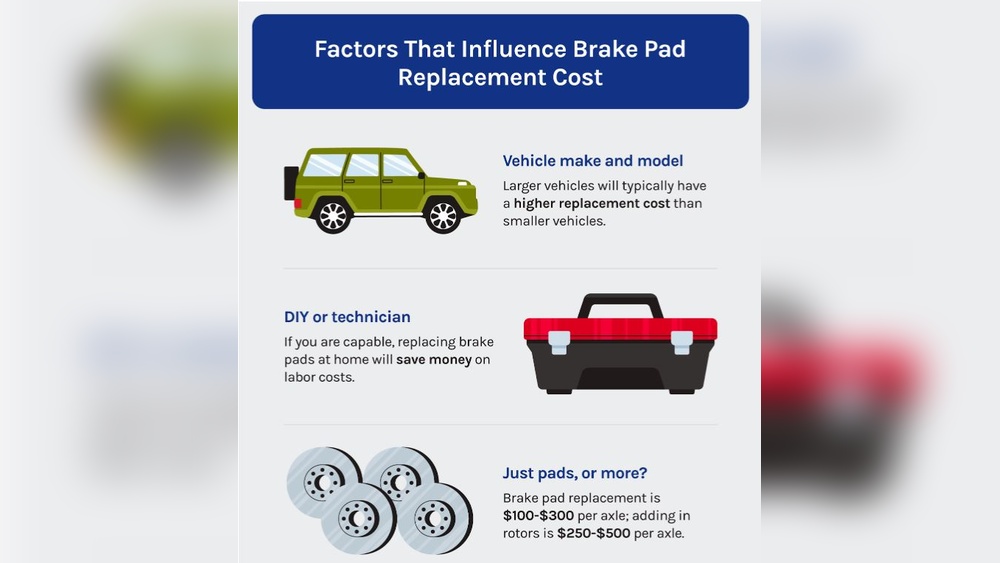
Choosing The Right Brake Pads And Rotors
Choose brake pads made for your car model and driving style. Ceramic pads are quiet and clean. Semi-metallic pads last longer but can be noisy. Pick rotors that fit your vehicle’s make and year. Some rotors come with extra features like cooling vents. Consider your driving conditions, such as city or highway use. Check the quality and brand for reliability and safety. Buy parts from trusted sellers to avoid poor quality.
.jpg)
Credit: www.cbac.com
Preparing Your Vehicle
Preparing your vehicle is the first step to changing brake pads and rotors safely. Proper preparation helps avoid accidents and makes the job easier. Take time to get everything ready before starting the work.
Safety Precautions
Wear gloves to protect your hands from dirt and sharp parts. Use safety glasses to keep dust and debris out of your eyes. Work on a flat surface to stop the car from rolling. Keep a fire extinguisher nearby just in case. Never rush the job. Safety is the top priority.
Lifting And Securing The Car
Loosen the lug nuts on the wheel before lifting the car. Use a strong jack to lift the vehicle from the right spot. Check the owner’s manual for the correct lifting point. Place jack stands under the car to hold it up securely. Never rely only on the jack. Give the car a gentle shake to ensure it is stable before working underneath.
Removing The Old Brake Pads And Rotors
Removing the old brake pads and rotors is a key step in brake maintenance. It ensures your car stops safely and smoothly. This process requires care and the right tools. Follow each step carefully for best results.
Removing The Wheel
Start by loosening the lug nuts with a wrench. Lift the car using a jack and secure it with stands. Remove the lug nuts completely. Take off the wheel and set it aside.
Taking Off The Caliper
Locate the caliper, which holds the brake pads. Use a socket wrench to remove the bolts holding it. Carefully lift the caliper off the rotor. Support the caliper with a hanger or rope. Avoid hanging it by the brake hose.
Removing The Old Brake Pads
Slide the brake pads out of the caliper bracket. They may be stuck due to wear or rust. Use a flat tool to pry them gently if needed. Check the pads for thickness and damage.
Detaching The Rotor
The rotor may be held by screws or stuck from rust. Remove any screws using a screwdriver. Tap the rotor lightly with a rubber mallet to loosen it. Pull the rotor straight off the hub. Clean the hub surface before installing new parts.
Installing New Brake Pads And Rotors
Installing new brake pads and rotors is a key step in car maintenance. It helps keep your vehicle safe and stops it smoothly. This part of the process needs care and focus. Each step must be done right for the brakes to work well.
Cleaning And Inspecting Components
Start by cleaning the brake parts. Use a wire brush to remove dirt and rust. Check the caliper and hardware for damage. Look for cracks or worn-out parts. Clean parts ensure a better fit and longer life.
Placing The New Rotor
Put the new rotor onto the wheel hub carefully. Make sure it sits flat and tight. Spin the rotor to check for any wobble. A smooth fit prevents noise and uneven wear. Secure it with bolts if needed.
Installing The New Brake Pads
Place the new brake pads into the caliper bracket. The friction surface must face the rotor. Press them firmly but gently. Avoid touching the pad surface with oily hands. Proper placement ensures good braking power.
Reattaching The Caliper
Slide the caliper back over the pads and rotor. Align it with the mounting bolts. Tighten the bolts evenly and securely. Check the caliper moves freely without binding. This step finishes the brake assembly.
Final Steps
After replacing your brake pads and rotors, the job is almost done. The final steps ensure your vehicle is safe and ready to drive. Pay close attention to each task. Proper finishing can prevent problems on the road.
Reinstalling The Wheel
Put the wheel back on the hub carefully. Align the holes with the bolts. Hand-tighten the lug nuts in a star pattern. This keeps the wheel balanced. Use a wrench to snug the nuts. Do not fully tighten them yet.
Lowering The Vehicle
Use the jack to lower your vehicle slowly. Make sure the car is steady on the ground. Remove the jack completely. Now, tighten the lug nuts fully. Use the star pattern again. This ensures even pressure and safety.
Testing The Brakes
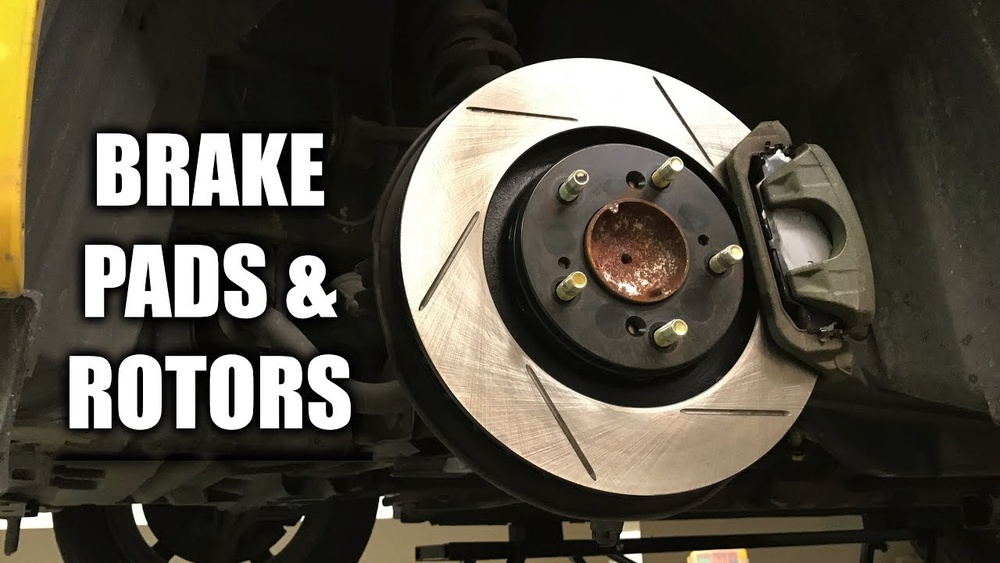
Press the brake pedal several times. This helps the pads settle on the rotors. Start the car and drive slowly in a safe area. Test the brakes gently at first. Listen for unusual sounds or vibrations. If all feels right, you finished the job well.

Credit: www.youtube.com
Tips For Maintenance
Proper brake maintenance keeps your car safe and saves money. Regular care helps avoid sudden brake failures. It also improves your vehicle’s performance and reduces repair costs.
Follow simple tips to know when to replace parts and how to extend brake life. Stay alert to signs of wear and take action early.
Signs Your Brakes Need Replacement
Listen for squeaking or grinding noises when you brake. These sounds mean the pads are worn out. Feel for vibrations in the brake pedal or steering wheel. This can show rotor damage. Notice if the car pulls to one side during braking. That points to uneven brake wear. Check if the brake warning light is on. It signals an issue that needs attention. Early detection prevents bigger problems and keeps driving safe.
Extending Brake Life
Drive smoothly without sudden stops to reduce brake wear. Avoid riding the brakes on hills or in traffic. Keep tires properly inflated to lessen strain on brakes. Clean brake parts regularly to remove dust and dirt. Use quality brake pads and rotors for longer durability. Have brakes checked at every oil change for timely fixes. Small steps keep brakes working well and last longer.
Credit: www.liv-cycling.com
Frequently Asked Questions
How Often Should I Change Brake Pads And Rotors?
Brake pads typically last 30,000 to 70,000 miles. Rotors can last longer but may need replacement when warped or worn. Regular inspection helps maintain safety and performance. Follow your vehicle’s manual for specific intervals.
What Tools Do I Need To Change Brake Pads And Rotors?
You need a jack, lug wrench, C-clamp, socket set, and screwdriver. Also, brake cleaner and grease are essential. Proper tools ensure a safe and efficient brake job.
Can I Change Brake Pads And Rotors Myself Safely?
Yes, with proper tools and knowledge, you can. Follow step-by-step instructions and safety precautions. If unsure, consult a professional to avoid brake failure risks.
How Do I Know If My Brake Rotors Need Replacement?
Signs include vibration when braking, squealing noises, or visible grooves. Warped or thin rotors reduce braking efficiency. Regular checks help identify rotor issues early.
Conclusion
Changing brake pads and rotors is a task you can handle yourself. Follow the steps carefully and take your time. Use the right tools and safety gear for the job. Check your work twice to make sure everything fits well.
Good brakes keep you safe on the road. Regular maintenance saves money and prevents bigger problems. Keep learning and practicing to improve your skills. This simple guide helps you stay confident and in control. Your car will thank you with better stopping power.