
If you want to give your Honda CRV a sleek, polished look while protecting its doors from dings and scratches, installing body side molding is a smart choice. But you might wonder—how do you do it yourself without professional help?
This guide will walk you through each simple step, so you can confidently add that extra layer of style and protection to your vehicle. By the end, you’ll have the know-how to make your CRV stand out and keep it looking great for years to come.
Ready to get started? Let’s dive in!
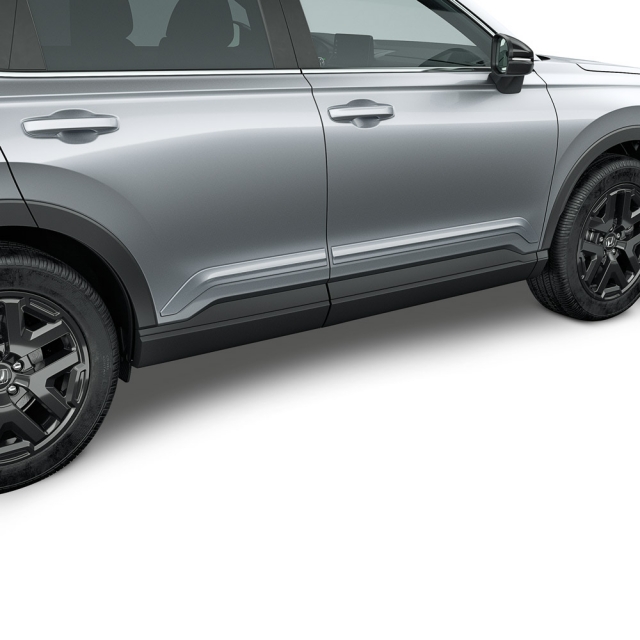
Credit: www.collegehillshonda.com
Tools And Materials Needed
Before installing body side molding on your Honda CRV, gather all necessary tools and materials. Preparation helps the process go smoothly and prevents mistakes. Having the right items ensures proper fit and finish.
Each tool and material plays a key role in the installation. Some items clean the surface, others help attach the molding securely. Use quality products for the best results and long-lasting hold.
Cleaning Supplies
Clean the car surface before installation. Use rubbing alcohol or a mild cleaner. A microfiber cloth works well to remove dirt and oils. Clean surfaces help the molding stick better and last longer.
Measuring Tools
Accurate measurement is crucial. Use a tape measure or ruler to mark placement. Painter’s tape helps mark the area without damaging paint. Proper alignment gives a neat, professional look.
Body Side Molding Kit
Buy a molding kit made for your Honda CRV model. The kit usually includes molding strips and clips. Double-check the parts fit your vehicle before starting. Correct parts prevent installation problems.
Adhesive Or Mounting Clips
Some moldings use strong adhesive tape. Others come with mounting clips or screws. Follow the kit instructions to know which to use. Proper mounting keeps molding secure during driving.
Tools For Installation
Common tools include a plastic trim removal tool, a screwdriver, and a heat gun or hair dryer. The heat gun softens adhesive for better bonding. The trim tool prevents scratches when removing old parts.
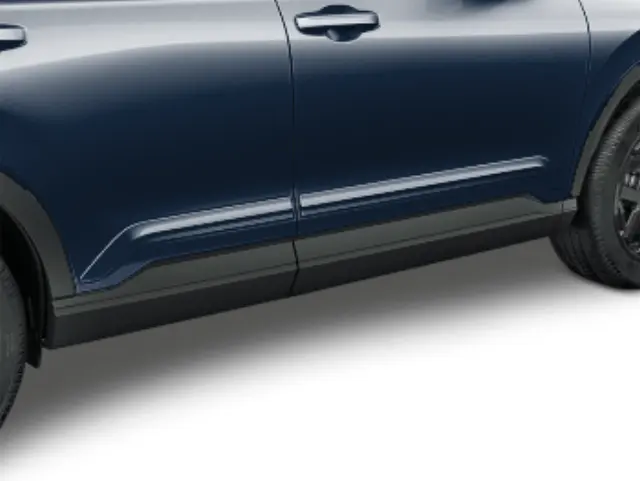
Credit: www.hondaautomotiveparts.com
Preparing The Vehicle
Preparing your Honda CRV before installing body side molding is important. It helps the molding stick well and look neat. Take your time to get the vehicle ready for the best results.
Start by cleaning the area where the molding will go. Dirt and grease can stop the adhesive from holding properly. Also, check if there is old molding that needs removal. Removing it carefully avoids damage to the car’s paint.
Clean The Surface
Use soap and water to wash the side panels of your CRV. Remove all dirt, dust, and grease. Dry the area with a clean cloth. Then, wipe the surface with rubbing alcohol. This removes leftover oils and helps the molding stick better.
Remove Old Molding
Check if old molding is still on your vehicle. Use a plastic scraper to lift the edges gently. Pull the molding slowly to avoid peeling paint. Remove any old adhesive with an adhesive remover. Clean the surface again before adding new molding.
Measuring And Aligning
Measuring and aligning are key steps to install body side molding on your Honda CRV. Proper measurement ensures the molding fits well and looks neat. Aligning correctly avoids mistakes that can damage the paint or cause uneven placement. This part of the process helps the molding sit flush against the car’s body. Take your time here for the best results.
Marking The Placement
Start by cleaning the area where you will place the molding. Use a soft cloth and mild cleaner. Dry the surface fully before marking. Use painter’s tape to outline the area. This tape acts as a guide and protects the paint. Measure the height from the ground to keep the molding level. Mark points lightly with a pencil or a fine-tip marker. Check these marks twice before moving on.
Checking Fitment
Hold the molding up to the marked area. See how it matches the tape and marks. Check if the ends line up with the car’s edges. Make sure the molding follows the car’s curves smoothly. Adjust the marks if the fit looks off. Press gently to feel if the molding sits flat. Confirm the fit on both sides of the vehicle. This step saves time and prevents rework later.
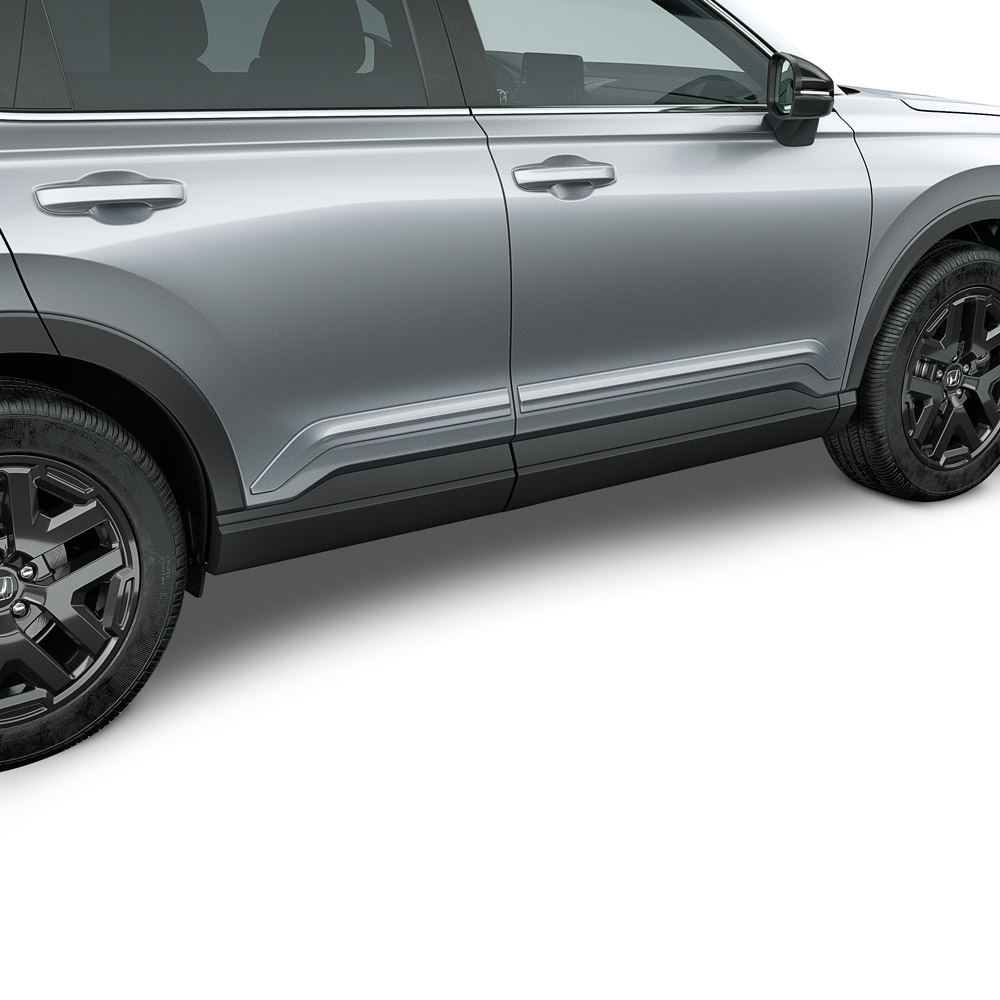
Credit: www.collegehillshonda.com
Installing The Body Side Molding
Installing the body side molding on your Honda CRV is a simple way to protect and enhance your vehicle’s look. The process requires careful steps to ensure the molding sticks well and looks neat. Follow these steps to apply the molding correctly and avoid any damage.
Peeling Adhesive Backing
Start by cleaning the area where the molding will go. Dirt and dust can stop the adhesive from sticking. Slowly peel off the adhesive backing from the molding. Do not touch the sticky side. It must stay clean for strong adhesion.
Attaching The Molding
Carefully align the molding with the body of your Honda CRV. Check the fit before pressing it down. Begin attaching at one end and work your way to the other. Make sure the molding is straight and even.
Applying Pressure
Press the molding firmly against the car’s surface. Use your hands or a soft cloth to apply pressure. Hold it for a few minutes to secure the bond. This step helps the adhesive stick better and last longer.
Final Checks And Maintenance
After installing the body side molding on your Honda CRV, it is important to perform final checks and maintain the molding well. This step ensures the molding stays secure and looks good for a long time.
Checking your work carefully helps catch any small issues early. Proper cleaning keeps the molding looking fresh and prevents damage.
Inspecting The Installation
Look closely at the edges of the molding. Make sure it sticks tightly to the car’s body without gaps. Press gently along the molding to confirm it is fully attached. Check for any loose parts or uneven spots. Also, verify the molding lines up evenly on both sides of the vehicle. Fix any problems immediately to avoid future damage.
Cleaning Tips
Use a soft cloth and mild soap with water to clean the molding. Avoid harsh chemicals that might harm the plastic or paint. Dry the molding gently with a clean towel after washing. Clean the molding regularly to remove dirt and grime. This helps maintain its shine and prevents build-up that can weaken the adhesive.
Frequently Asked Questions
How Do I Prepare My Honda Crv For Molding Installation?
Clean the car surface thoroughly and remove dirt and grease. Dry the area completely to ensure proper adhesion of the molding.
What Tools Are Needed To Install Body Side Molding?
You will need molding adhesive, a heat gun, cleaning supplies, and a plastic trim tool for easy and secure installation.
Can I Install Body Side Molding Without Professional Help?
Yes, with proper tools and instructions, you can install molding yourself. Take time and follow steps carefully for best results.
How Long Does The Molding Adhesive Take To Cure?
Typically, adhesive cures within 24 hours. Avoid washing or heavy contact during this time to ensure strong bonding.
Conclusion
Installing body side molding on your Honda CRV adds style and protection. Follow each step carefully for the best results. Take your time to align the molding properly. Clean the surface before applying to ensure it sticks well. Check the fit and press firmly to avoid bubbles.
This simple upgrade keeps your car looking neat and guards against small dents. Enjoy the fresh look and added defense on your CRV. With patience and care, the installation goes smoothly every time.


