
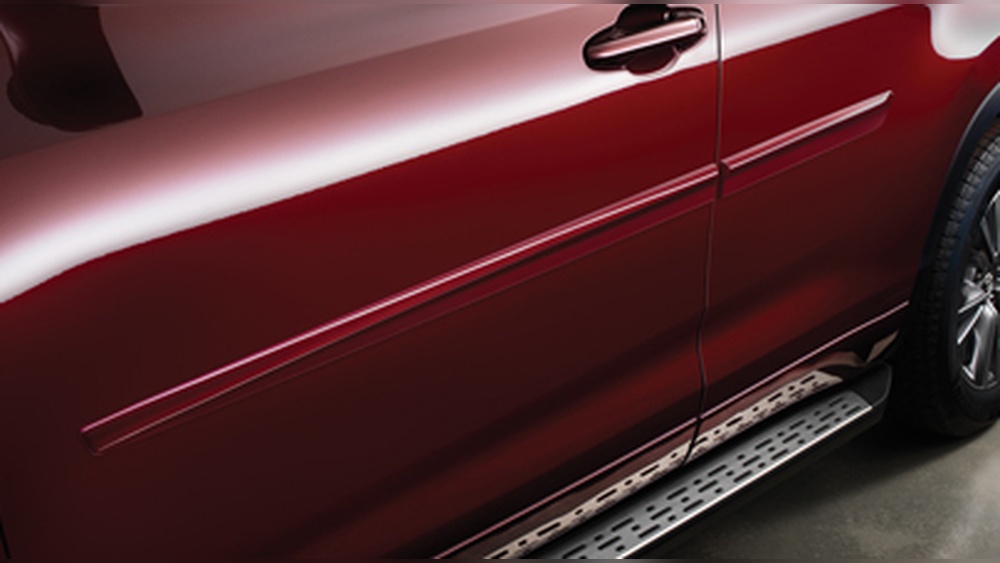
If you want to give your Toyota Highlander a fresh, sleek look while protecting it from dings and scratches, installing body side molding is a smart move. But how do you do it right without spending a fortune or making mistakes?
This guide will walk you through every step, using simple language and clear instructions. By the end, you’ll have your Highlander looking sharp and safeguarded, all thanks to your own handiwork. Ready to get started? Let’s dive in!
Tools And Materials Needed
Installing body side molding on your Toyota Highlander needs the right tools and materials. Preparing these before starting saves time and effort. It also helps ensure a clean, smooth installation without damage.
Gathering everything needed makes the process easier. It helps you avoid interruptions to find missing items. Below is a list of tools and tips for choosing the right molding.
List Of Required Tools
- Measuring tape for accurate placement
- Masking tape to mark the area
- Clean cloth to wipe surfaces
- Isopropyl alcohol for cleaning
- Plastic trim removal tool to avoid scratches
- Adhesive promoter for better bonding
- Heat gun or hair dryer to soften molding
- Rubber roller to press molding firmly
- Screwdriver set if screws are involved
Choosing The Right Molding
Select molding made specifically for the Toyota Highlander. This ensures proper fit and style matching your vehicle.
Choose molding with strong adhesive backing. It sticks well and lasts longer against weather and road debris.
Consider color and texture. Match the molding color closely to your car’s paint for a seamless look.
Check customer reviews to find durable and easy-to-install molding brands. This helps avoid poor quality products.
Preparing The Vehicle
Preparing the vehicle is the first step to install body side molding on your Toyota Highlander. This step helps the molding stick better and last longer. Proper preparation also prevents damage to your car’s paint.
Start with a clean surface and remove any old molding or adhesive. This makes sure the new molding fits perfectly and looks neat. Follow these simple steps to prepare your vehicle well.
Cleaning The Surface
Wash the area where you will install the molding. Use soap and water to remove dirt and dust. Dry the surface completely with a clean cloth. Any grease or oil can stop the adhesive from sticking well. Use rubbing alcohol on a cloth to wipe the area. This removes any leftover grease or wax.
Removing Old Molding Or Adhesive
Check if there is old molding or adhesive on the car. Carefully peel off the old molding. Use a plastic scraper to avoid scratching the paint. For stubborn adhesive, apply a small amount of adhesive remover. Let it sit for a few minutes. Wipe the residue with a clean cloth. Clean the surface again with rubbing alcohol. Make sure no sticky bits remain before adding new molding.
Aligning The Body Side Molding
Aligning the body side molding on your Toyota Highlander is a key step. Proper alignment ensures the molding fits perfectly and looks neat. It also helps the molding stick well and last longer. Take your time during this step. Small adjustments can make a big difference in the final look.
Marking The Placement
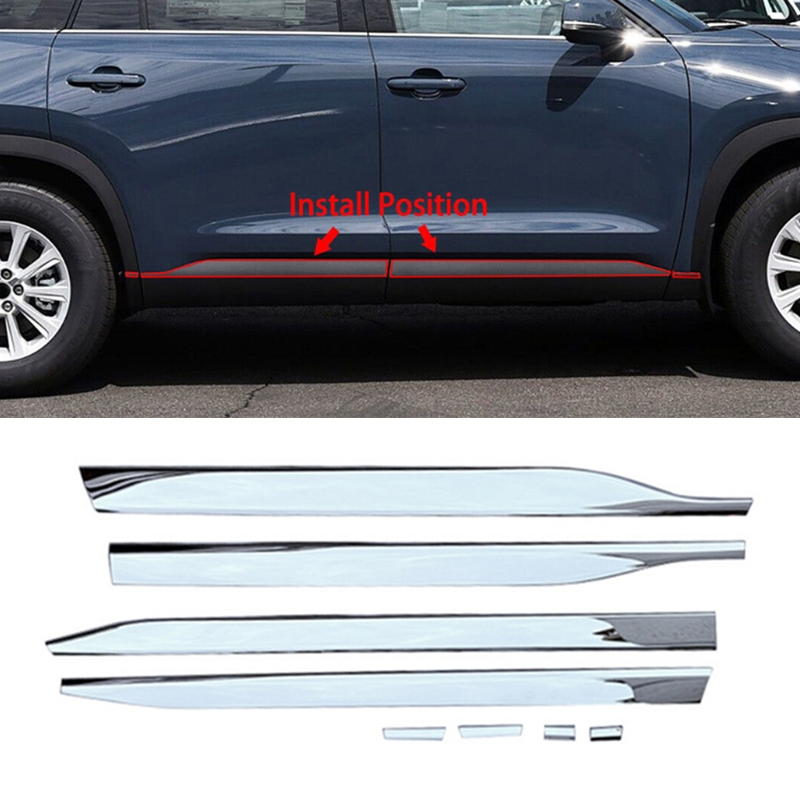
Start by holding the molding against the vehicle’s side. Check the edges and curves to see where the molding fits best. Use a pencil or masking tape to mark the top and bottom edges. These marks guide you during installation. Avoid pressing too hard to prevent damage to the paint. Mark both ends and the middle for better accuracy.
Checking Fit And Position
Before removing the backing tape, place the molding on the marks. Look closely to confirm the fit matches the vehicle’s shape. Adjust the position if the molding looks uneven or misaligned. Step back and view the molding from different angles. This helps catch any mistakes early. Once satisfied, prepare to attach the molding securely.

Credit: parts.longotoyota.com
Installing The Molding
Installing the body side molding on your Toyota Highlander enhances its look and protects the doors. This process requires care to ensure a strong fit. Follow each step carefully to avoid damage and ensure the molding stays secure.
Applying Adhesive Or Clips
Start by cleaning the area where the molding will attach. Use rubbing alcohol to remove dirt and grease. This helps the adhesive or clips stick better.
If your molding uses adhesive tape, peel off the backing slowly. Press the molding firmly against the car’s side. Hold it in place for a few minutes to bond well.
For clip-on moldings, line up the clips with the holes in the car body. Push the molding gently until the clips snap into place. Check that all clips are secure before moving on.
Attaching The Molding Securely
After placing the molding, press along its entire length. This ensures full contact with the car surface. Use a soft cloth to avoid scratches while pressing.
Check for any loose sections. Reapply pressure or adjust clips if needed. Avoid driving the car for a few hours to let the adhesive set completely.
Proper attachment prevents the molding from falling off. It also keeps dirt and moisture away from the car doors. Take your time for a neat and lasting result.
Finishing Touches
Finishing touches are key to a perfect look and strong hold. This step ensures the body side molding fits well and stays in place. It also keeps your Toyota Highlander looking clean and neat.
Pressing And Securing
Press the molding firmly against the car side. Use your hands to apply even pressure. Check all edges to avoid air bubbles. Hold for a few minutes to help the adhesive stick. Use painter’s tape to secure the molding if needed. Let it sit for at least one hour before driving.
Cleaning Up Residue
Remove any leftover adhesive with a soft cloth. Use rubbing alcohol or a mild cleaner. Avoid harsh chemicals that can harm the paint. Gently wipe the area until it looks clean. This step keeps your car shiny and fresh.
Credit: www.ebay.com
Maintenance Tips
Maintaining the body side molding on your Toyota Highlander helps keep it looking new. Regular care protects the molding from wear and tear. Simple steps can extend its life and appearance.
Keeping The Molding Clean
Wash the molding gently with soap and water. Use a soft cloth or sponge to avoid scratches. Rinse thoroughly to remove all soap. Dry the molding with a clean towel to prevent water spots. Clean the molding every time you wash your vehicle.
Preventing Damage
Avoid parking too close to other vehicles or objects. This reduces the risk of scratches and dents. Check the molding often for loose parts or cracks. Fix small issues quickly to avoid bigger problems. Use protective wax to shield the molding from sun and rain.

Credit: www.shopsar.com
Frequently Asked Questions
How Do I Prepare My Toyota Highlander For Molding Installation?
Clean the side area thoroughly and dry it completely. Remove any dirt or grease to ensure strong adhesion. Gather necessary tools like adhesive promoter and clips before starting the installation.
What Tools Are Needed To Install Body Side Molding?
You will need adhesive promoter, clips or double-sided tape, a heat gun or hairdryer, and a clean cloth. These tools help secure the molding properly and ensure a smooth fit.
Can I Install Body Side Molding Myself On Highlander?
Yes, with basic tools and careful steps, DIY installation is possible. Follow manufacturer instructions closely for a professional-looking finish and secure attachment.
How Long Does Body Side Molding Installation Take?
Typically, installation takes about 30 to 60 minutes depending on experience. Allow extra time for cleaning, positioning, and curing of adhesive for best results.
Conclusion
Installing body side molding on your Toyota Highlander protects the doors from dings. It also adds a stylish look to your vehicle. Follow each step carefully to ensure a tight fit. Take your time and use the right tools for best results.
Small effort brings big benefits in the long run. Enjoy a cleaner, sharper appearance on your Highlander. This simple upgrade can save you money on future repairs. Ready to drive with extra confidence and style?


