If you want your brakes to work smoothly and last longer, knowing how to bed in brake pads and rotors is a must. This simple process might sound technical, but it’s easier than you think—and it can save you money and headaches down the road.
By taking a few extra minutes, you’ll improve your car’s stopping power and avoid annoying noises or uneven wear. Ready to learn the step-by-step method that experts use? Keep reading, and you’ll soon have the confidence to do it yourself like a pro.
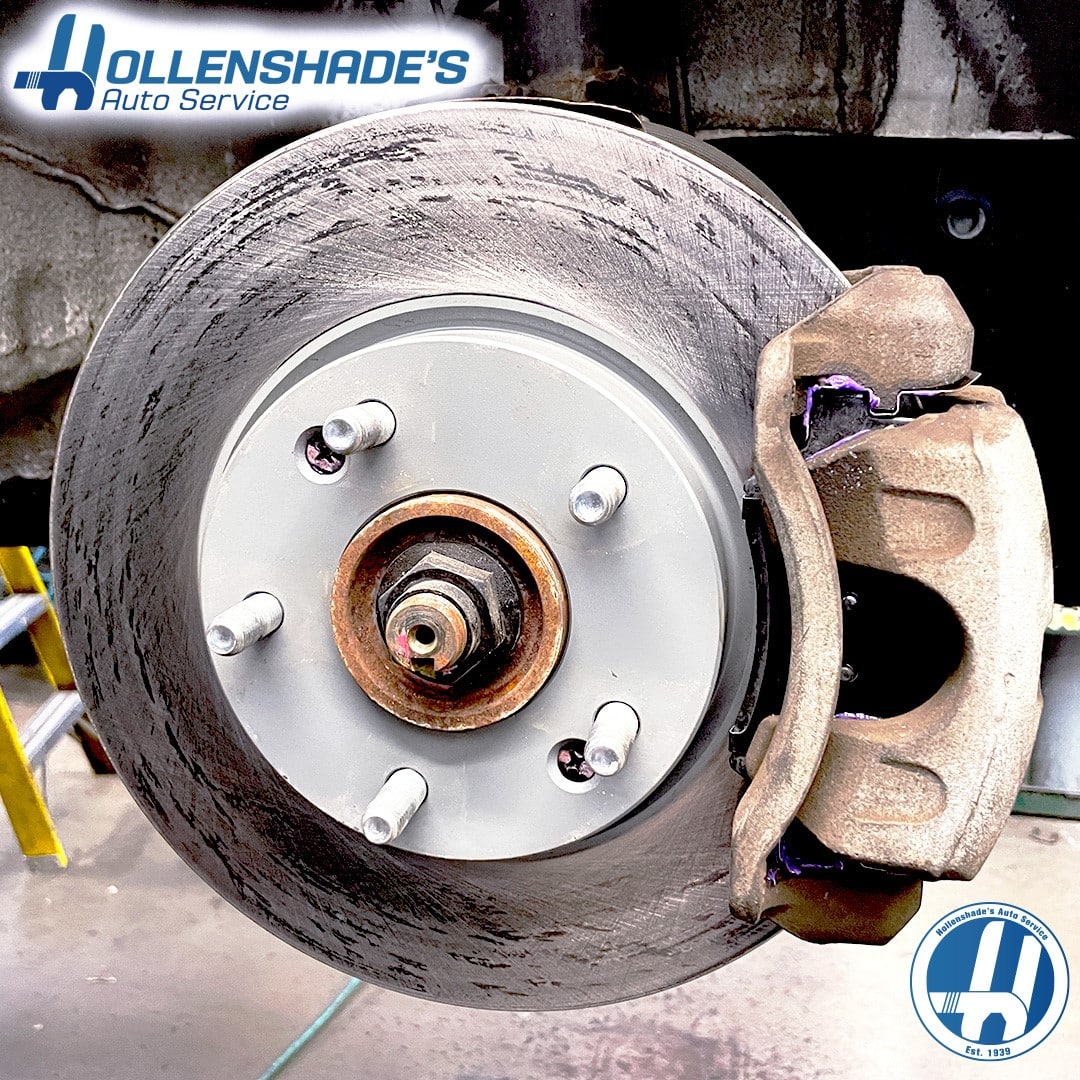
Credit: www.hollenshades.com
Why Bedding Matters
Bedding brake pads and rotors is a key step after installation. It means breaking in the new parts properly. This process helps the brakes work well and last longer. Skipping bedding can cause poor brake feel and early wear. Understanding why bedding matters makes it clear how it affects your safety and costs.
Impact On Brake Performance
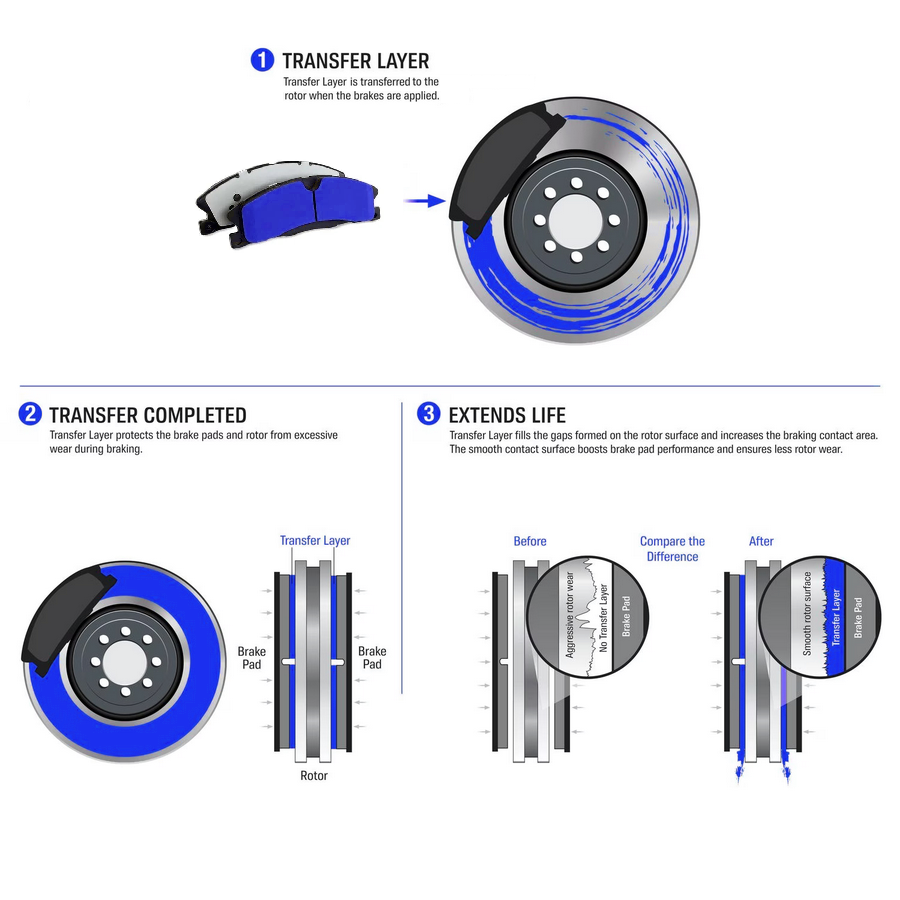
Bedding helps the pads and rotors work smoothly together. It creates a thin layer of pad material on the rotor surface. This layer improves grip and reduces noise. Proper bedding means better stopping power and shorter stopping distances. Without it, brakes can feel spongy or grab suddenly. Consistent brake performance starts with good bedding.
Extending Pad And Rotor Life
New pads and rotors need to wear in evenly. Bedding prevents uneven spots and warping on the rotor. It reduces heat build-up that can cause damage. Even wear means the parts last longer and work better. Skipping bedding can lead to early replacements and higher costs. Taking time to bed brakes protects your investment.
Preparing For The Bedding Process
Preparing for the bedding process is an important step in brake maintenance. Proper preparation ensures that the brake pads and rotors wear evenly. This leads to better braking performance and longer part life. Taking time to prepare helps avoid future problems like noise or vibration.
Gathering Necessary Tools
Start by collecting all the tools needed for bedding your brakes. You will need a jack and jack stands to lift the vehicle safely. A lug wrench helps remove the wheels. Have brake cleaner and a clean rag ready to clean the rotors. A torque wrench is useful to tighten bolts to the right level. Check that you have new brake pads and rotors if you plan to replace them.
Ensuring Safety Measures
Safety is key before starting any brake work. Park on a flat surface and set the parking brake firmly. Use wheel chocks to stop the car from rolling. Always wear gloves to protect your hands. Eye protection is important to shield against dirt or debris. Double-check that the jack stands are stable before working under the car. Never rely only on a jack to hold the vehicle up.
Step-by-step Bedding Procedure
Bedding in brake pads and rotors is crucial for safe and effective braking. This process helps the parts work together smoothly. It reduces noise, vibration, and uneven wear. Follow the step-by-step procedure below for best results.
Initial Break-in Drives
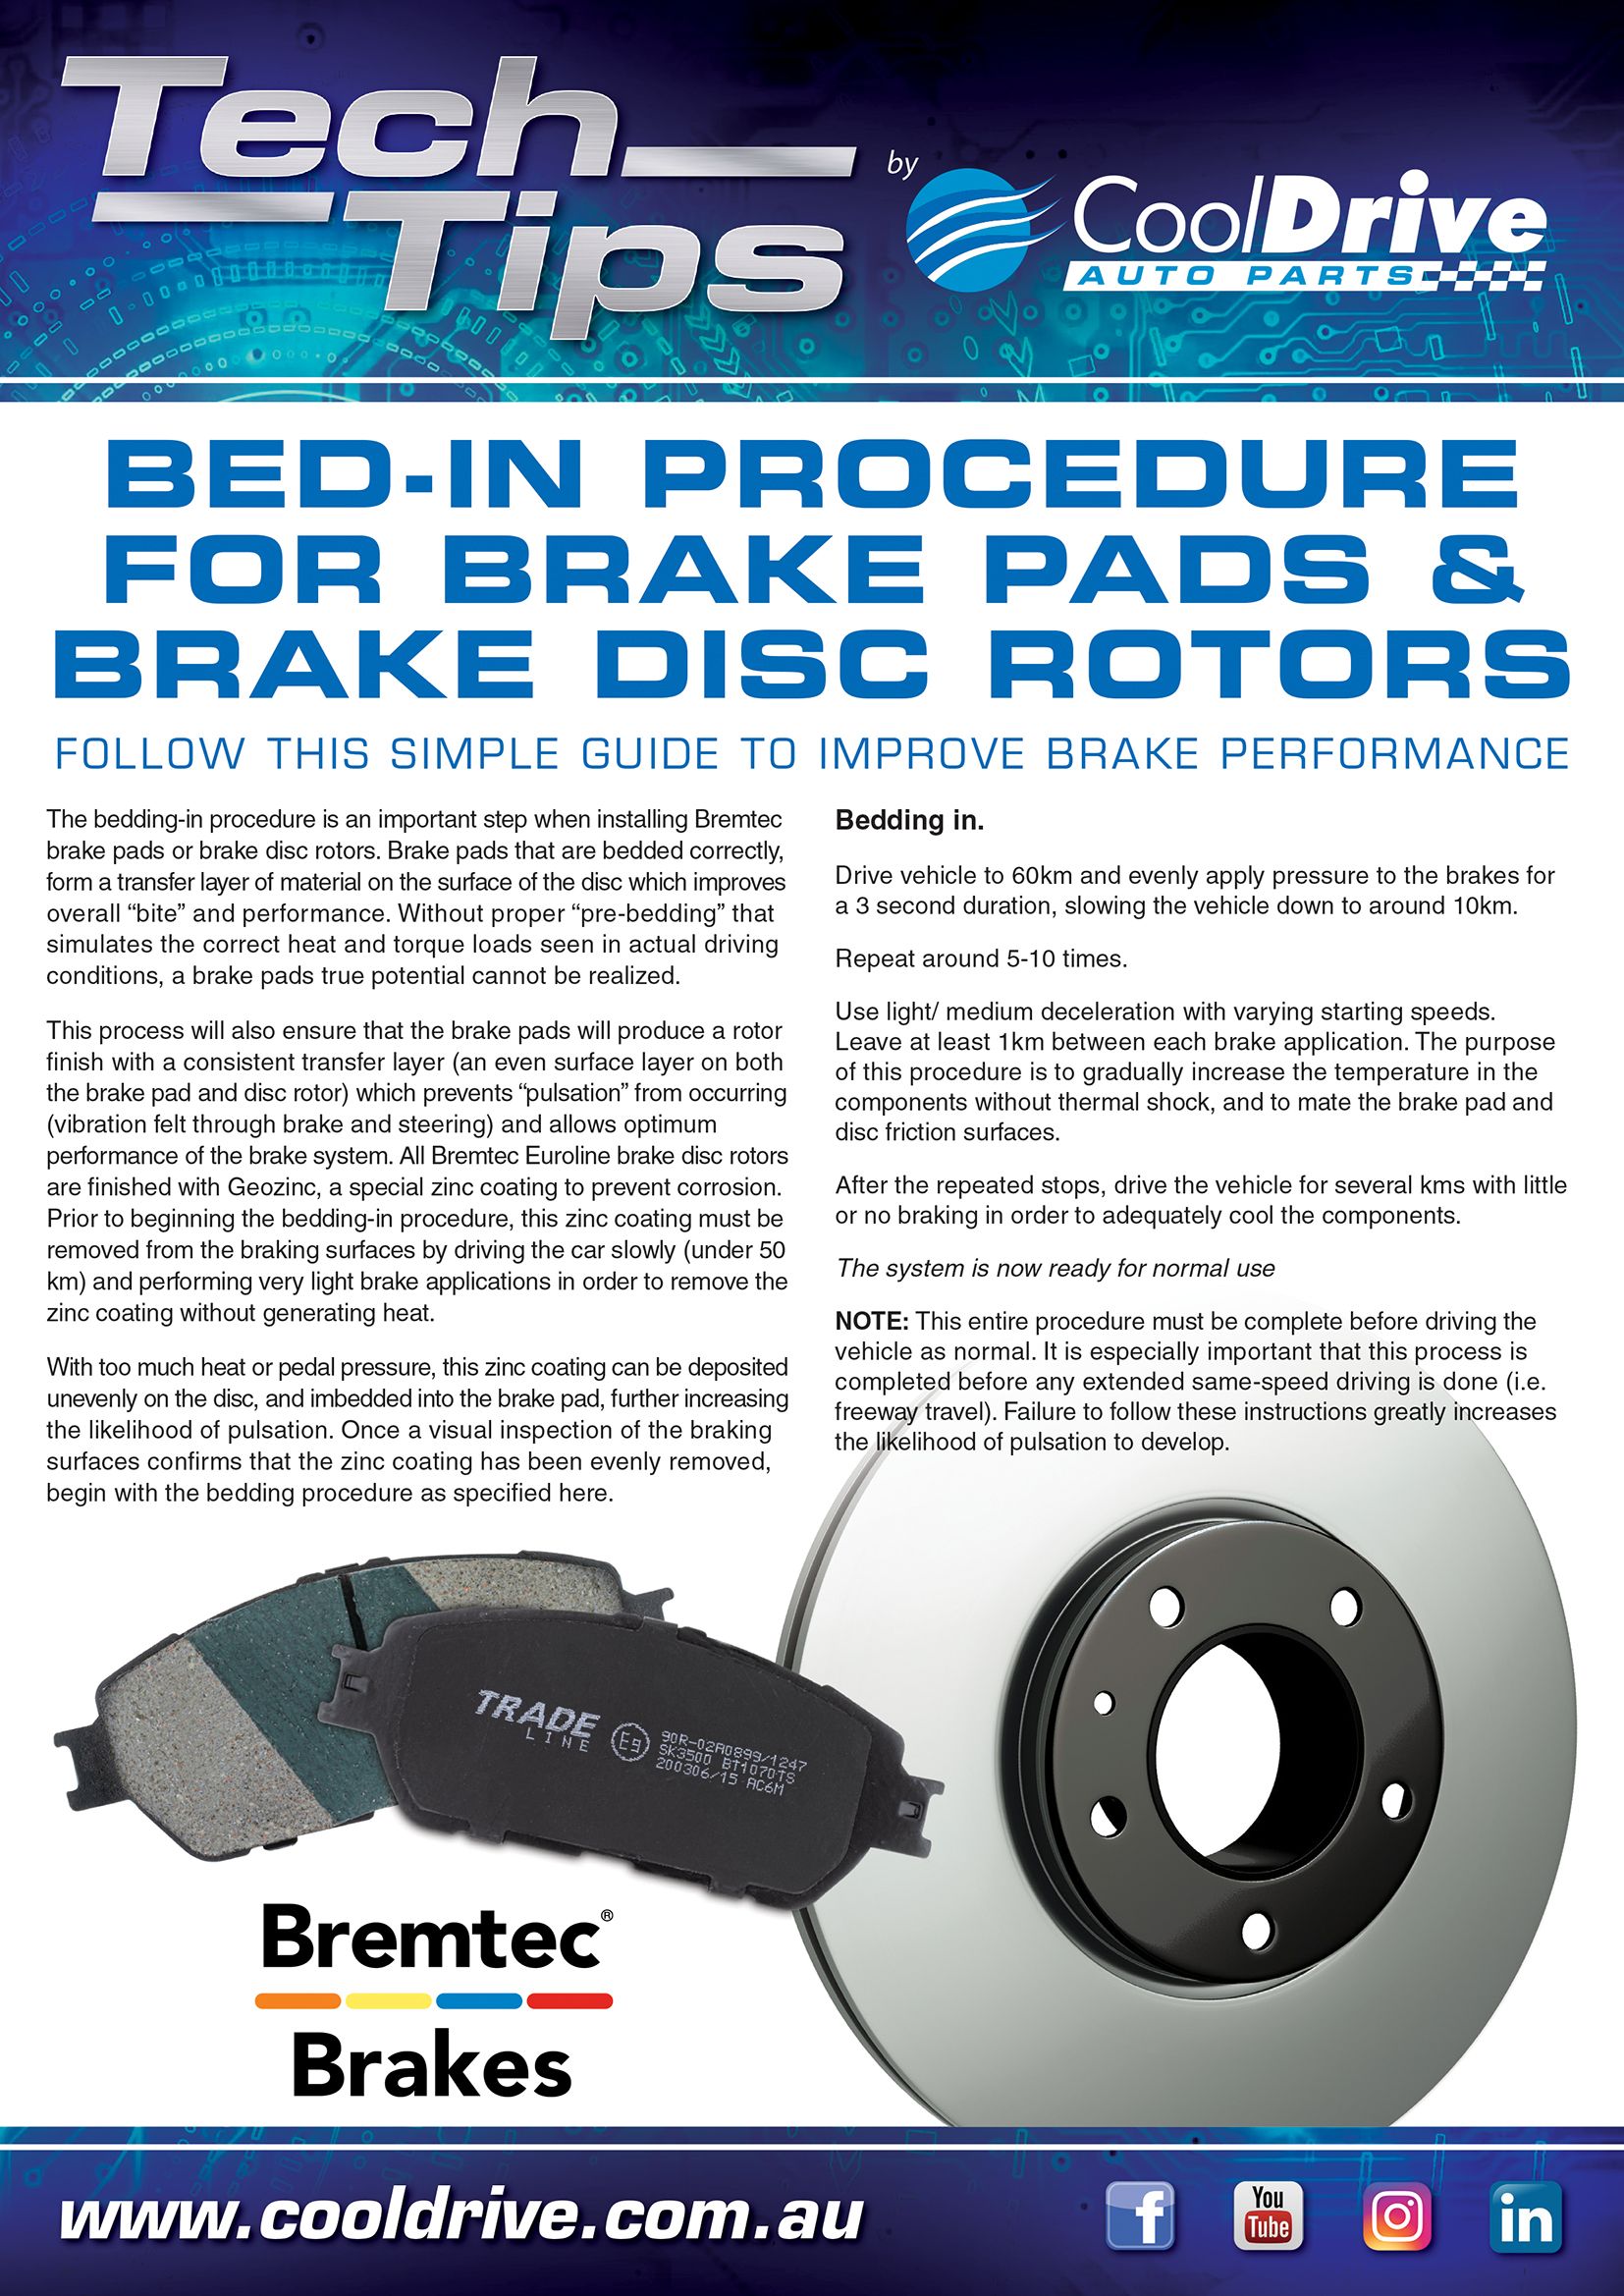
Start with short drives at low speeds. Avoid hard stops during this phase. Let the brakes heat up gently. This helps the pads and rotors adjust to each other. Repeat this for about 10 to 15 minutes. It prepares the brakes for controlled braking next.
Controlled Braking Techniques
Drive at moderate speeds, around 30 to 40 mph. Apply brakes firmly but not fully. Use a series of 8 to 10 stops in a row. Let the brake speed reduce to about 5 mph before releasing. This action transfers a thin layer of pad material onto the rotor. It creates a smooth, even surface. Avoid holding the brakes during stops. This prevents uneven pad deposits.
Cooling Periods
Allow the brakes to cool down after each set of stops. Drive without using the brakes hard for 5 to 10 minutes. Cooling prevents overheating and warping of parts. Repeat the controlled braking and cooling cycles 3 to 4 times. This process ensures a proper bond between pads and rotors.
Credit: www.brakes-shop.com
Common Mistakes To Avoid
Bedding in brake pads and rotors is key for safe driving. Many drivers make mistakes that can harm braking performance. Avoiding common errors saves time and money. Follow clear steps to get the best results.
Overheating Components
Overheating brakes cause damage to pads and rotors. Heat breaks down the pad material fast. Warped rotors and reduced braking power often result. Avoid riding the brakes or stopping hard repeatedly. Let the brakes cool down between stops. Use gentle braking during the bedding process to control heat.
Incomplete Bedding Cycles
Stopping too soon hurts the bedding process. Pads need time to bond with the rotor surface. Incomplete cycles lead to uneven pad wear and noise. Follow the full bedding procedure without skipping steps. Gradually increase braking force during the cycles. This ensures even material transfer and better brake feel.
Signs Of Proper Bedding
Knowing the signs of proper bedding helps you confirm the brake pads and rotors work well. Proper bedding improves braking safety and extends the life of brake parts. Recognizing these signs saves time and effort by avoiding unnecessary repairs.
Improved Brake Response
One clear sign of good bedding is better brake response. The brakes feel firmer and more consistent under your foot. The car stops smoothly without vibrations or noises. This means the pads and rotors have matched well and work together. You can trust the brakes to perform reliably every time.
Even Pad Wear
Even wear on the brake pads shows proper bedding. The pad surface looks smooth and uniform, not patchy or rough. Uneven wear can cause poor braking and shorten pad life. Proper bedding spreads the heat evenly across the pads and rotors. This balance helps the pads wear down at the same rate.
Maintaining Brake Performance Post-bedding
Maintaining brake performance after bedding pads and rotors is essential for safety and vehicle longevity. Proper care keeps brakes responsive and reduces wear. Regular checks and timely replacements help avoid costly repairs. Understanding post-bedding maintenance ensures brakes work smoothly every day.
Regular Inspections
Check brake pads and rotors often for signs of wear or damage. Look for uneven pad thickness or grooves on rotors. Listen for unusual noises like squeaking or grinding. Inspect brake fluid levels and condition regularly. Early detection of problems prevents brake failure and keeps stopping power strong.
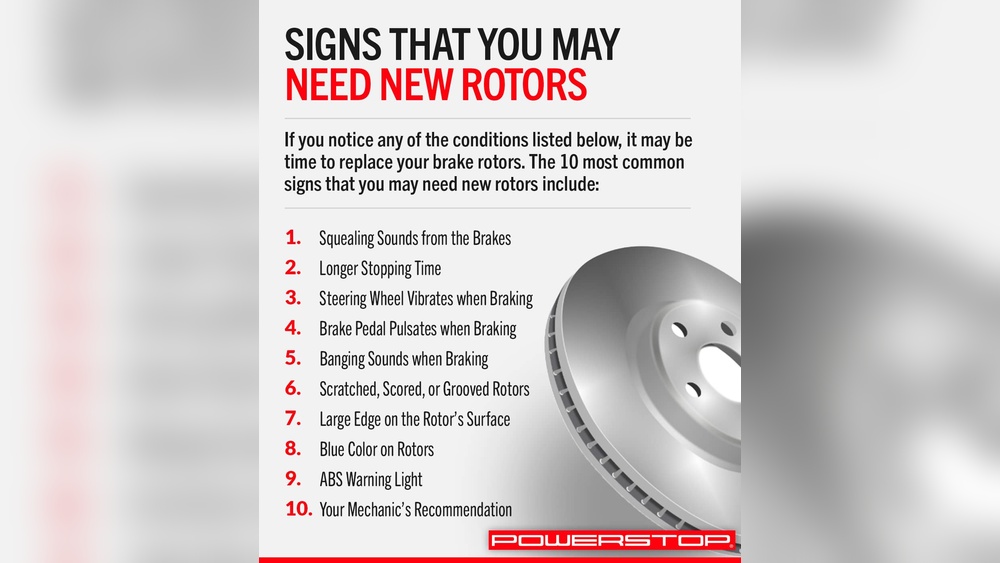
When To Replace Pads And Rotors
Replace brake pads when thickness is less than three millimeters. Rotors need replacement if they show deep grooves or warping. Vibrations during braking can signal rotor issues. Pay attention to warning lights on your dashboard. Timely replacement maintains safe braking and avoids damage to other parts.
Credit: ishop.cooldrive.com.au
Frequently Asked Questions
What Does Bedding In Brake Pads And Rotors Mean?
Bedding in means breaking in new brake pads and rotors. It helps transfer an even layer of pad material to the rotor. This process ensures optimal braking performance and prevents uneven wear or noise.
Why Is Bedding Brake Pads And Rotors Important?
Bedding improves brake efficiency and lifespan. It reduces brake fade and overheating. Proper bedding ensures smooth, consistent stops and prevents premature damage to brake components.
How Long Does It Take To Bed Brake Pads And Rotors?
Typically, bedding takes about 20 to 30 minutes. It involves several gradual stops from moderate speeds. This controlled process heats the brakes evenly for best results.
Can I Drive Normally Before Bedding New Brakes?
Avoid heavy braking during initial 100 miles. Drive gently to allow pads and rotors to adapt. Normal driving without bedding can cause uneven wear and reduced braking power.
Conclusion
Properly bedding in brake pads and rotors improves braking safety. It helps the parts wear evenly and last longer. Follow the steps carefully and take your time. Avoid hard stops during the bedding process. Listen for any unusual noises or vibrations.
Once done, your brakes will feel smoother and more reliable. Regular maintenance keeps your brakes working well. Safe driving starts with good brake care.