Is your snowblower not running as smoothly as it used to? One common reason could be a clogged fuel filter.
Replacing the fuel filter might sound tricky, but it’s easier than you think—and it can save you from costly repairs down the line. In this guide, you’ll learn exactly how to replace the fuel filter on your snowblower step-by-step. Keep reading, and soon your machine will be ready to tackle winter’s toughest snowstorms with ease.
Tools And Materials Needed
Replacing the fuel filter on a snowblower requires a few simple tools and materials. Having these ready makes the job faster and easier. It also helps prevent mistakes and keeps you safe during the process.
Prepare everything before starting. This way, you avoid interruptions and work efficiently. Each tool and material plays an important role in the replacement process.
Basic Tools Required
Gather a screwdriver set, both flathead and Phillips. These help remove screws holding the fuel filter in place. A pair of pliers is useful to grip and pull off fuel lines gently. A small wrench might be needed to loosen any bolts securing the filter.
Materials Needed
Buy a replacement fuel filter that matches your snowblower model. Check the owner’s manual for exact specifications. Have a clean container ready to catch any fuel that might spill during removal. Keep some rags nearby to wipe spills and clean parts.
Safety Gear
Wear gloves to protect your hands from fuel and dirt. Safety glasses shield your eyes from debris and splashes. Work in a well-ventilated area to avoid inhaling fumes. Proper safety gear prevents injuries and keeps the work safe.
Safety Tips Before Starting
Before starting, make sure the snowblower is off and cool. Wear gloves to protect your hands from fuel and dirt. Work in a well-ventilated area to avoid breathing fumes.
Turn Off The Snowblower And Let It Cool
Always switch off the snowblower before starting any repair. Let the engine cool for at least 15 minutes. Hot parts can cause burns. Cooling reduces risk of injury.
Work In A Well-ventilated Area
Fuel fumes are harmful and can build up indoors. Choose an open space or a garage with the door open. Fresh air prevents dangerous fume buildup. Safety first.
Wear Protective Gear
Use gloves to protect your hands from fuel and dirt. Safety glasses shield your eyes from splashes. Dress in clothes that cover your skin. Protect yourself fully.
Keep Fire And Sparks Away
Fuel is highly flammable. Remove all sources of fire or sparks nearby. Do not smoke or use electrical tools that can spark. Safety prevents accidents.
Drain The Fuel Tank If Possible
Empty the fuel tank to avoid spills. It stops fuel from leaking during filter replacement. Use a proper container to catch fuel safely. Avoid mess and fire hazards.
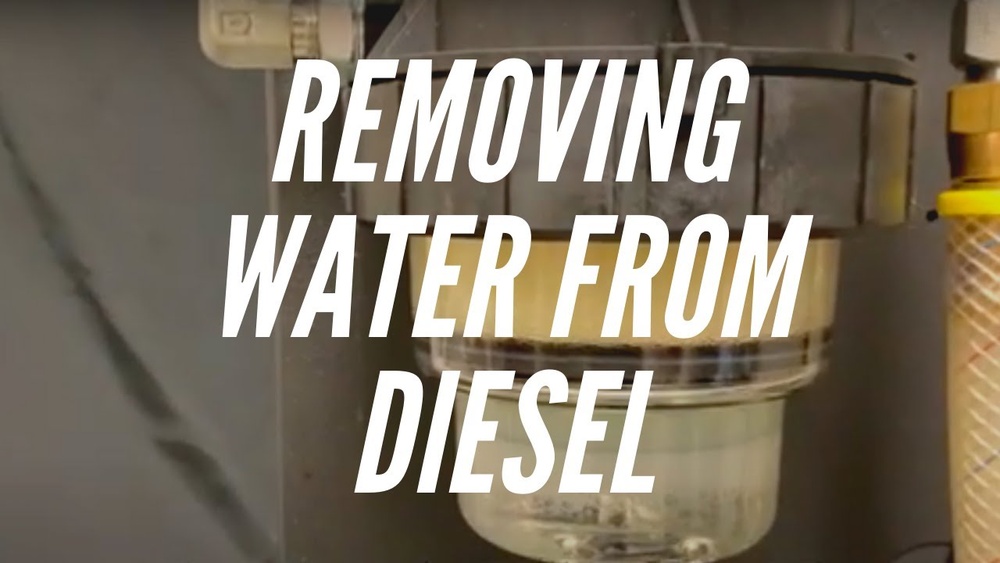
Locating The Fuel Filter
Locating the fuel filter on your snowblower is the first step in replacing it. The fuel filter cleans the gas before it reaches the engine. Dirt and debris can clog it, causing the snowblower to run poorly. Knowing where to find the fuel filter helps you fix problems fast.
The fuel filter usually sits between the gas tank and the carburetor. It looks like a small, clear or white plastic or glass part. In some models, it might be inside the fuel line. Checking the user manual can help find the exact spot.
Check Near The Fuel Tank
Start by looking around the fuel tank. The filter often connects to the fuel line at the tank’s base. You may see a small cylinder or a clear piece attached to the line. This is likely the fuel filter.
Follow The Fuel Line
Trace the fuel line from the tank to the engine. The fuel filter usually sits along this line. It may be clipped or held in place by small clamps. Look carefully to spot the filter’s shape and size.
Consult The Snowblower Manual
The owner’s manual shows the fuel system layout. It often includes a diagram with the fuel filter’s location. Use this guide to avoid confusion. Manuals also provide safety tips for handling fuel parts.
Draining The Fuel System
Draining the fuel system is an important step before replacing the fuel filter on your snowblower. This process helps remove old fuel and prevents spills while you work. It also protects the engine from damage caused by dirty fuel or debris. Taking the time to drain the fuel system ensures the new filter works well and lasts longer.
Prepare The Snowblower For Draining
First, move the snowblower to a flat surface. Turn off the engine and let it cool down. Wear gloves to protect your hands. Place a container below the fuel tank to catch the drained fuel. Have rags ready for any spills.
Locate The Fuel Drain Valve
Find the fuel drain valve near the carburetor or fuel tank. It usually looks like a small screw or lever. Check your snowblower manual if unsure. Opening this valve allows fuel to flow out safely.
Drain The Fuel From The Tank
Open the fuel drain valve slowly. Let the fuel flow into the container. Watch carefully to avoid overfilling. Close the valve once the fuel stops draining. Dispose of the old fuel properly following local rules.
Flush The Fuel Lines
Next, detach the fuel lines from the filter. Use a clean container to catch fuel from the lines. Allow any remaining fuel to drain out. This step clears dirt and old fuel from the system. Reconnect the lines after draining.
Removing The Old Fuel Filter
Removing the old fuel filter from your snowblower is a key step in keeping the machine running smoothly. A clogged or dirty filter stops fuel flow and can cause engine problems. Taking out the old filter carefully makes way for a new one to work well.
Follow these clear steps to remove the old fuel filter without damaging any parts. Work slowly and safely for the best results.
Prepare Your Workspace And Tools
Choose a clean, flat area to work on the snowblower. Have a small container ready to catch any fuel spills. Gather pliers and screwdrivers to loosen clamps or screws. Wear gloves to protect your hands from fuel.
Turn Off The Snowblower And Drain Fuel
Switch off the engine and disconnect the spark plug for safety. Find the fuel valve and close it to stop fuel flow. Place the container under the fuel line to catch drips. Open the fuel cap to release pressure.
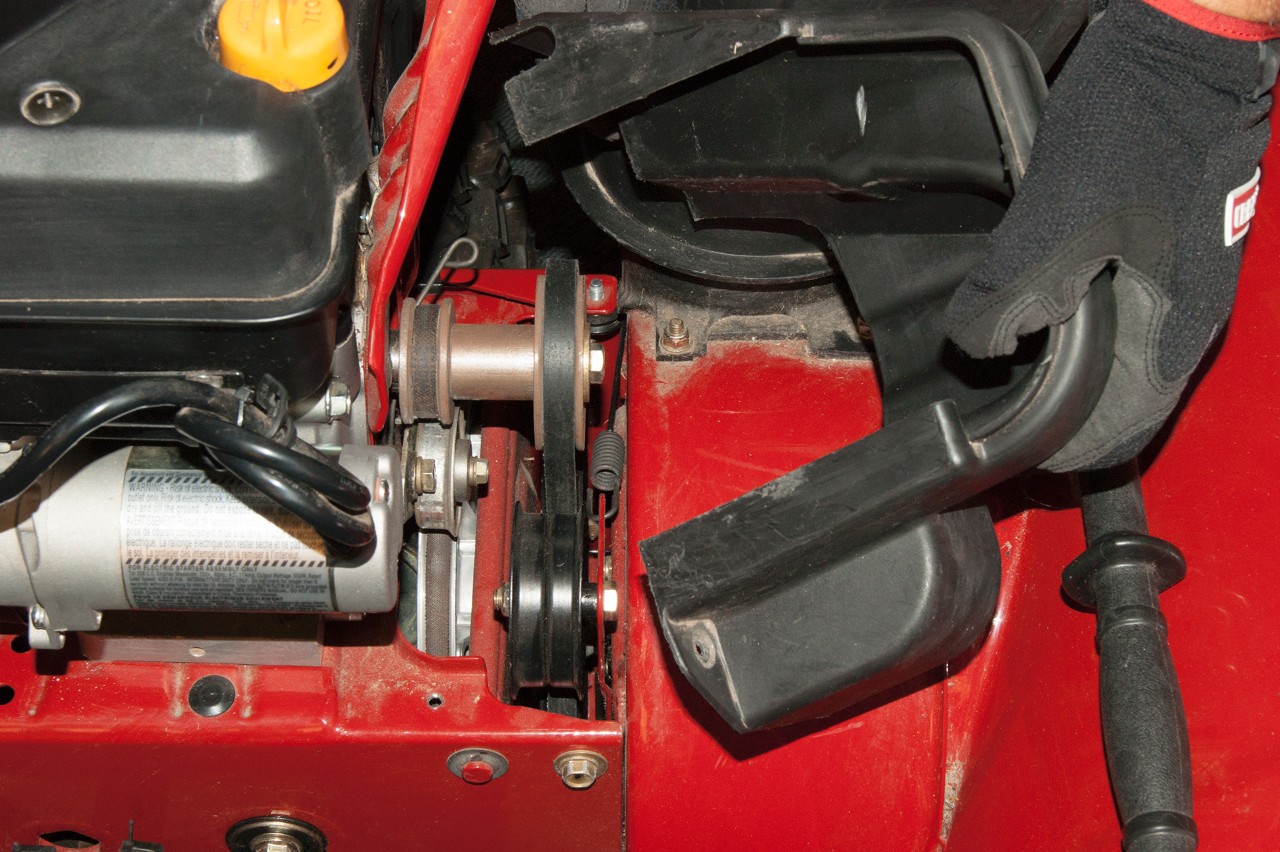
Locate The Fuel Filter
Look along the fuel line from the tank to the engine. The fuel filter is a small, clear or opaque cylinder. It is usually held by clips or clamps on the fuel hose. Note the filter’s direction for correct reinstallation.
Remove The Fuel Line Clamps
Use pliers to squeeze and slide the clamps away from the filter. Be gentle to avoid breaking the fuel lines. If clamps are tight, twist the hose slightly to loosen. Keep the clamps safe to reuse later.
Detach The Old Fuel Filter
Pull the fuel lines off the filter carefully. Some fuel may leak, so keep the container ready. Remove the filter completely and inspect it for dirt or damage. Dispose of the old filter properly.
Credit: www.searspartsdirect.com
Installing The New Fuel Filter
Installing the new fuel filter on your snowblower is a key step to keep the engine running smoothly. The process is simple but requires care to avoid damage or leaks. Follow each step carefully to ensure proper installation and safe operation.
Prepare The New Fuel Filter
Start by checking the new fuel filter for any defects. Make sure it matches the old filter in size and shape. Some filters have an arrow showing fuel flow direction. Note this to install correctly.
Attach The Fuel Filter To The Fuel Line
Slide the fuel line onto one end of the filter. Push it firmly to create a tight seal. Repeat this for the other fuel line on the opposite end of the filter. Ensure the filter is between the fuel tank and the carburetor.
Secure The Fuel Lines With Clamps
Use hose clamps to hold the fuel lines in place. Tighten the clamps with a screwdriver. This prevents leaks during operation. Do not overtighten to avoid damaging the fuel lines.
Check For Proper Alignment And Flow
Confirm the fuel filter is aligned with the fuel flow direction. The arrow on the filter should point toward the engine. Incorrect alignment can block fuel and stall the snowblower.
Test The Installation
Turn on the snowblower and check for leaks. Watch for any fuel dripping near the filter. If you see leaks, tighten the clamps or adjust the fuel lines. Once secure, the snowblower is ready to use.
Reassembling And Testing
After replacing the fuel filter on your snowblower, reassembly and testing are important steps. These steps ensure the machine runs smoothly and safely. Taking time during this phase prevents future problems and helps your snowblower work efficiently.
Reattaching Fuel Lines And Filter
First, reconnect the fuel lines to the new filter. Make sure the lines fit tightly on the filter’s inlet and outlet. Loose connections can cause leaks or air bubbles. Use clamps if needed to secure the hoses firmly. Check that the filter is positioned correctly, without twisting the lines.
Securing The Fuel Filter In Place
Next, fasten the fuel filter back to its mounting bracket. Use screws or clips provided with your snowblower. The filter must not move during operation. A stable filter ensures steady fuel flow. Double-check that the filter is aligned and secured properly.
Starting The Snowblower For Testing
Turn on the fuel valve and start the snowblower. Listen for any unusual sounds or sputtering. Let the engine run for several minutes to check fuel flow. Watch for leaks around the filter and fuel lines. If the engine runs smoothly, the fuel filter replacement is successful.

Credit: www.amazon.com
Troubleshooting Common Issues
Troubleshooting common issues with your snowblower’s fuel filter saves time and money. Problems often cause the machine to run poorly or stop. Knowing what to check helps fix these issues fast. This section covers key problems and simple fixes. Keep your snowblower working well by spotting these issues early.
Clogged Fuel Filter Symptoms
A clogged fuel filter stops fuel flow. The engine may sputter or stall. It might not start at all. You may hear the engine struggle to run smoothly. Check the filter if fuel flow seems weak. Replace the filter to restore proper fuel flow.
Fuel Filter Installation Errors
Installing the filter backward blocks fuel. The engine will not run or will stall. Check the filter arrow for correct direction. Tighten clamps to avoid leaks. A loose filter can cause fuel leaks or air leaks. Fix installation mistakes to keep the engine running.
Dirty Fuel Tank Effects
Dirt in the fuel tank clogs the filter faster. Sediment reduces fuel flow and engine power. Clean the tank before replacing the filter. Use clean fuel to prevent future blockages. Regular cleaning stops dirt from causing filter problems.
Air In The Fuel Line
Air bubbles can stop fuel from reaching the engine. The engine may sputter or run unevenly. Check all connections and clamps for tightness. Remove air by priming the fuel system. This clears air and restores smooth running.
Maintenance Tips For Fuel System
Maintaining the fuel system of your snowblower keeps it running smoothly. Clean fuel parts help the engine start fast and run strong. Dirt and old fuel can cause problems and damage parts.
Regular care of the fuel system saves time and money. It also stops breakdowns during cold winter days. Follow simple steps to protect your snowblower’s fuel system.
Use Fresh Fuel
Always fill the tank with fresh gasoline. Old fuel can clog the filter and carburetor. Store fuel in a clean container away from heat and sunlight.
Check The Fuel Filter Regularly
Inspect the fuel filter every season. Replace it if you see dirt or damage. A clean filter stops debris from reaching the engine.
Drain Fuel Before Storage
Empty the fuel tank before storing the snowblower. Fuel left inside can become stale and sticky. Run the engine until it stops to clear fuel lines.
Clean Fuel Lines
Check fuel lines for cracks or leaks often. Replace damaged lines right away. Clean lines allow fuel to flow easily to the engine.
Use Fuel Stabilizer
Add fuel stabilizer to gasoline before storage. It keeps fuel fresh longer and prevents gum build-up. Follow product instructions for best results.

Credit: www.youtube.com
Frequently Asked Questions
How Often Should I Replace My Snowblower’s Fuel Filter?
Replace your snowblower’s fuel filter every 25 hours of use or once per season. Regular replacement prevents clogs and engine issues, ensuring smooth performance. Check your owner’s manual for specific recommendations.
What Tools Do I Need To Replace A Snowblower Fuel Filter?
You typically need a screwdriver, pliers, and a new fuel filter. Some models may require a wrench. Always wear gloves and work in a well-ventilated area to avoid fuel exposure.
How Do I Safely Remove The Old Fuel Filter?
Turn off the snowblower and disconnect the spark plug. Relieve fuel system pressure. Use pliers to detach fuel lines carefully, then remove the old filter. Avoid spilling fuel and keep a rag handy.
Can I Use Any Fuel Filter For My Snowblower?
No, use only the fuel filter specified by your snowblower’s manufacturer. Using incorrect filters can cause poor fuel flow and damage the engine. Check the manual or parts list for the right type.
Conclusion
Replacing your snowblower’s fuel filter keeps the machine running well. Clean fuel helps the engine work smoothly and last longer. Regular checks prevent dirt from clogging the system. This simple task saves time and money on repairs. Follow the steps carefully for safe and easy replacement.
A well-maintained snowblower makes winter chores easier and faster. Take care of your equipment, and it will take care of you.